1. Introduction
Thank you for purchasing the BaBylissPRO FX780 Barberology Cord/Cordless Trimmer. This professional-grade trimmer is designed for precision outlining, detailing, and general trimming of necklines, hairlines, sideburns, beards, and mustaches. Please read this manual thoroughly before using your new trimmer to ensure safe and optimal performance.
2. Important Safety Instructions
When using electrical appliances, especially when children are present, basic safety precautions should always be followed, including the following:
- DANGER – To reduce the risk of electric shock:
- Always unplug this appliance from the electrical outlet immediately after using and before cleaning.
- Do not reach for an appliance that has fallen into water. Unplug immediately.
- Do not use while bathing or in a shower.
- Do not place or store appliance where it can fall or be pulled into a tub or sink. Do not place in or drop into water or other liquid.
- WARNING – To reduce the risk of burns, electric shock, fire, or injury to persons:
- An appliance should never be left unattended when plugged in.
- Close supervision is necessary when this appliance is used by, on, or near children or individuals with certain disabilities.
- Use this appliance only for its intended use as described in this manual. Do not use attachments not recommended by the manufacturer.
- Never operate this appliance if it has a damaged cord or plug, if it is not working properly, or if it has been dropped or damaged, or dropped into water. Return the appliance to an authorized service center for examination and repair.
- Keep the cord away from heated surfaces.
- Never drop or insert any object into any opening.
- Do not use outdoors or operate where aerosol (spray) products are being used or where oxygen is being administered.
- Do not use this appliance with a damaged or broken comb attachment, as facial injury may occur.
- Always attach plug to appliance first, then to outlet. To disconnect, turn all controls to OFF, then remove plug from outlet.
- The appliance is designed for household use only.
3. Package Contents
Verify that all items listed below are included in your package:
- BaBylissPRO FX780 Cord/Cordless Trimmer
- Charging Stand
- Power Adapter
- 2 Slimline Comb Attachments
- Cleaning Brush
- Lubricating Oil
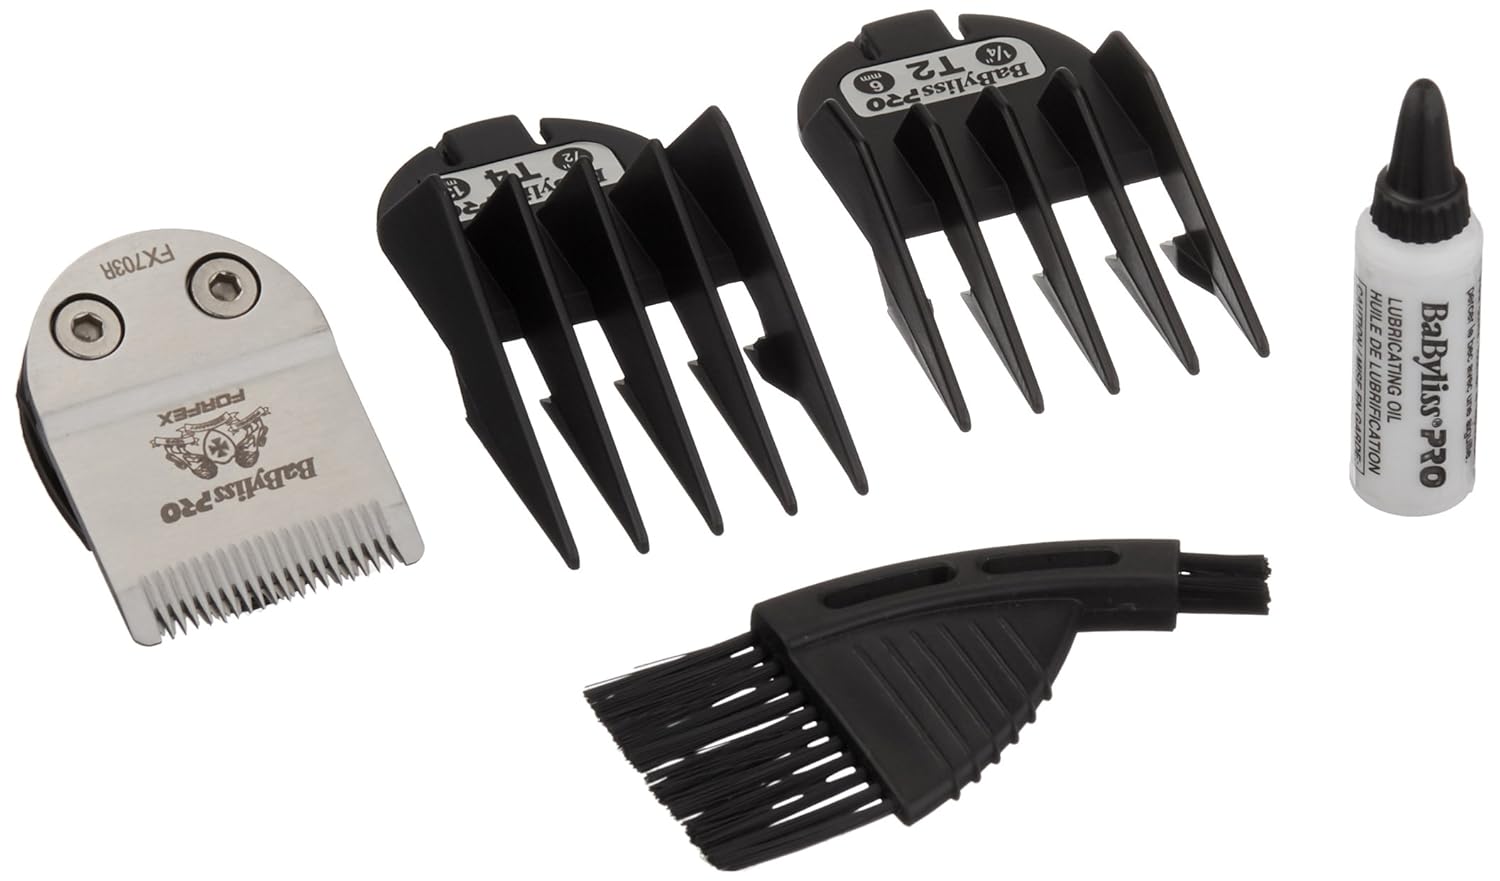
Figure 1: Included accessories for the BaBylissPRO FX780 Trimmer.
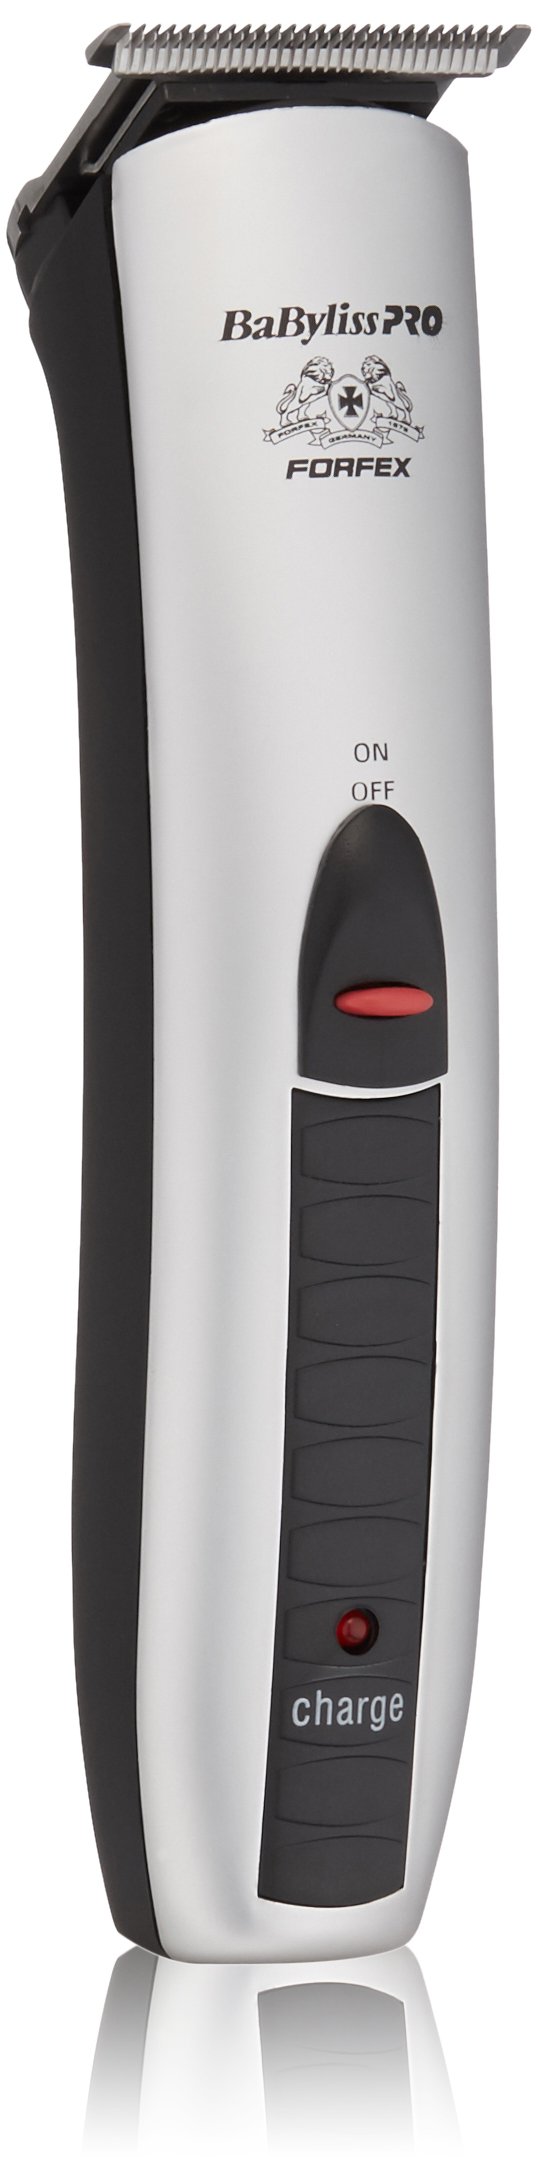
Figure 2: BaBylissPRO FX780 Trimmer with charging stand and comb attachments.
4. Product Features
The BaBylissPRO FX780 Trimmer is engineered with advanced features for professional performance:
- Ultra-Thin Detachable Blades: Features a fine tooth pattern for precision detailing.
- Cord/Cordless Operation: Provides flexibility for use with or without the power cord.
- Rechargeable NiMH Battery: Ensures consistent power and improved charging functionality.
- 60-Minute Run Time: Offers ample operating time on a full charge.
- Charging Stand: Conveniently stores and charges the trimmer.
- Charging Indicator: Light indicates charging status.
- Dual Voltage: Suitable for worldwide usage (100-240V).
5. Setup
5.1 Initial Charging
- Before first use, fully charge the trimmer for 16 hours.
- Ensure the trimmer is switched OFF.
- Connect the power adapter to the charging stand.
- Plug the power adapter into an electrical outlet.
- Place the trimmer into the charging stand. The charging indicator light on the trimmer will illuminate to confirm it is charging.
For subsequent charges, a full charge typically takes 8 hours and provides approximately 60 minutes of cordless operation.
5.2 Attaching and Detaching Blades
The FX780 features detachable blades for easy cleaning and replacement.
- To Detach: Ensure the trimmer is OFF. Gently push the blade assembly forward and away from the trimmer body.
- To Attach: Align the blade assembly with the trimmer body and push it back until it clicks securely into place.
5.3 Attaching Comb Attachments
The trimmer comes with two slimline comb attachments for varying hair lengths.
- Ensure the trimmer is OFF.
- Select the desired comb attachment.
- Slide the comb attachment onto the trimmer blade until it locks into position.
- To remove, gently pull the comb attachment away from the blade.
6. Operating Instructions
6.1 Powering On/Off
To turn the trimmer ON, slide the power switch upwards. To turn it OFF, slide the switch downwards.
6.2 Corded and Cordless Use
- Cordless Operation: For maximum flexibility, use the trimmer on battery power after a full charge.
- Corded Operation: If the battery is low or you prefer continuous power, connect the power adapter directly to the trimmer and an electrical outlet. The trimmer can be used while charging.
6.3 Trimming Techniques
For best results, ensure hair is clean and dry before trimming.
- Outlining and Detailing: Use the trimmer without a comb attachment. Hold the trimmer at a slight angle to the skin and use light, controlled strokes to create sharp lines around the neckline, sideburns, and beard edges.
- Beard and Mustache Trimming: Attach a comb attachment for desired length. Start with a longer comb if unsure, and gradually reduce length. Trim against the direction of hair growth for an even cut.
- Neckline and Hairline: Use the trimmer without a comb attachment for a close finish. Gently pull the skin taut with one hand and trim with the other, moving against the direction of hair growth.
7. Maintenance
7.1 Cleaning the Trimmer
- Ensure the trimmer is OFF and unplugged from the power source.
- Detach the blade assembly (refer to Section 5.2).
- Use the provided cleaning brush to remove any loose hairs from the blades and the trimmer body.
- Do not rinse the trimmer body under water. The blades can be carefully rinsed under running water, but ensure they are completely dry before reattaching.
- Wipe the trimmer body with a clean, damp cloth.
7.2 Oiling the Blades
To maintain optimal cutting performance and blade longevity, it is essential to oil the blades regularly.
- After each use, or at least once a week, apply 2-3 drops of the lubricating oil (provided) across the top of the blades.
- Turn the trimmer ON for a few seconds to allow the oil to distribute evenly.
- Wipe off any excess oil with a soft cloth.
Note: Only use the oil specifically designed for hair clippers/trimmers. Do not use hair oil, grease, or any oil mixed with kerosene or solvents, as these will slow down the blades and evaporate, leaving a thick residue.
8. Troubleshooting
| Problem | Possible Cause | Solution |
|---|---|---|
| Trimmer does not turn on. | Battery is not charged; Power cord not properly connected. | Charge the trimmer for the recommended time. Ensure power cord is securely plugged into both the trimmer/stand and the electrical outlet. |
| Poor cutting performance or pulling hair. | Blades are dull, dirty, or not oiled; Hair buildup in blades; Battery low. | Clean and oil the blades (refer to Section 7). Ensure the trimmer is fully charged. Consider replacing blades if they are excessively dull. |
| Trimmer gets hot during use. | Extended continuous use; Blades require lubrication. | Allow the trimmer to cool down. Ensure blades are properly cleaned and oiled. |
| Charging indicator light not on. | Trimmer not properly seated in stand; Power adapter not connected; Faulty outlet. | Ensure trimmer is correctly placed in the charging stand. Check power adapter connections and try a different electrical outlet. |
9. Specifications
- Model: FX780
- Power Source: Cord/Cordless (Rechargeable NiMH Battery)
- Run Time: Approximately 60 minutes (on full charge)
- Charge Time: 16 hours (initial), 8 hours (subsequent)
- Input Voltage: 100-240V AC (Dual Voltage)
- Dimensions: 4.25 x 5 x 9.5 inches
- Weight: 1 Pound
- Manufacturer: BaBylissPro
10. Warranty and Support
BaBylissPRO products are manufactured to the highest standards and undergo rigorous quality control. This product is covered by a limited warranty against defects in materials and workmanship. For specific warranty details, duration, and terms, please refer to the warranty card included with your purchase or visit the official BaBylissPRO website.
For technical support, service, or replacement parts, please contact BaBylissPRO customer service. Contact information can typically be found on the product packaging or the official BaBylissPRO website.
Website: www.babylisspro.com