Introduction
These Bushwacker OE Style Fender Flares are designed to provide enhanced tire coverage and body protection for your 2009-2011 Toyota Rav4. Crafted from durable Dura-Flex 2000 TPO material, these flares offer a smooth, matte black finish that can be painted to match your vehicle's color. This manual outlines the installation process, maintenance guidelines, and product specifications to ensure optimal performance and longevity.
What's in the Box
Verify that all components are present before beginning installation:
- Fender Flares (4 pieces)
- Installation Hardware
- Instruction Manual (this document)
Installation Instructions
Installation of Bushwacker OE Style Fender Flares requires minor drilling and precision fitment. Please read all instructions thoroughly before beginning.
Preparation
- Clean the vehicle's fender areas where the flares will be installed. Ensure surfaces are free of dirt, debris, and wax.
- Gather all necessary tools. Refer to the included hardware kit for specific tool requirements.
- Perform a test fit of each fender flare to its corresponding wheel well to familiarize yourself with the fitment and attachment points.

Image: Bushwacker OE Style Fender Flares providing tire coverage on a vehicle.
Mounting the Flares
- Carefully align the fender flare with the wheel well. The flares are precision-engineered using CAD data for a specific vehicle fit.
- Mark the drilling locations as indicated in the detailed instructions provided with the hardware kit. Minor drilling into the vehicle's fender lip may be required.
- Drill pilot holes at the marked locations. Ensure proper drill bit size is used to avoid damage.
- Attach the fender flares using the provided hardware. Ensure all fasteners are securely tightened, but do not overtighten.
- Repeat the process for all four fender flares.

Image: Features of Bushwacker OE Style Fender Flares, including Dura-Flex 2000 TPO material and 100% UV protection.
Final Checks
- Verify that all flares are securely attached and properly aligned.
- Ensure there are no gaps or loose areas that could allow debris or water to accumulate.
- Clean any residue from the installation process.
Installation Video Resources
For a visual guide on installing Bushwacker OE Style Fender Flares, please refer to the official video below:
Video: Official Bushwacker guide for installing OE Style Fender Flares. This video demonstrates the general installation process and highlights key features.
Another helpful video demonstrating Bushwacker Fender Flares:
Video: General overview of Bushwacker Fender Flares, showcasing their design and benefits.
Operating and Maintenance
Once installed, your Bushwacker OE Style Fender Flares require minimal operational considerations and simple maintenance to retain their appearance and protective qualities.
General Care
- Regularly clean the fender flares with mild soap and water. Avoid abrasive cleaners or harsh chemicals that could damage the finish or UV protection.
- Periodically inspect the flares and all mounting hardware for tightness. Re-tighten any loose fasteners to ensure secure attachment.
- The Dura-Flex 2000 TPO material is 100% UV-protected to prevent chalking. However, prolonged exposure to extreme sunlight without regular cleaning can still affect appearance over time.
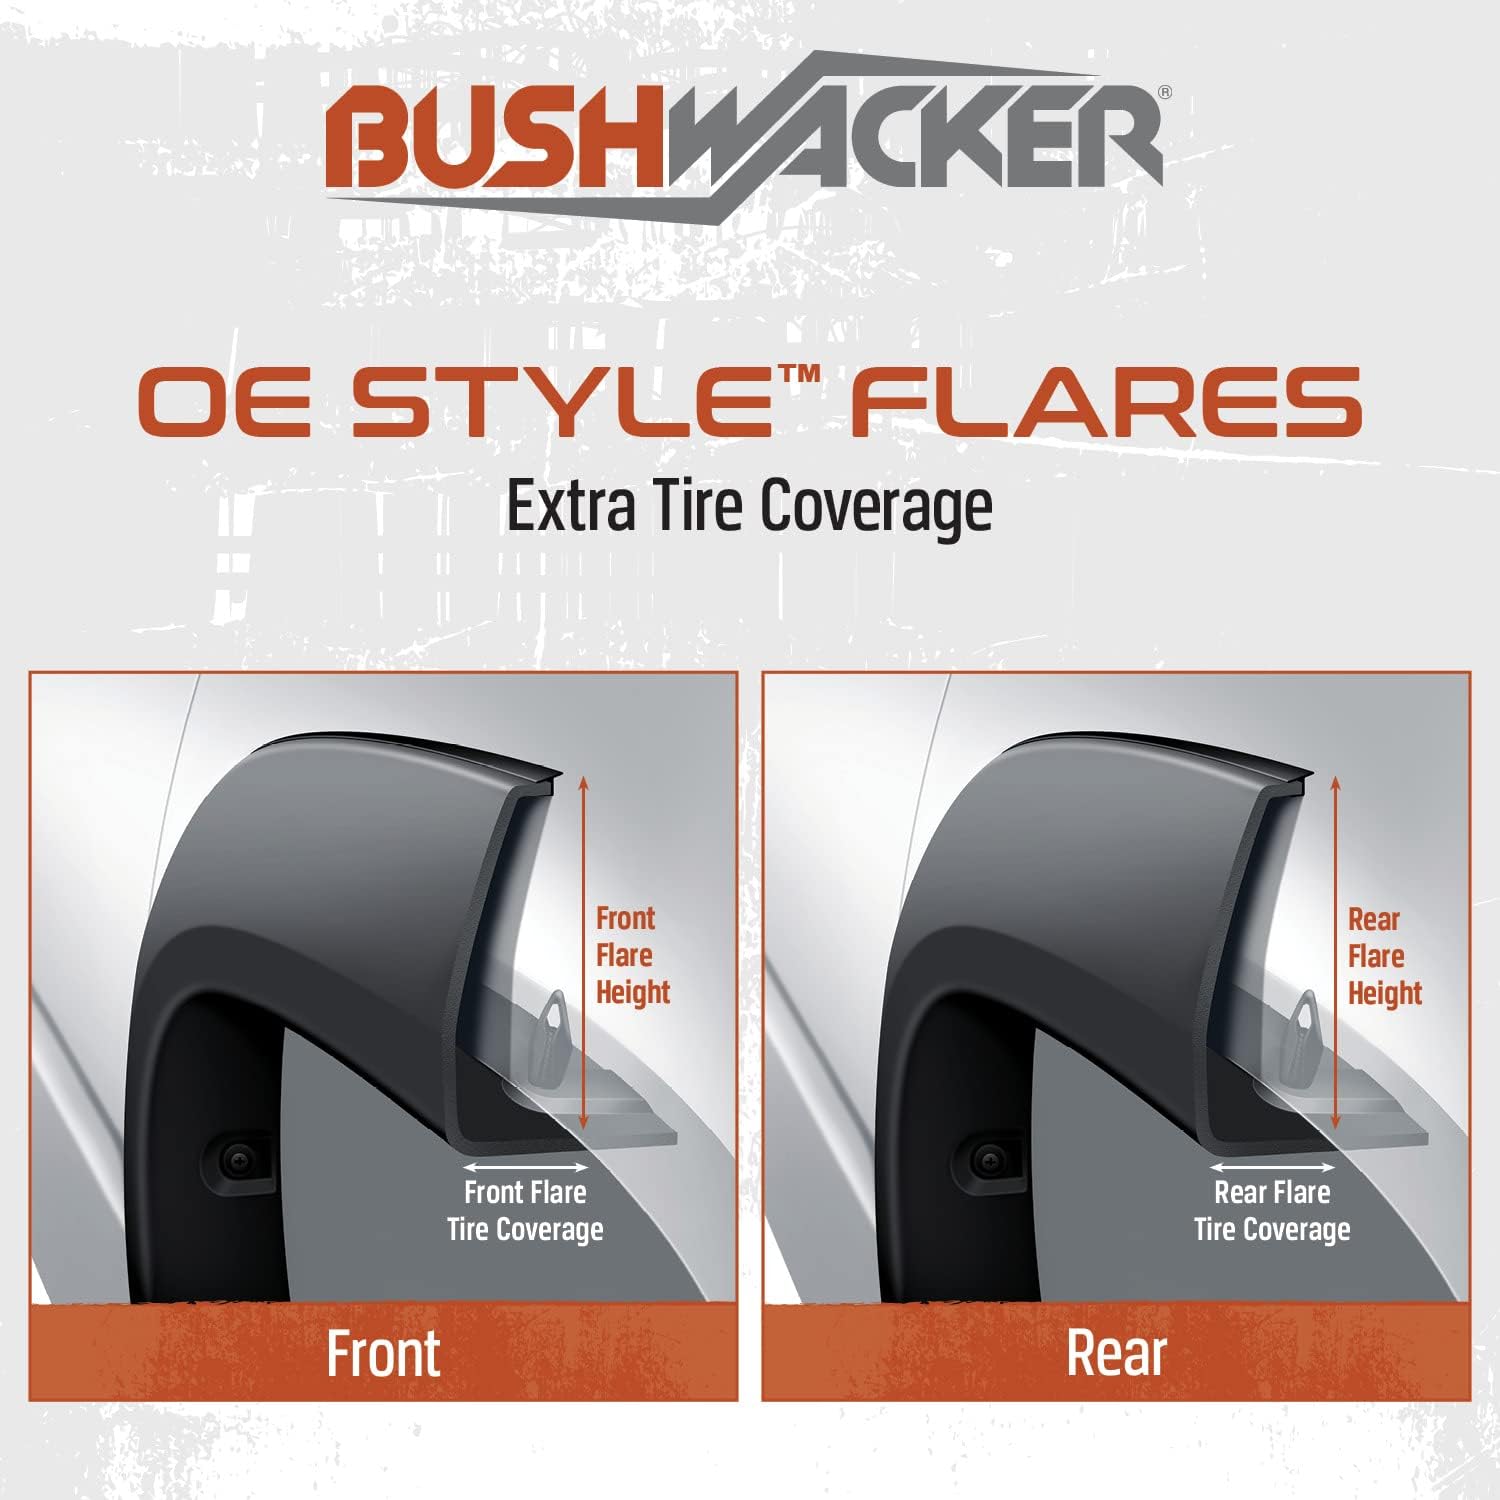
Image: Illustration detailing the tire coverage provided by the front and rear fender flares.
Troubleshooting
| Issue | Possible Cause | Solution |
|---|---|---|
| Loose Fitment | Fasteners not tightened sufficiently or improper installation. | Re-check all mounting points and tighten fasteners. Ensure flares are correctly seated against the vehicle body. |
| Discoloration/Chalking | Extreme prolonged UV exposure or use of harsh cleaning agents. | Clean with mild soap and water. While UV protected, extreme conditions can still cause wear. Consider using a UV protectant spray designed for automotive plastics. |
| Gaps between Flare and Body | Incorrect alignment during installation. | Remove and re-install the flare, ensuring precise alignment before tightening fasteners. |
Specifications
| Attribute | Detail |
|---|---|
| Brand | Bushwacker |
| Model Number | 31926-02 |
| Compatible Vehicle | 2009-2011 Toyota Rav4 (Base Model Only) |
| Material | Dura-Flex 2000 TPO |
| Finish | Smooth Matte Black (Paintable) |
| UV Protection | 100% UV-protected |
| Auto Part Position | Front, Rear |
| Item Weight | 14 Pounds |
| Item Dimensions (L x W x H) | 46 x 9 x 29 inches |
Warranty and Support
Bushwacker OE Style Fender Flares are backed by an industry-leading Limited Lifetime Warranty. This warranty covers defects in material and workmanship under normal use and service.
For warranty claims, technical assistance, or any questions regarding your product, please contact Bushwacker customer support directly. Refer to the official Bushwacker website for the most current contact information.
You can visit the official Bushwacker store for more information: Bushwacker Store