1. Introduction
This manual provides detailed instructions for the installation, operation, and maintenance of your Elkay LK6000 Everyday Single Hole Pull Down Kitchen Faucet. Please read all instructions carefully before beginning installation or use to ensure proper function and longevity of your product.
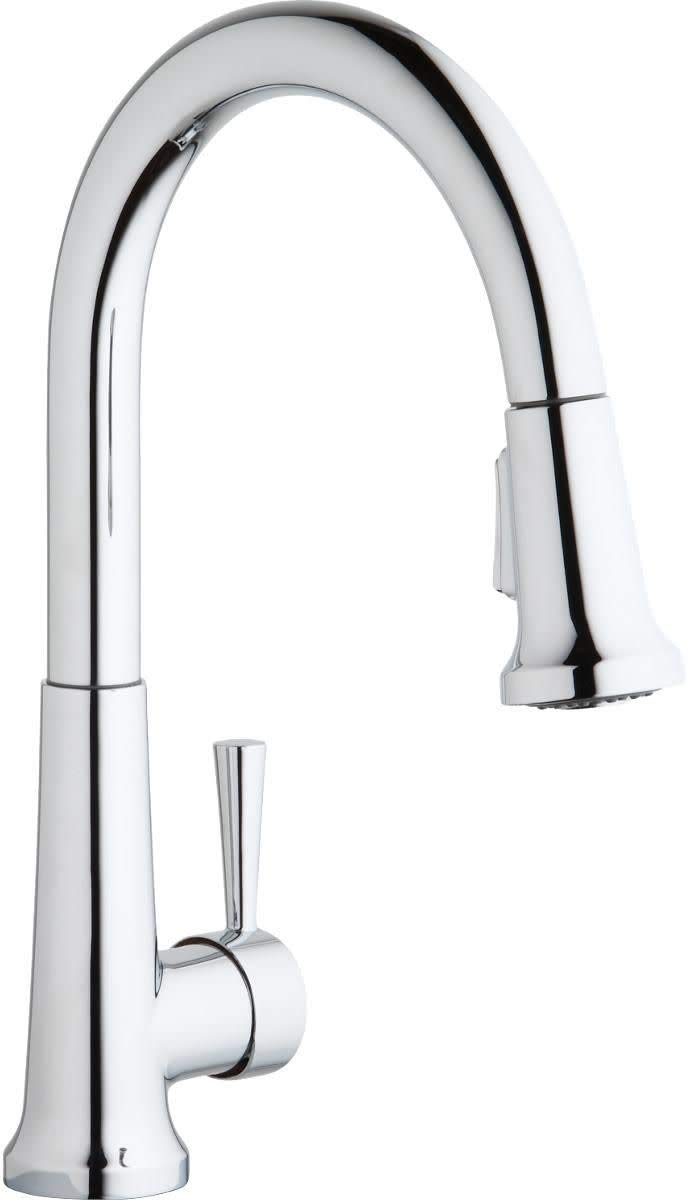
Figure 1.1: Elkay LK6000 Everyday Single Hole Pull Down Kitchen Faucet.
2. Product Features
- ADA Compliant: Faucet design meets Americans with Disabilities Act standards.
- Lead-Free Compliant: Certified to NSF/ANSI 61 and 372, adhering to federal and state regulations for low or no-lead products.
- Low Flow: Incorporates water-saving features for efficient water usage.
- Solid Brass Waterways: Constructed with durable solid brass for long-term reliability.
- Includes Two Aerators: Comes pre-installed with a 1.5 GPM (Gallons Per Minute) water-saving aerator; an optional 2.2 GPM aerator insert is also included for higher flow needs.
- Removable Cartridge: Designed for easy repair and replacement of the cartridge.
- Optional Escutcheon: A cover plate is included to allow for various installation types, including 3-hole sinks.

Figure 2.1: Key features of the Elkay Everyday Pull-Down Spray Kitchen Faucet.
3. Specifications
| Specification | Detail |
|---|---|
| Model Number | LK6000 |
| Mounting Type | Deck Mount |
| Finish Type | Chrome |
| Material | Brass |
| Number of Handles | 1 |
| Hole Count | 1 (Optional escutcheon for 3-hole installation) |
| Maximum Flow Rate | 1.5 GPM (2.2 GPM optional aerator included) |
| Spout Height | 15.25 Inches (389mm) |
| Spout Reach | 9 Inches (230mm) |
| Product Dimensions | 10 x 11.5 x 15.3 inches |
| Item Weight | 1 pound |
4. Installation
Before installation, ensure you have all necessary tools and components. Turn off the main water supply before beginning any plumbing work.
4.1. Dimensions and Planning
Review the product dimensions to ensure proper fit and clearance for your sink and countertop setup. The faucet is designed for single-hole installation, but an optional escutcheon is provided for 3-hole sinks.

Figure 4.1: Faucet dimensions for installation planning.
4.2. Component Identification
Familiarize yourself with the faucet's components using the exploded view diagram. This will assist in assembly and future maintenance.
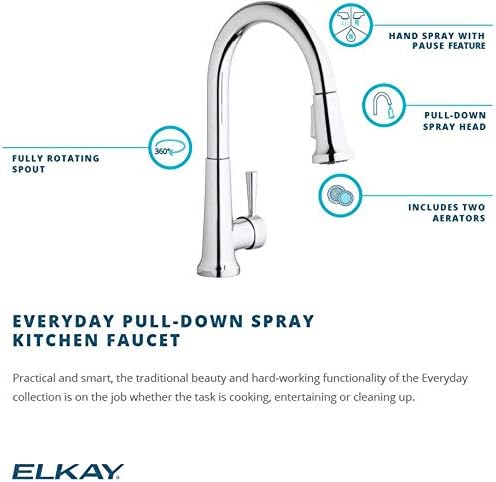
Figure 4.2: Exploded view of faucet components.
4.3. General Installation Steps
- Prepare the sink hole: Ensure the mounting surface is clean and dry. If using the escutcheon, place it over the sink holes.
- Mount the faucet: Insert the faucet body through the mounting hole(s). Secure it from underneath the sink using the provided washer and mounting nut.
- Connect water supply lines: Attach the hot and cold water supply lines to the corresponding connections on the faucet and your home's water supply. Ensure all connections are tight to prevent leaks.
- Install the pull-down hose and weight: Connect the pull-down spray hose to the faucet's quick connect fitting. Attach the hose weight to the pull-down hose at the recommended position to ensure proper retraction.
- Test for leaks: Slowly turn on the main water supply and check all connections for leaks. Operate the faucet to ensure proper water flow and temperature control.
5. Operation
5.1. Water Flow and Temperature Control
The single lever handle controls both water flow and temperature. Lift the handle to turn on the water and adjust the flow rate. Move the handle left for hot water and right for cold water.
5.2. Pull-Down Sprayer Function
The faucet features a pull-down spray head for extended reach and versatility. Pull the spray head down from the spout to use. The spray head offers multiple spray patterns, typically toggled by a button on the spray head itself. A pause feature may also be available to temporarily stop water flow directly from the spray head.
After use, gently guide the spray head back into the spout. The hose weight underneath the sink will assist in smooth retraction. Ensure the spray head is fully seated in the spout for proper alignment.
5.3. Spout Rotation
The faucet spout is designed to rotate 360 degrees, providing flexibility and convenience for various sink tasks.
6. Maintenance
6.1. Cleaning the Faucet
To maintain the finish of your Elkay faucet, clean regularly with a soft cloth and mild soap. Avoid abrasive cleaners, harsh chemicals, or scouring pads, as these can damage the finish.
6.2. Aerator Maintenance
If water flow decreases or becomes irregular, the aerator may be clogged with debris. Unscrew the aerator from the tip of the spout, clean any mineral deposits or particles, and rinse thoroughly before reattaching.
6.3. Cartridge Replacement
The faucet features a removable cartridge for easy repair and replacement. If you experience persistent drips or issues with water temperature control, the cartridge may need to be replaced. Refer to the exploded view diagram (Figure 4.2) for cartridge location and consult a qualified plumber if you are unsure about the replacement process.
7. Troubleshooting
This section addresses common issues you might encounter with your faucet. For problems not listed here, please contact customer support.
| Problem | Possible Cause | Solution |
|---|---|---|
| Low Water Flow | Clogged aerator; partially closed shut-off valves; kinked supply line. | Clean or replace aerator. Ensure shut-off valves are fully open. Check supply lines for kinks. |
| Leaking from Spout | Worn cartridge. | Replace the cartridge (refer to Section 6.3). |
| Water Temperature Issues | Improperly adjusted cartridge; issues with hot/cold supply. | Check cartridge installation. Verify hot and cold water supply to the faucet. |
| Spray Head Does Not Retract Fully | Hose weight improperly positioned or obstructed. | Adjust the position of the hose weight. Clear any obstructions under the sink that might impede hose movement. |
8. Warranty and Support
8.1. Warranty Information
This Elkay faucet is covered by a limited warranty. Please refer to the warranty documentation included with your purchase for specific terms and conditions. Keep your proof of purchase for warranty claims.
8.2. Customer Support
For further assistance, technical support, or to order replacement parts, please contact Elkay customer service. Contact information can typically be found on the Elkay website or in the packaging materials.