Introduction
This manual provides detailed instructions for the installation, operation, and maintenance of your Hifonics HFi3000D Class D Mono Car Amplifier. Please read this manual thoroughly before attempting installation or operation to ensure proper use and to prevent damage to the unit or your vehicle's audio system.
Safety Precautions
- Always disconnect the vehicle's battery negative terminal before starting any electrical work.
- Ensure all wiring is properly routed and secured to prevent shorts or damage.
- Use appropriate gauge wiring for power and ground connections as specified.
- Avoid mounting the amplifier in areas exposed to direct sunlight, excessive heat, or moisture.
- Consult a professional car audio installer if you are unsure about any part of the installation process.
Key Features
The Hifonics HFi3000D amplifier is designed for high-performance audio, incorporating several advanced features:
- HFi Series Single Channel Class D Car Amplifier: Efficient power delivery for subwoofers.
- Pulse Width Modulated (PWM) MOSFET Power Supply: Ensures stable and efficient power.
- 1 Ohm Stable: Capable of driving low impedance loads for maximum power output.
- Blue “Military Grade” PCB: Durable and high-quality circuit board.
- Bass EQ with 45 Hz Bass Boost: Adjustable bass enhancement (0 to +10 dB).
- RCA Inputs and Outputs: For signal connection and daisy-chaining multiple amplifiers.
- Built-in System Diagnostics: For monitoring amplifier status.
- Illuminated HF Logo: Aesthetic design element.
- LED Power (Blue) and Protect (Red) Indicators: Visual status feedback.
- Wired HFR-3 Remote Bass Level Control: Convenient adjustment of bass from the driver's seat.
- Soft Start Sound Function: Prevents turn-on thumps.
- 4-Way System Protection Circuitry: Guards against thermal, overload, DC, and speaker short conditions.
- Dual 12 Gauge Speaker Terminals: Simplifies speaker wire connections.
- Heavy Duty Aluminum Alloy Vented Heatsink: Ensures efficient heat dissipation.
- Silver Nickel-Plated RCA Level Inputs and Screw Terminals: For optimal signal transfer and secure connections.
Installation and Setup
Proper installation is crucial for the performance and longevity of your amplifier. Follow these steps carefully.
1. Mounting Location
Choose a mounting location that is dry, well-ventilated, and away from direct heat sources. The amplifier is designed for car mount installation. Ensure there is sufficient space around the heatsink for proper airflow. Avoid mounting on carpet or in enclosed spaces without ventilation.

Image: Front view of the Hifonics HFi3000D amplifier, showing the Hifonics logo and model number.
2. Power Wiring
- Battery Connection (BATT+12V): Run a heavy-gauge power cable (e.g., 4-gauge or larger, depending on total system power) directly from the positive terminal of the vehicle's battery to the BATT+12V terminal on the amplifier. Install an appropriate fuse holder with a fuse (not included) within 18 inches (45 cm) of the battery.
- Ground Connection (GND): Run a heavy-gauge ground cable of the same size as the power cable from the GND terminal on the amplifier to a clean, unpainted metal surface on the vehicle's chassis. Ensure a solid, low-resistance connection.
- Remote Turn-On (REM): Connect a remote turn-on wire (typically 18-gauge) from your head unit's remote output to the REM terminal on the amplifier. This wire turns the amplifier on and off with your head unit.
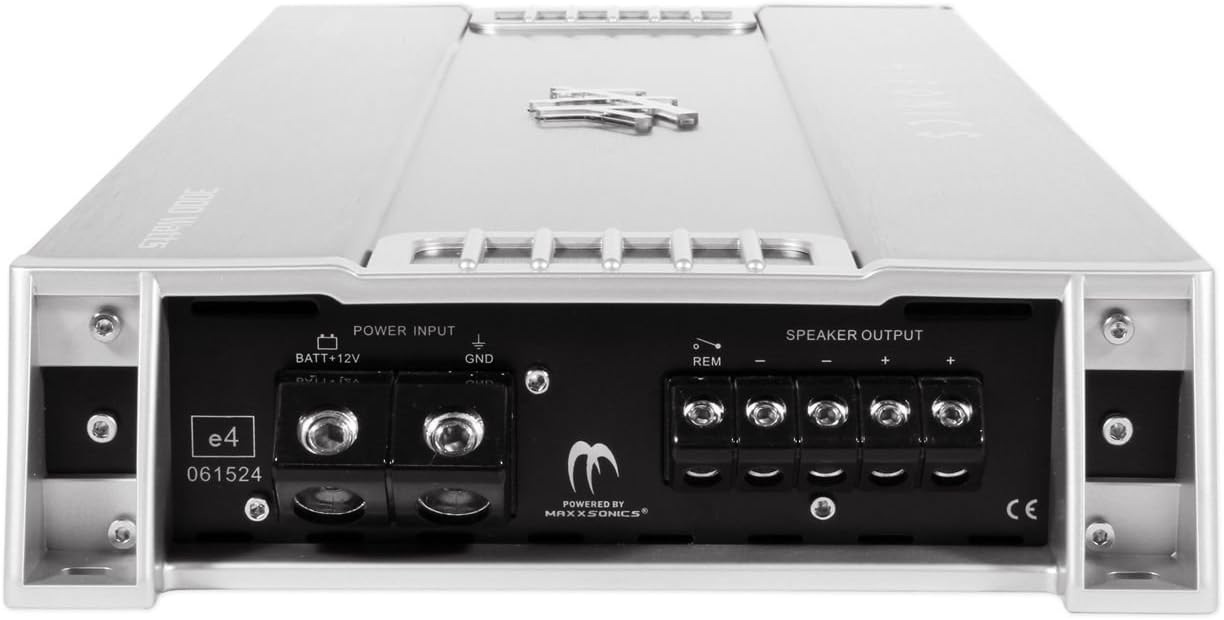
Image: Rear view of the Hifonics HFi3000D amplifier, showing the power input (BATT+12V, GND), remote turn-on (REM), and speaker output terminals.
3. Signal Input (RCA)
Connect RCA cables from your head unit's subwoofer or full-range pre-out to the RCA input jacks on the amplifier. If daisy-chaining multiple amplifiers, use the RCA output jacks to send the signal to the next amplifier.
4. Speaker Output
Connect your subwoofer(s) to the dual 12 gauge speaker terminals. Ensure correct polarity (+ to + and - to -). The HFi3000D is a mono amplifier and is 1 Ohm stable. Verify your subwoofer's impedance matches the amplifier's capabilities.
5. Remote Bass Control (HFR-3)
Connect the wired HFR-3 remote bass level control to the designated port on the amplifier. Mount the control in a convenient location for easy adjustment of bass levels from the driver's seat.
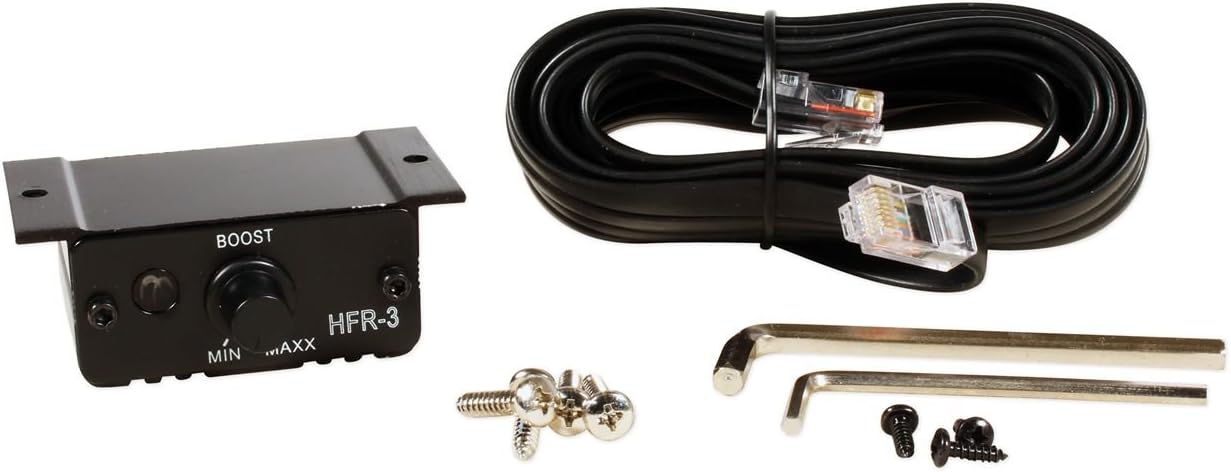
Image: The HFR-3 wired remote bass level control, connecting cable, and mounting hardware included with the amplifier.
Operation
Power On/Off
The amplifier will power on automatically when your head unit is turned on, thanks to the remote turn-on connection. The blue LED indicator will illuminate, signifying normal operation. The soft start sound function prevents abrupt audio output upon power-up.
Adjusting Bass Boost
Use the wired HFR-3 remote bass level control to adjust the bass output from 0 to +10 dB at 45 Hz. Start with the bass boost at its minimum setting and gradually increase it to achieve your desired bass level without distortion.
System Protection
The amplifier features 4-way system protection circuitry. If the red "Protect" LED illuminates, it indicates one of the following conditions:
- Thermal Overload: The amplifier has overheated. Allow it to cool down. Ensure adequate ventilation.
- Electrical Overload: The amplifier is drawing too much current. Check speaker impedance and wiring.
- DC Offset: A DC voltage is detected on the speaker outputs. This usually indicates an internal fault.
- Speaker Short: A short circuit is detected in the speaker wiring or the speaker itself. Inspect all speaker connections.
In case of a protection fault, the amplifier will shut down to prevent damage. Resolve the issue before attempting to power on the amplifier again.
Maintenance
The Hifonics HFi3000D amplifier requires minimal maintenance. Follow these guidelines to ensure optimal performance and longevity:
- Cleaning: Periodically wipe the amplifier's exterior with a soft, dry cloth. Do not use harsh chemicals or abrasive cleaners. Ensure the heatsink fins are free from dust and debris to maintain efficient cooling.
- Connection Checks: Annually, inspect all power, ground, remote, RCA, and speaker connections. Ensure they are secure and free from corrosion. Loose connections can lead to poor performance or damage.
- Ventilation: Ensure the amplifier's mounting location remains well-ventilated. Do not obstruct the heatsink or airflow around the unit.
Troubleshooting
| Problem | Possible Cause | Solution |
|---|---|---|
| No Power (No LEDs) |
|
|
| Protect LED (Red) is On |
|
|
| No Audio Output |
|
|
| Distorted Sound |
|
|
Specifications
| Feature | Detail |
|---|---|
| Model Number | HFi3000D |
| Brand | Hifonics |
| Amplifier Type | Class D Mono Channel |
| Output Power | 3000 Watts RMS |
| Minimum Supply Voltage | 12 Volts (DC) |
| Maximum Supply Voltage | 14.5 Volts (DC) |
| Impedance Stability | 1 Ohm Stable |
| Bass Boost | 0 to +10 dB at 45 Hz |
| Dimensions (L x W x H) | 24.5 x 10.5 x 3.5 inches |
| Item Weight | 16.6 pounds |
| Protection Circuitry | Thermal, Overload, DC, Speaker Short |
Warranty Information
Hifonics products are designed and manufactured to the highest quality standards. For specific warranty terms and conditions applicable to your HFi3000D amplifier, please refer to the warranty card included with your product or visit the official Hifonics website. Keep your proof of purchase for warranty claims.
Customer Support
If you encounter any issues or have questions regarding your Hifonics HFi3000D amplifier that are not covered in this manual, please contact Hifonics customer support. You can typically find contact information on the official Hifonics website or on the product packaging.
Hifonics Official Website: www.hifonics.com (Note: This is a placeholder URL, please verify the actual Hifonics support website.)


