
Introduction
This manual provides comprehensive instructions for the assembly, operation, and maintenance of your ephotoinc ePhoto Digital Photo Studio Video Lighting Kit, model H69G. This kit is designed to provide versatile lighting solutions for studio photography, videography, and on-location projects, compatible with various camera systems.

Image: The complete ephotoinc ePhoto Digital Photo Studio Video Lighting Kit, including two umbrella lights, light stands, a chromakey backdrop stand, and a carrying case.
Important Safety Information
- Always ensure all components are securely assembled before use.
- Do not exceed the maximum wattage for light bulbs. Use only specified 45W 5500K bulbs.
- Keep electrical components away from water and moisture.
- Position light stands on a stable, level surface to prevent tipping.
- Allow light bulbs to cool completely before handling or storing.
- Keep children and pets away from the setup area during operation.
Package Contents
Verify that all the following items are included in your package:
- 2 x 6.5 feet Light Stands
- 2 x Single Light Umbrella Holders
- 2 x 45W 5500K Light Bulbs
- 2 x 33" White Umbrellas
- 1 x Complete Background Stand with Cross Bars
- 1 x 6 x 9 ft Chromakey Muslin (Green)
- 1 x Carrying Case

Image: The black carrying case provided for convenient storage and transport of the lighting kit components.
Setup Instructions
1. Assembling the Light Stands
- Extend the legs of the light stand (2x) to form a stable base. Secure them using the locking knob.
- Extend the telescopic sections of the stand to the desired height (up to 6.5 feet) and tighten all locking collars.

Image: An individual light stand, fully extended, demonstrating its stable tripod base.
2. Attaching Umbrella Holders and Bulbs
- Mount the single light umbrella holder (2x) onto the top spigot of each light stand. Tighten the securing screw.
- Carefully screw a 45W 5500K light bulb (2x) into each umbrella holder socket. Avoid overtightening.
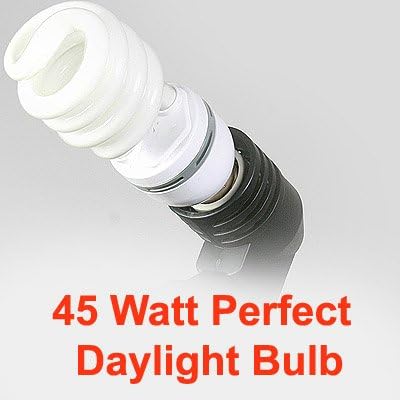
Image: A 45-watt 5500K daylight balanced fluorescent light bulb, ready for installation into the light socket.
3. Installing the Umbrellas
- Open each 33" white umbrella (2x).
- Insert the umbrella shaft through the designated hole in the umbrella holder until it is positioned correctly in front of the light bulb.
- Adjust the umbrella's depth to control light spread and softness.

Image: Two white translucent umbrellas, designed to diffuse and soften light for photography and videography.
4. Setting Up the Background Stand and Muslin
- Assemble the complete background stand by extending the two upright stands and connecting the cross bars. Ensure all sections are securely locked.
- Drape the 6 x 9 ft Chromakey Muslin (Green) over the cross bar. Use clamps (not included) to secure the muslin and ensure it hangs smoothly without wrinkles.
Operating Instructions
- Power Connection: Plug the power cords from the umbrella holders into appropriate electrical outlets.
- Light Adjustment: Use the switches on the umbrella holders to turn the lights on/off. Adjust the height and angle of the light stands to achieve desired lighting effects.
- Umbrella Positioning: The white umbrellas diffuse the light, creating a softer, more even illumination. Experiment with the distance of the umbrella from the bulb and the subject to control light intensity and spread.
- Backdrop Usage: The chromakey green muslin is ideal for green screen effects in video production or for isolating subjects in photography for later background replacement. Ensure even lighting on the backdrop to facilitate post-production keying.
- Camera Compatibility: This lighting kit is universally compatible with most digital cameras, including Nikon, Canon, Sony, and Olympus.
Maintenance
- Cleaning:
- Wipe light stands and umbrella holders with a dry, soft cloth.
- For the muslin backdrop, follow standard fabric care instructions. Gentle spot cleaning is recommended for minor marks.
- Ensure light bulbs are cool before cleaning.
- Storage: Disassemble the kit and store all components in the provided carrying case to protect them from dust and damage. Ensure bulbs are removed and stored safely.
- Bulb Replacement: Replace 45W 5500K bulbs with identical specifications to maintain consistent lighting quality. Always ensure the power is off and the bulb is cool before replacing.
Troubleshooting
- Lights not turning on:
- Check if the power cords are securely plugged into both the umbrella holder and the wall outlet.
- Ensure the power switch on the umbrella holder is in the "ON" position.
- Verify that the light bulb is securely screwed into the socket and is not burnt out. Replace if necessary.
- Test the outlet with another device to confirm it is functional.
- Light stand instability:
- Ensure the legs of the light stand are fully extended and the locking knob is tightened.
- Verify that all telescopic sections are securely locked.
- Place the stand on a flat, even surface.
- Wrinkles in chromakey muslin:
- Stretch the muslin taut and secure it with additional clamps if needed.
- Light steaming or gentle ironing on a low setting may help remove stubborn wrinkles (check fabric care instructions).
Specifications
| Model Number: | H69G |
| Brand: | ephotoinc |
| Light Stand Height: | Up to 6.5 feet (2 meters) |
| Light Bulb Type: | 45W 5500K Fluorescent (Daylight Balanced) |
| Umbrella Size: | 33 inches |
| Muslin Backdrop Size: | 6 x 9 feet |
| Product Dimensions: | 32 x 12 x 12 inches (packaged) |
| Item Weight: | 16.9 pounds |
| UPC: | 523984772348 |
Warranty and Support
ephotoinc products are manufactured to high-quality standards. For specific warranty details and customer support, please refer to the documentation included with your purchase or visit the official ephotoinc website. Keep your purchase receipt as proof of purchase.
For further assistance, please contact ephotoinc customer service through their official channels.