Briggs & Stratton 798653
Briggs & Stratton 798653 Carburetor Instruction Manual
Genuine Replacement Part for Single Cylinder Engines
1. Product Overview
The Briggs & Stratton 798653 Carburetor is a genuine OEM replacement part designed for single-cylinder engines. This carburetor ensures proper fuel-air mixture delivery, which is crucial for optimal engine performance and longevity. It is specifically used on select 12 cubic inch horizontal Intek OHV engines.
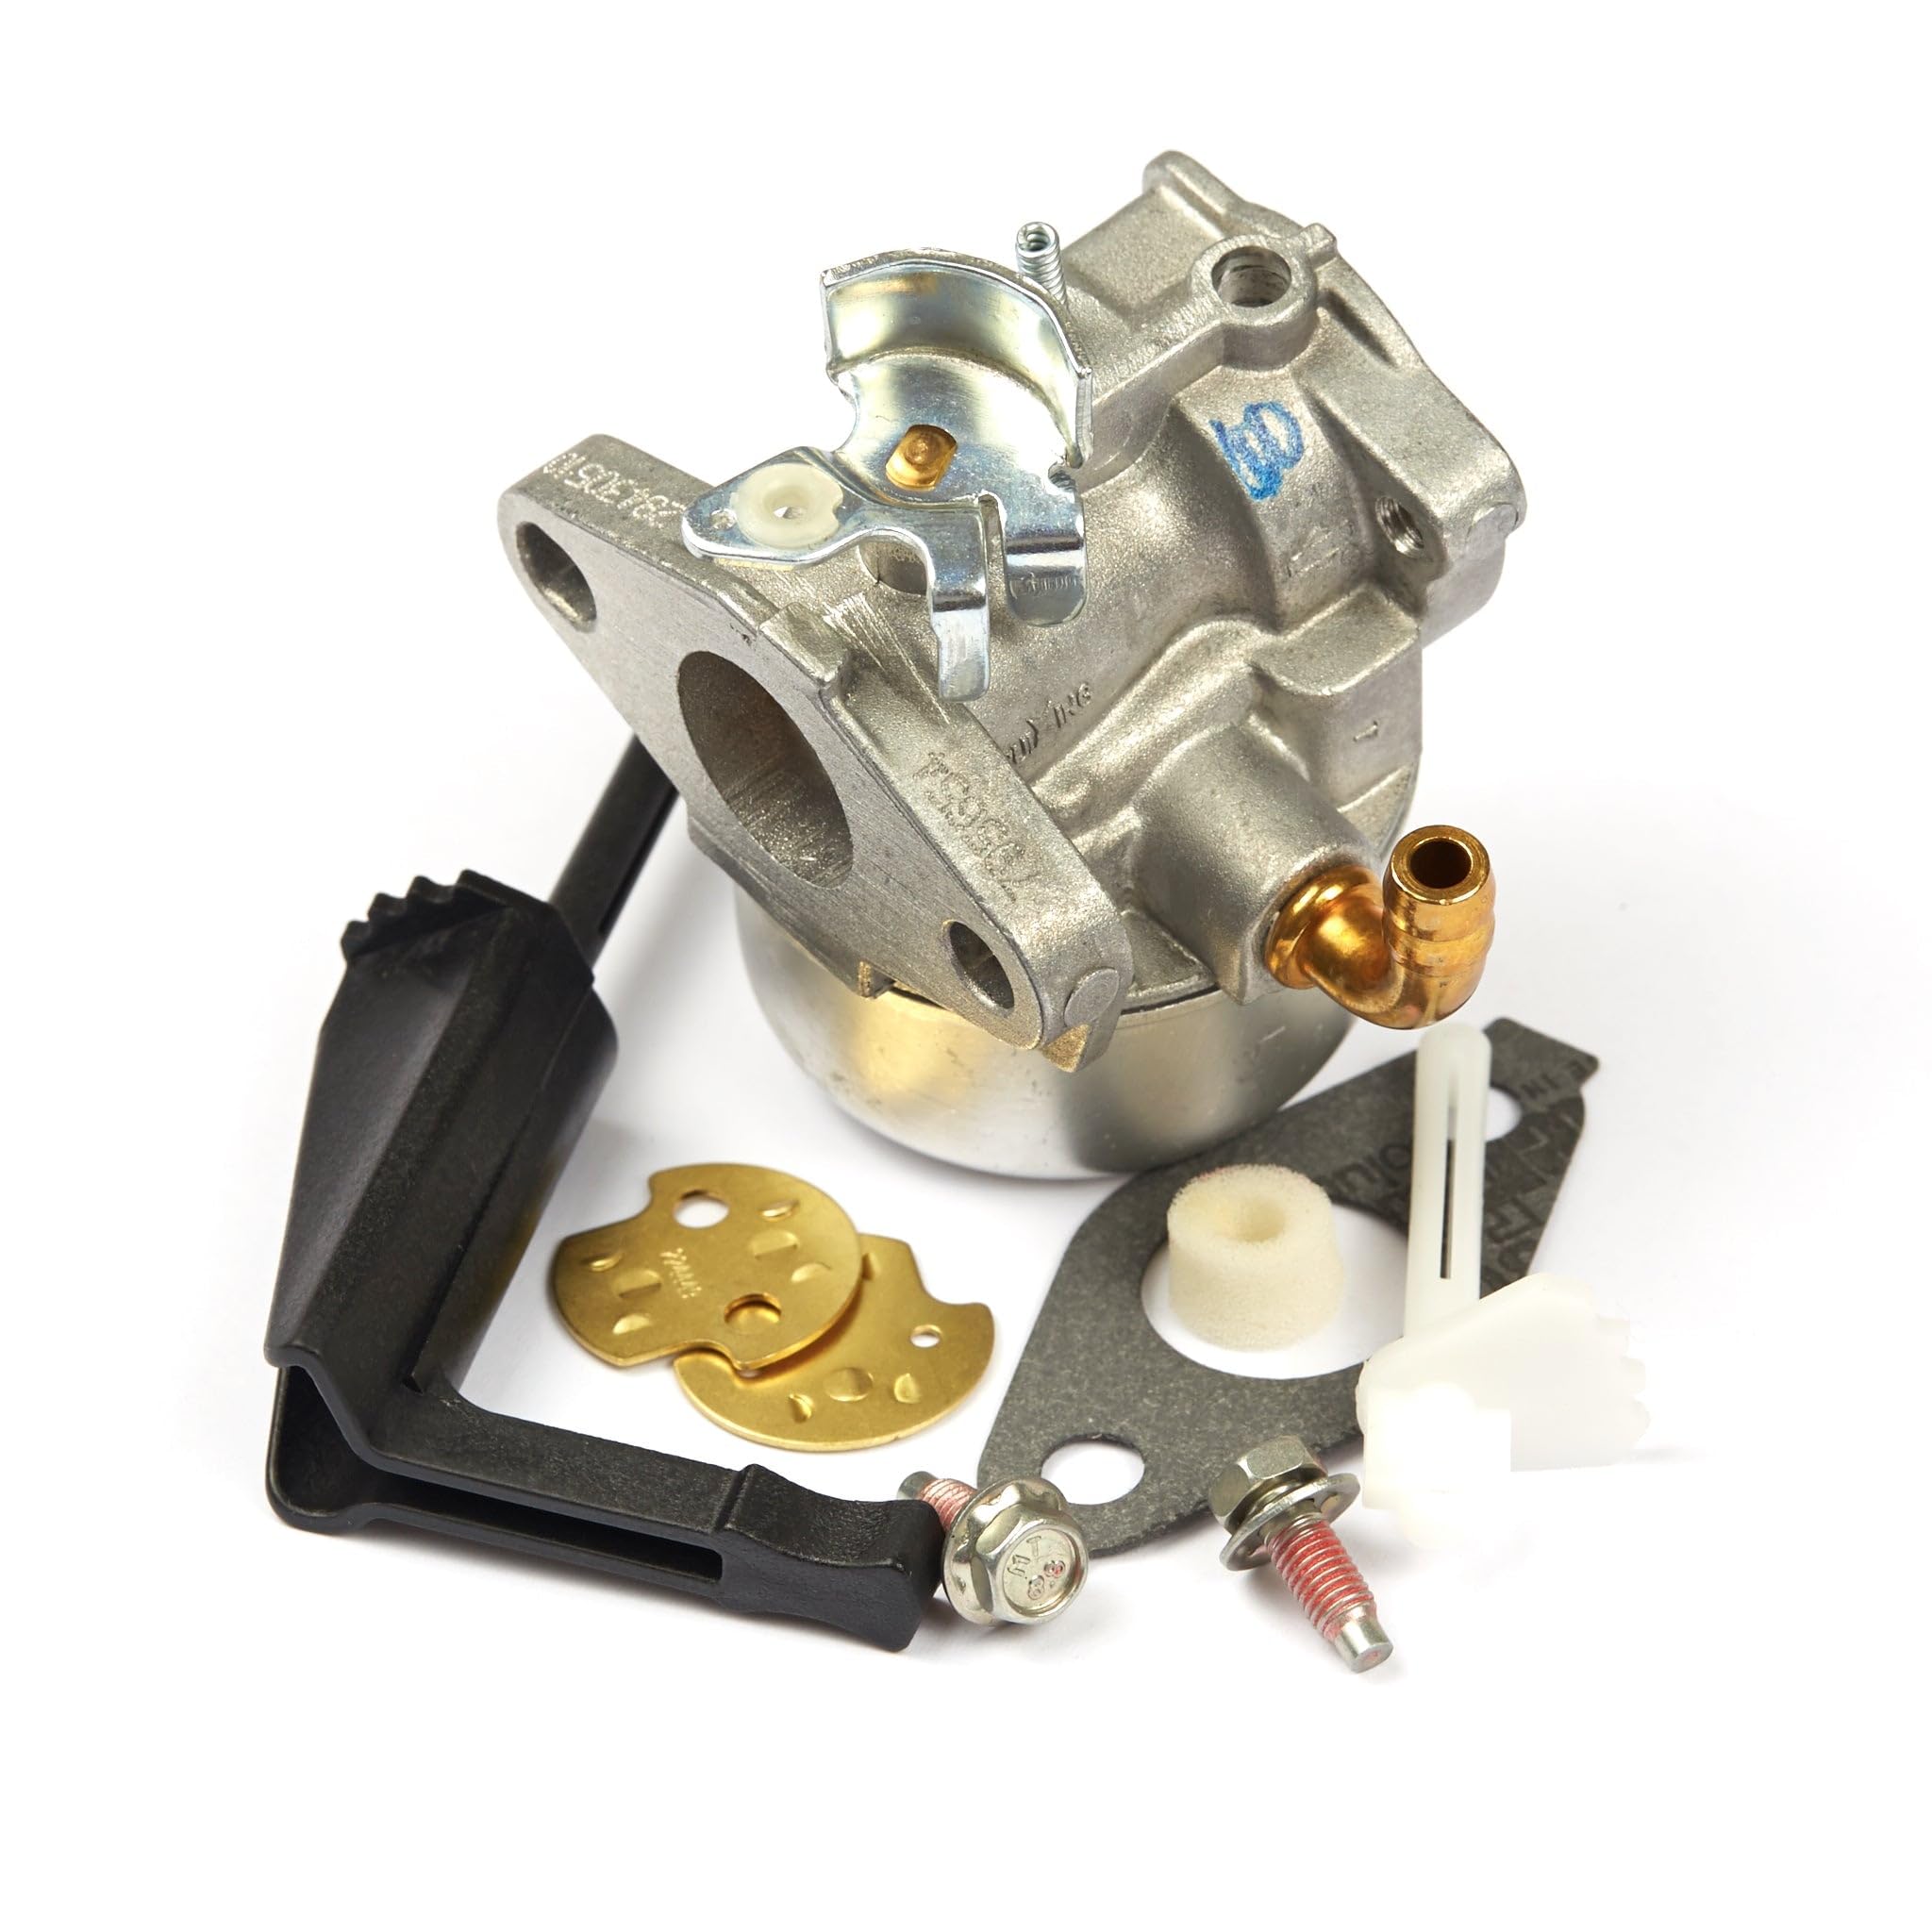
Image 1.1: Briggs & Stratton 798653 Carburetor. This image displays the complete carburetor unit, highlighting its main components and overall design.
Key Features:
- Genuine Briggs & Stratton Part: Ensures compatibility and performance as per manufacturer standards.
- Model Number: 798653
- Engine Compatibility: Fits most 120000 and 121000 series Briggs & Stratton engines.
- Replaces Multiple Part Numbers: This carburetor replaces older Briggs & Stratton part numbers including 791077, 696981, 698860, 790182, 694508, 795069, 698859, 790180, 790290, 693865, and 697354.
2. Safety Information
Always prioritize safety when working with engine components. Failure to follow safety instructions can result in serious injury or damage to equipment.
- Read Engine Manual: Consult your engine's specific owner's manual for detailed safety procedures and warnings.
- Disconnect Spark Plug: Before performing any service or maintenance, always disconnect the spark plug wire to prevent accidental engine starting.
- Work in a Well-Ventilated Area: Fuel vapors are flammable and hazardous. Ensure adequate ventilation.
- Wear Protective Gear: Use safety glasses, gloves, and appropriate clothing to protect against fuel, oil, and sharp edges.
- Handle Fuel Carefully: Fuel is highly flammable. Store it in approved containers and avoid spills. Clean up any spills immediately.
- Hot Surfaces: Engine components can be hot. Allow the engine to cool before servicing.
3. Installation
This section provides general steps for replacing a carburetor. Specific procedures may vary depending on your engine model. Refer to your engine's service manual for detailed instructions.
Tools Required:
- Socket set or wrenches
- Screwdrivers (flathead and Phillips)
- Pliers
- Fuel line clamps
- Clean rags
- New gaskets (often included with the carburetor)
Installation Steps:
- Prepare the Engine:
- Ensure the engine is cool and the spark plug wire is disconnected.
- Turn off the fuel supply or drain the fuel tank if necessary.
- Place clean rags around the carburetor area to catch any spilled fuel.
- Remove Air Filter Assembly:
- Carefully remove the air filter cover and the air filter element.
- Unbolt and remove the air filter housing from the engine.
- Disconnect Fuel Line and Linkages:
- Use fuel line clamps to pinch off the fuel line, then disconnect it from the carburetor.
- Carefully detach the throttle and choke linkages from the old carburetor. Note their positions for reassembly.

Image 3.1: Carburetor components including gaskets and mounting hardware. This image shows the carburetor along with essential installation accessories like gaskets and screws.
- Remove Old Carburetor:
- Unbolt the carburetor from the engine manifold.
- Remove the old carburetor and any old gaskets.
- Install New Carburetor:
- Ensure all mounting surfaces are clean.
- Place new gaskets in their correct positions.
- Mount the new Briggs & Stratton 798653 Carburetor onto the engine manifold, ensuring it seats properly.
- Secure the carburetor with the bolts, tightening them evenly.

Image 3.2: Front view of the Briggs & Stratton 798653 Carburetor. This perspective highlights the air intake and fuel inlet connections.

Image 3.3: Side view of the Briggs & Stratton 798653 Carburetor. This view shows the various adjustment screws and linkage points.
- Reconnect Fuel Line and Linkages:
- Reconnect the fuel line to the carburetor and remove the clamps.
- Reattach the throttle and choke linkages to their correct positions on the new carburetor.
- Reinstall Air Filter Assembly:
- Reattach the air filter housing, insert the air filter element, and secure the cover.
- Final Checks:
- Double-check all connections for tightness and proper routing.
- Ensure there are no fuel leaks.
- Reconnect the spark plug wire.
4. Operating the Engine After Carburetor Replacement
After installing the new carburetor, follow these steps to start and operate your engine.
- Add Fuel: Ensure the fuel tank has fresh, clean fuel.
- Prime the Carburetor (if applicable): Some carburetors have a primer bulb. Press it several times until fuel is visible in the bulb or fuel lines.
- Set Choke: For cold starts, set the choke to the "Full Choke" position. For warm starts, the choke may not be necessary.
- Start Engine: Follow your engine's specific starting procedure (e.g., pull starter cord, turn key).
- Adjust Choke: As the engine warms up, gradually move the choke to the "Run" position.
- Monitor Performance: Listen for smooth engine operation. If the engine runs rough or stalls, further adjustments or troubleshooting may be required.
5. Maintenance
Regular maintenance of your carburetor and engine components will ensure reliable performance and extend the life of your equipment.
- Use Fresh Fuel: Always use fresh, clean gasoline. Stale fuel can cause carburetor issues. Consider using a fuel stabilizer if storing the engine for extended periods.
- Clean Air Filter: Regularly inspect and clean or replace the air filter to prevent dirt and debris from entering the carburetor.
- Inspect Fuel Lines: Check fuel lines for cracks, leaks, or deterioration. Replace as needed.
- Carburetor Cleaning: If performance issues arise, the carburetor may need cleaning. This typically involves disassembling, cleaning with carburetor cleaner, and reassembling with new gaskets. This procedure should only be performed by individuals with appropriate mechanical knowledge.
6. Troubleshooting Common Issues
If your engine experiences problems after carburetor replacement, consider the following common issues:
| Problem | Possible Cause | Solution |
|---|---|---|
| Engine won't start | No fuel, incorrect choke setting, spark plug issue, fuel line blockage. | Check fuel level, adjust choke, inspect spark plug, check fuel lines for kinks or blockages. |
| Engine runs rough/stalls | Improper carburetor adjustment, dirty air filter, stale fuel, fuel contamination. | Ensure carburetor is properly installed and linkages are correct. Clean/replace air filter. Use fresh fuel. |
| Fuel leaks | Loose connections, damaged gaskets, cracked fuel line. | Tighten connections, replace gaskets, replace damaged fuel lines. |
If troubleshooting steps do not resolve the issue, consult a qualified service technician or refer to your engine's comprehensive service manual.
7. Specifications
| Attribute | Detail |
|---|---|
| Brand | Briggs & Stratton |
| Model Number | 798653 |
| Manufacturer Part Number | 798653 |
| Flange Type | Bolt On |
| Product Dimensions (D x W x H) | 1"D x 1"W x 1"H (Approximate) |
| Item Weight | 0.44 Pounds (Approximate) |
| Unit Count | 1.0 Count |
| Replaces Part Numbers | 791077, 696981, 698860, 790182, 694508, 795069, 698859, 790180, 790290, 693865, 697354 |
8. Warranty and Support
For information regarding the warranty of your Briggs & Stratton 798653 Carburetor, please refer to the official Briggs & Stratton website or contact their customer support directly. Genuine Briggs & Stratton parts are typically covered by the manufacturer's standard warranty.
Contact Information:
Visit the official Briggs & Stratton website for support resources, service locator, and contact details.
Ask a question about this manual
Ask about setup, troubleshooting, compatibility, parts, safety, or missing instructions. Manuals+ will review the question and use this page’s manual context to help answer it.