Artsana 1939
Artsana PIC Classic Check Arm Blood Pressure Monitor User Manual
Model: 1939
Introduction
Thank you for choosing the Artsana PIC Classic Check Arm Blood Pressure Monitor. This device is designed to provide accurate and convenient blood pressure measurements for home use. Please read this manual thoroughly before using the device to ensure proper operation and to understand all safety precautions.
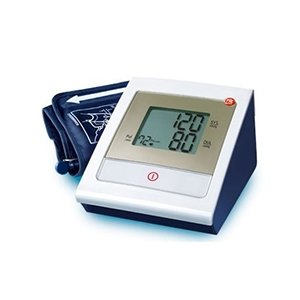
Image: The Artsana PIC Classic Check Arm Blood Pressure Monitor, showing the main unit with a large digital display and the attached arm cuff.
Important Safety Information
- Consult your physician before using this device if you have any medical conditions.
- Do not use this device for purposes other than measuring blood pressure.
- Keep the device out of reach of children.
- Do not disassemble or attempt to repair the device yourself.
- Avoid strong electromagnetic fields near the device.
Components
The Artsana PIC Classic Check Blood Pressure Monitor typically includes the following components:
- Main Unit (monitor)
- Arm Cuff
- Instruction Manual
- Storage Bag (may vary by package)
- Batteries (may be included)
Setup
- Install Batteries: Open the battery compartment on the back of the main unit. Insert the required batteries (e.g., 4 x AA) according to the polarity indicators (+/-). Close the compartment securely.
- Connect Cuff: Insert the air tube connector from the arm cuff firmly into the air jack on the side of the main unit. Ensure a secure connection to prevent air leakage during measurement.
Operating Instructions
Before Measurement:
- Avoid eating, drinking alcohol, smoking, exercising, and bathing for 30 minutes before measurement.
- Rest for at least 5 minutes before taking a measurement.
- Sit in a comfortable position with your back supported and feet flat on the floor.
- Place your arm on a table so the cuff is at heart level.
Applying the Arm Cuff:
- Slide your arm through the cuff loop. The air tube should run down the inside of your arm.
- Position the cuff approximately 1-2 cm above your elbow joint, directly over your brachial artery.
- Wrap the cuff snugly around your arm, ensuring it is not too tight or too loose. The index line on the cuff should fall within the range indicated.
Taking a Measurement:
- Once the cuff is correctly positioned, press the red button (Start/Stop button) on the main unit.
- The cuff will automatically inflate. Remain still and silent during the measurement.
- After inflation, the cuff will slowly deflate, and your blood pressure readings (systolic and diastolic) and pulse rate will be displayed on the large screen.
- The device may also indicate if the values are too high according to European Society of Hypertension standards.
- To turn off the device, press the red button again. The device will automatically shut off after a period of inactivity.
Maintenance and Storage
- Cleaning: Wipe the main unit and cuff with a soft, dry cloth. Do not use abrasive cleaners or immerse the device in water.
- Storage: Store the device in a cool, dry place, away from direct sunlight and extreme temperatures. If not in use for an extended period, remove the batteries.
- Cuff Care: Ensure the cuff is clean and free from damage. Do not fold the air tube sharply.
Troubleshooting
| Problem | Possible Cause | Solution |
|---|---|---|
| Device does not turn on. | Batteries are low or incorrectly inserted. | Replace batteries or check polarity. |
| Cuff does not inflate or inflates weakly. | Cuff not connected properly; air leakage. | Ensure cuff tube is securely connected to the main unit. Check cuff for damage. |
| Inaccurate readings. | Incorrect cuff placement; movement during measurement. | Re-read "Operating Instructions" section. Ensure proper cuff placement and remain still. |
Specifications
- Model: 1939
- Brand: Artsana
- Measurement Method: Oscillometric
- Power Source: Batteries (e.g., AA)
- Weight: Approximately 1.5 kg (3.31 lbs) (Main unit and cuff)
- ASIN: B005CVGDIA
- Manufacturer: ARTSANA
Warranty and Support
For warranty information and customer support, please refer to the warranty card included with your product or visit the official Artsana website. Keep your purchase receipt as proof of purchase.
For further assistance, you may contact the retailer where the product was purchased or the manufacturer directly.
Related Documents - 1939
 |
Artsana 2020 Sustainability Report: Sustainable Parenting, Environmental & Social Responsibility Artsana Group's 2020 Sustainability Report details the company's commitment to sustainable parenting, environmental stewardship, and social responsibility. Discover initiatives across brands like Chicco, Boppy, and Recaro, focusing on people, planet, and ethical business practices. |
 |
EU Regulation 2023/826 Product Data - Artsana Model 06867_H Official data for EU Regulation 2023/826 concerning product model 06867_H by Artsana. Details include off-mode status, power consumption (0.3W), and operational period (21 min). |
 |
Artsana 2020 Sustainability Report: ESG, Sustainable Parenting, and Corporate Responsibility Explore Artsana's 2020 Sustainability Report, detailing their commitment to ESG principles, sustainable parenting, environmental stewardship, social impact, and brand initiatives like Chicco and Recaro. |
 |
Artsana 2024 Sustainability Report Artsana's 2024 Sustainability Report details the company's commitment to environmental stewardship, social responsibility, and ethical governance. It covers initiatives in climate action, sustainable products, employee well-being, supply chain ethics, and community engagement, reflecting a dedication to families and the planet. |
 |
Chicco TrolleyMe: Manuale d'Uso e Istruzioni Scopri il manuale d'uso completo per il passeggino Chicco TrolleyMe. Trova istruzioni dettagliate, consigli di sicurezza e manutenzione per un utilizzo ottimale. |
 |
Chicco TROLLEYme Passeggino: Manuale d'Uso e Sicurezza Manuale utente completo per il passeggino Chicco TROLLEYme. Include istruzioni dettagliate per l'assemblaggio, l'uso sicuro, la manutenzione e le avvertenze per garantire il benessere del tuo bambino. |
Ask a question about this manual
Ask about setup, troubleshooting, compatibility, parts, safety, or missing instructions. Manuals+ will review the question and use this page’s manual context to help answer it.