1. Product Overview
The Delta Faucet RP51919 is an OEM authorized 6-setting diverter cartridge assembly designed to restore or enhance the functionality of compatible Delta Faucet diverter valve bodies (R11000 and integrated R22000 or R22000-WS). This brass construction part ensures long-lasting durability and reliable water diversion between multiple shower outputs.
Video: Product Overview - This video provides a general overview of the Delta Faucet RP51919 diverter cartridge. It highlights its features and design, offering a visual introduction to the product.
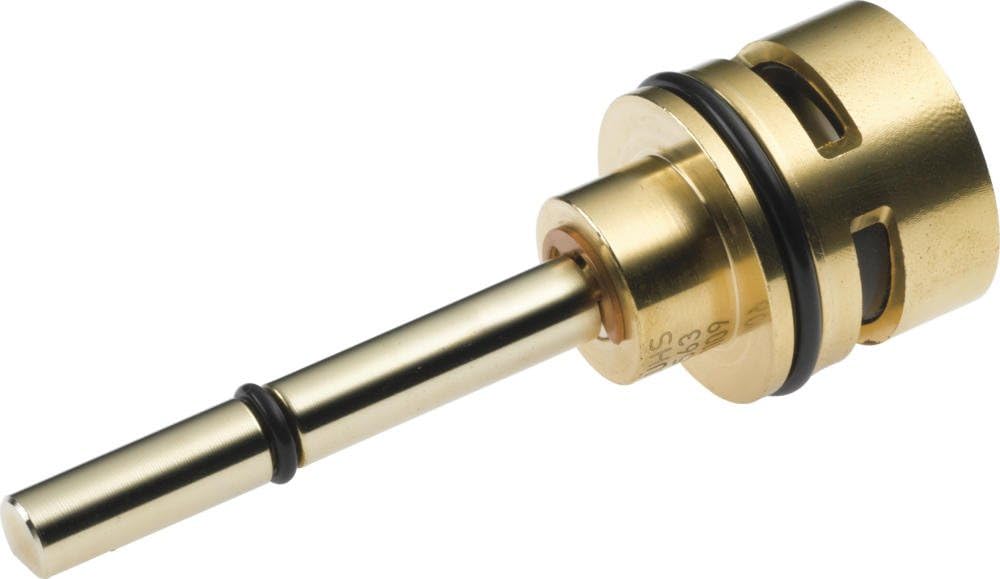
Image: Delta Faucet RP51919 Diverter Cartridge - A close-up view of the Delta Faucet RP51919 6-setting diverter cartridge assembly, showcasing its brass construction and design.
2. Installation Instructions
2.1 Safety First
- Before beginning any work, ensure the main water supply to the bathroom or entire house is turned off to prevent water damage.
- Wear appropriate safety gear, such as gloves and eye protection.
2.2 Tools Required
- Hex tool (often supplied with faucet trim)
- Phillips head screwdriver
- Clean cloth or towel
- Silicone lubricant (if not supplied, use plumbing-grade silicone grease)
2.3 Disassembly
- Using the hex tool, loosen the set screw on the diverter handle and carefully pull the handle off.
- Repeat the process for the main temperature/volume control handle.
- Twist off the threaded sleeve that covers the diverter valve.
- Gently pull away the chrome cover plate from the wall. If it's siliconed, carefully cut the silicone seal with a utility knife.
- Using a Phillips head screwdriver, remove the screws holding the underlying plastic escutcheon or mounting plate.
- Carefully pull the existing diverter valve cartridge out of the valve body. Be prepared for a small amount of residual water to drain from the pipes; use a cloth to absorb it.
2.4 Cartridge Replacement
- Apply a thin layer of silicone lubricant around the rubber O-rings on the new Delta Faucet RP51919 diverter cartridge. This aids in smooth installation and ensures a proper seal.
- Align the notch on the new diverter cartridge with the corresponding slot in the valve body. Carefully push the cartridge into place until it is fully seated.
2.5 Reassembly
- Reattach the plastic escutcheon or mounting plate with the Phillips head screws.
- Place the chrome cover plate back onto the wall.
- Thread the sleeve back over the diverter valve and tighten it by hand.
- Reinstall the main temperature/volume control handle, securing it with its set screw.
- Reinstall the diverter handle, securing it with its set screw.
2.6 Testing
- Slowly turn the main water supply back on.
- Test the main showerhead and then rotate the diverter handle to check all individual and shared positions for proper water flow and diversion.
3. Operating Instructions
The Delta Faucet RP51919 6-setting diverter cartridge allows for precise control over your shower outputs. It supports 3 individual positions and 3 shared positions, enabling you to direct water to a single outlet or a combination of outlets.
- Individual Positions: Rotate the diverter handle to specific detents to activate a single shower output (e.g., main showerhead, hand shower, body sprays).
- Shared Positions: Intermediate positions on the diverter handle will activate two outputs simultaneously, allowing for a customized showering experience.
Familiarize yourself with the handle's rotation to understand which positions correspond to your installed shower components.
4. Maintenance
To ensure the longevity and smooth operation of your Delta Faucet RP51919 diverter cartridge, follow these maintenance guidelines:
- Cleaning: Periodically clean the exterior of the diverter trim with a soft, damp cloth. Avoid abrasive cleaners or harsh chemicals, as these can damage the finish.
- Lubrication: If the diverter handle becomes stiff or difficult to turn, the O-rings on the cartridge may require re-lubrication. Follow the disassembly steps (Section 2.3) to access the cartridge, apply plumbing-grade silicone lubricant to the O-rings, and reassemble.
- Hard Water Areas: In areas with hard water, mineral deposits can accumulate. Regular cleaning and occasional lubrication can help prevent buildup and maintain smooth operation.
5. Troubleshooting
If you encounter issues with your Delta Faucet RP51919 diverter cartridge, consider the following:
- No Water from an Output: If one of your shower outputs is not receiving water, it's possible that the rough-in plumbing has a capped pipe on the wrong side, or the diverter cartridge is not correctly installed. Ensure the cartridge is fully seated and oriented correctly. If the issue persists, professional plumbing assistance may be required to verify the rough-in installation.
- Stiff Diverter Handle: This usually indicates a need for lubrication. Refer to the Maintenance section (Section 4) for instructions on lubricating the O-rings.
- Leaking: A leak around the diverter handle or cover plate often points to improperly seated O-rings or a damaged cartridge. Disassemble, inspect the O-rings for damage, lubricate, and reassemble carefully. If the leak continues, the cartridge may need replacement.
6. Specifications
| Feature | Specification |
|---|---|
| Part Number | RP51919 |
| Material | Brass |
| Brand | DELTA |
| Item Dimensions (L x W x H) | 4 x 2.5 x 4 inches |
| Item Weight | 4.6 ounces |
| Exterior Finish | Chrome |
| Number of Ports | 2 (for diverter valve body R11000 and integrated valve body R22000 or R22000-WS) |
| Diverter Settings | 6-Setting (3 individual positions, 3 shared positions) |
| UPC | 034449577335 |
7. Warranty & Support
7.1 Warranty Information
This Delta Faucet RP51919 replacement part is covered by Delta Faucet's Lifetime Faucet and Finish Lifetime Limited Warranty. Please refer to the official Delta Faucet website or your product packaging for complete warranty details and terms.
7.2 Customer Support
For further assistance, technical support, or to inquire about replacement parts, please contact Delta Faucet customer service. Contact information can typically be found on the official Delta Faucet website or on your original product documentation.


