1. Introduction
Thank you for choosing the Stanley 6-TRE650 Electric Brad Nailer/Stapler. This tool is designed for efficient fastening tasks, offering reliability and ease of use for various applications. Please read this instruction manual thoroughly before operating the tool to ensure safe and effective use. Keep this manual for future reference.
2. Safety Instructions
Always follow basic safety precautions to reduce the risk of fire, electric shock, and personal injury when using power tools.
- Read All Instructions: Familiarize yourself with the tool's operation and safety guidelines.
- Wear Eye Protection: Always wear safety glasses or goggles that comply with applicable standards.
- Wear Hearing Protection: Prolonged use may require hearing protection.
- Keep Work Area Clean: Cluttered areas invite accidents.
- Avoid Dangerous Environments: Do not use power tools in damp or wet locations, or expose them to rain.
- Keep Children Away: All visitors should be kept at a safe distance from the work area.
- Secure Workpiece: Use clamps or a vise to hold work. This is safer than using your hand and it frees both hands to operate the tool.
- Do Not Overreach: Keep proper footing and balance at all times.
- Disconnect Power: Always disconnect the tool from the power supply before making adjustments, changing accessories, or storing the tool.
- Use the Right Tool: Do not force a small tool or attachment to do the job of a heavy-duty tool.
- Maintain Tools With Care: Keep tools sharp and clean for better and safer performance. Follow instructions for lubricating and changing accessories.
- Check for Damaged Parts: Before using the tool, carefully check for any damaged parts. Ensure all guards and other parts are in proper working order.
- Safety Contact Switch: This tool is equipped with a safety contact switch. Ensure it is functioning correctly before each use. The tool will not fire unless the contact trip is pressed against the workpiece.
- Power Source: Operate the tool only with a 230V/50Hz power supply.
3. Product Overview
The Stanley 6-TRE650 is a robust electric brad nailer and stapler designed for various fastening applications. Key features include:
- Soft Handle: Ergonomically designed soft handle for comfortable and reduced-fatigue operation during extended use.
- 2.5m Cable Length: Provides ample reach for various tasks without constant repositioning of power outlets.
- Nail Tip with Surface Damage Protection: Designed to minimize marring or damage to the workpiece surface.
- Safety Contact Switch: Prevents accidental firing by requiring the tool to be pressed against the workpiece before activation.
- Strength Adjustment Wheel: Allows for power adjustment depending on the material and fastener type, ensuring optimal penetration.
- Versatile Fastener Compatibility: Suitable for brad nails and staples of various lengths, specifically brad nails from 15mm to 32mm.

Figure 1: Front view of the Stanley 6-TRE650 Electric Brad Nailer/Stapler, showcasing its yellow and black design and ergonomic handle.
4. Setup
- Unpack the Tool: Carefully remove the tool and all accessories from its packaging. Inspect for any shipping damage.
- Power Connection: Ensure the tool's power cord is securely plugged into a standard 230V/50Hz electrical outlet.
- Loading Fasteners: Refer to Section 5, "Loading Fasteners," for detailed instructions on how to load brad nails or staples into the magazine.
- Adjust Power Setting: Before operation, adjust the strength adjustment wheel according to the material hardness and fastener length. Start with a lower setting and increase if necessary to achieve proper penetration.
5. Loading Fasteners
The Stanley 6-TRE650 is compatible with brad nails and staples. For brad nails, it supports lengths from 15mm to 32mm (15, 19, 25, 30, 32mm).
- Disconnect Power: Always unplug the tool from the power source before loading fasteners.
- Open Magazine: Locate the magazine release latch, typically at the bottom or rear of the tool. Press or slide it to open the fastener magazine.
- Insert Fasteners: Place a strip of brad nails or staples into the magazine with the points facing forward. Ensure they are correctly seated in the track.
- Close Magazine: Slide the magazine cover back until it latches securely. Do not force it.
- Verify: Gently shake the tool to ensure fasteners are properly loaded and not jammed.
6. Operating Instructions
Follow these steps for safe and effective operation:
- Connect Power: Plug the tool into a suitable 230V/50Hz power outlet.
- Adjust Power: Use the strength adjustment wheel to set the appropriate power level for your material and fastener.
- Position Tool: Place the nose of the tool firmly against the workpiece where you intend to drive a fastener. Ensure the safety contact switch is fully depressed.
- Apply Pressure: Apply firm, consistent pressure to the tool, pushing it straight into the workpiece. This is crucial for ensuring fasteners are driven flush. Lack of sufficient pressure can result in fasteners not fully sinking.
- Activate Trigger: Squeeze the trigger to drive the fastener. Release the trigger after each fastener.
- Inspect Work: After driving a fastener, inspect its depth. Adjust the strength wheel if necessary.
- Clear Jams: If the tool jams, immediately disconnect power and refer to the "Troubleshooting" section.
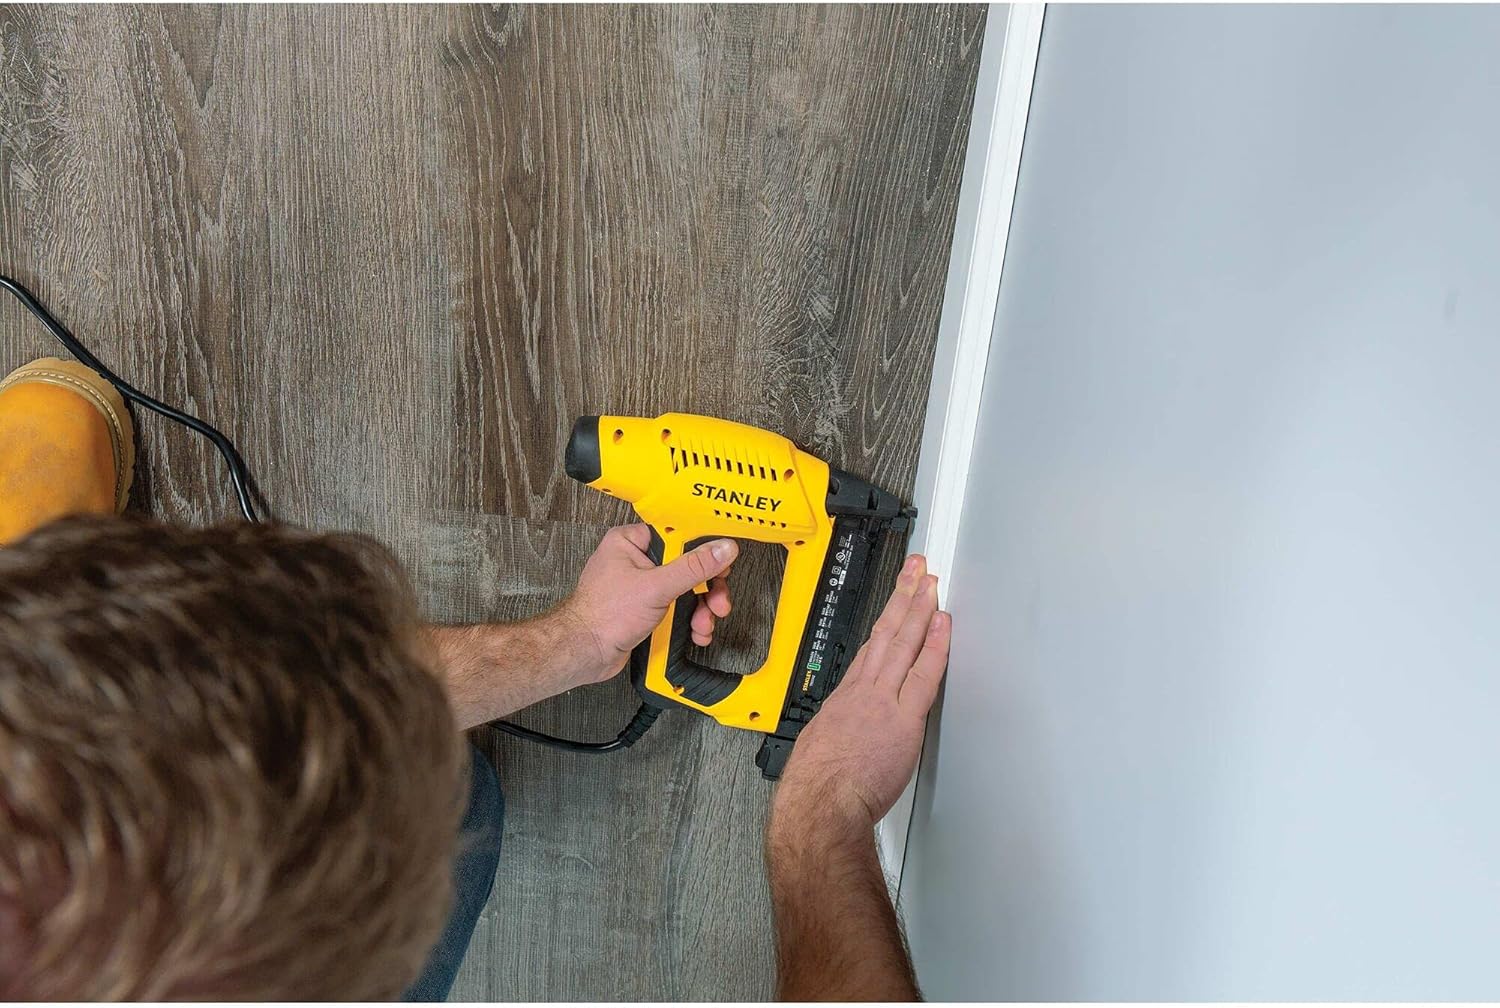
Figure 2: A user demonstrating the proper technique for operating the Stanley 6-TRE650, pressing the tool firmly against a wooden trim piece.
7. Adjusting Power
The Stanley 6-TRE650 features a strength adjustment wheel, typically located on the side of the tool. This wheel allows you to fine-tune the driving power to match the material you are working with and the length of the fasteners being used.
- Increase Power: Turn the wheel towards a higher setting for harder materials or longer fasteners to ensure they are driven flush.
- Decrease Power: Turn the wheel towards a lower setting for softer materials or shorter fasteners to prevent over-penetration or damage to the workpiece.
- Test on Scrap Material: Always test the power setting on a scrap piece of the same material before working on your main project.
8. Maintenance
Regular maintenance ensures the longevity and optimal performance of your tool.
- Disconnect Power: Always unplug the tool before performing any maintenance.
- Cleaning: Keep the tool clean and free from dust and debris. Use a dry cloth or compressed air. Do not use solvents.
- Inspect Fastener Magazine: Periodically check the magazine for any obstructions or wear.
- Cord Inspection: Regularly inspect the power cord for any damage, cuts, or fraying. Replace if damaged.
- Storage: Store the tool in a dry, secure place, out of reach of children.
9. Troubleshooting
| Problem | Possible Cause | Solution |
|---|---|---|
| Tool does not fire. |
|
|
| Fasteners not driven flush. |
|
|
| Tool jams frequently. |
|
|
10. Specifications
- Model: Stanley 6-TRE650
- Power Source: Corded Electric
- Operation: 230V/50Hz
- Cable Length: 2.5 meters
- Compatible Fasteners (Brad Nails): 15mm, 19mm, 25mm, 30mm, 32mm
- Magazine Capacity: Approximately 100 fasteners
- Material: Acrylonitrile Butadiene Styrene (ABS)
- Item Weight: 2.18 Kilograms
- Product Dimensions: Approximately 20L x 20W cm (tool body), with a height of approximately 28 cm (11 inches).

Figure 3: A diagram illustrating the approximate dimensions of the Stanley 6-TRE650, indicating a height of approximately 28 cm (11 inches).
11. Warranty and Support
Stanley products are manufactured to high-quality standards. For information regarding warranty coverage, service, or technical support, please refer to the warranty card included with your purchase or visit the official Stanley website. Keep your proof of purchase for any warranty claims.
For further assistance, you may contact Stanley customer service through their official channels. Visit Stanley Tools Official Website


