
Introduction
The GROHE 47364000 AquaDimmer Cartridge is an original replacement part designed for specific GROHE shower and faucet systems. This cartridge is crucial for controlling water flow and diverting water between different outlets (e.g., shower head and hand shower). This manual provides essential information for the safe and correct installation, operation, and maintenance of your AquaDimmer cartridge.
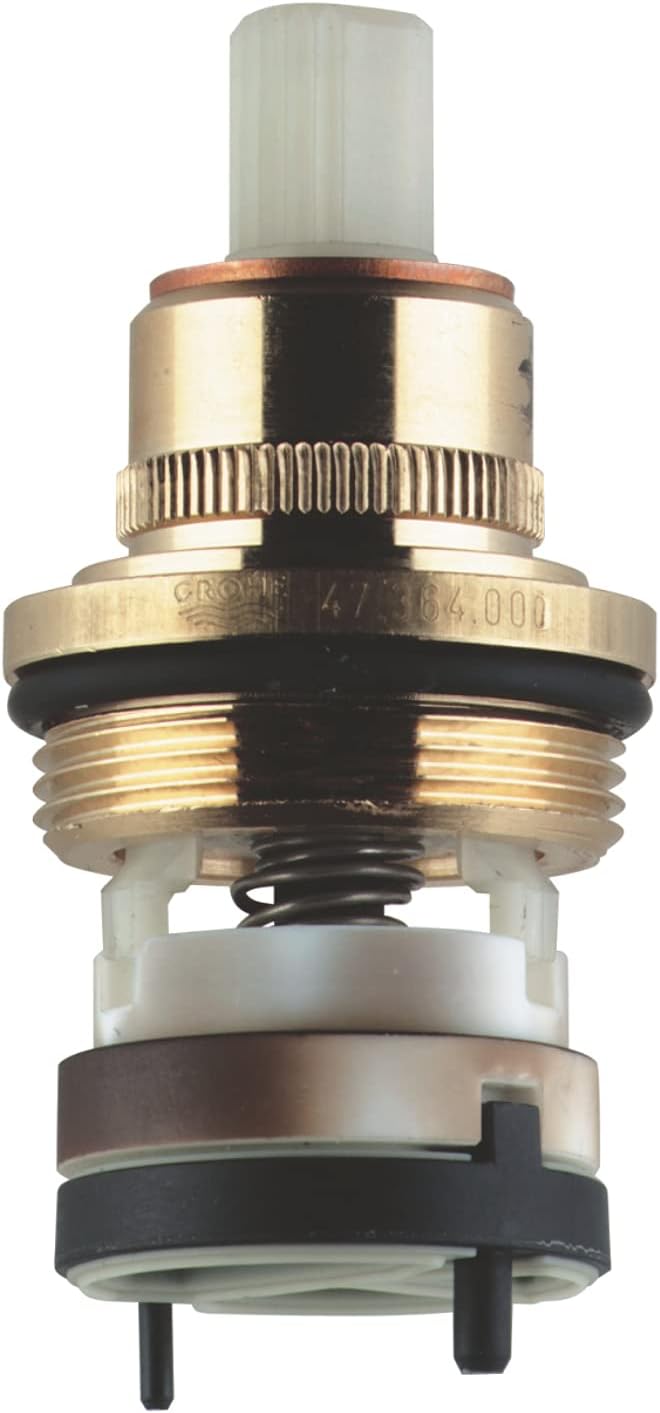
Image 1: The GROHE 47364000 AquaDimmer Cartridge. This image shows the complete cartridge assembly, highlighting its brass and plastic components.
Safety Information
Please read all safety instructions before attempting installation or maintenance. Failure to follow these instructions may result in property damage, personal injury, or improper product function.
- Turn off water supply: Always ensure the main water supply to the fixture is completely shut off before beginning any work.
- Wear protective gear: Use appropriate personal protective equipment, such as safety glasses and gloves.
- Professional installation: If you are unsure about any step, consult a qualified plumber.
- Handle with care: Components may have sharp edges or small parts.
- Water temperature: Be aware of potential hot water when testing the system after installation.
Package Contents
Verify that all components are present and undamaged before proceeding with installation.
- 1 x GROHE 47364000 AquaDimmer Cartridge
- Note: Additional seals or O-rings may be pre-installed on the cartridge.
Installation (Setup)
This section outlines the general steps for replacing an AquaDimmer cartridge. Specific disassembly and reassembly may vary slightly depending on your GROHE fixture model. Refer to your fixture's specific manual if available.
Tools Required:
- Adjustable wrench or appropriate size spanner (e.g., 32mm)
- Screwdriver (flathead or Phillips, depending on trim)
- Pliers (optional)
- Clean cloth
- Silicone grease (plumber's grease, if recommended for seals)
Installation Steps:
- Shut off Water Supply: Locate the main water shut-off valve for your home or the specific fixture and turn it off completely. Open the faucet to drain any remaining water.
- Remove Faucet Handle/Trim: Carefully remove the decorative handle and any trim plates covering the cartridge. This usually involves unscrewing a set screw or prying off a cap to access screws.
- Access the Old Cartridge: Once the trim is removed, you will see the cartridge housing. There may be a retaining nut or clip holding the old cartridge in place. Use an adjustable wrench or spanner to carefully loosen and remove the retaining nut.
- Remove Old Cartridge: Gently pull or twist the old AquaDimmer cartridge out of its housing. Note its orientation for correct installation of the new one. Inspect the housing for any debris or mineral buildup and clean if necessary.
- Prepare New Cartridge: Apply a thin layer of silicone grease to the O-rings and seals on the new GROHE 47364000 AquaDimmer Cartridge (if not pre-lubricated or if recommended by GROHE).
- Install New Cartridge: Insert the new cartridge into the housing, ensuring it is correctly aligned with any notches or pins. Push it firmly into place.
- Secure Cartridge: Reinstall the retaining nut or clip, tightening it securely but do not overtighten.
- Reassemble Trim: Reattach the decorative trim and faucet handle.
- Restore Water Supply: Slowly turn the main water supply back on. Check for any leaks around the newly installed cartridge and trim.
- Test Functionality: Test the faucet or shower to ensure proper water flow and temperature control.

Image 2: Technical line drawing of the AquaDimmer Cartridge. This diagram illustrates the internal and external structure, useful for understanding its components during installation.

Image 3: Top view of the AquaDimmer Cartridge. This perspective helps in identifying the correct orientation and connection points during installation.
Operating
Once installed, the GROHE 47364000 AquaDimmer Cartridge functions as the core control mechanism for your shower or faucet system. It typically allows you to:
- Control Water Flow: Rotate the handle to increase or decrease the water volume.
- Divert Water: Push or pull the handle, or rotate it to a specific position, to switch water flow between different outlets (e.g., from a bath spout to a shower head, or between multiple shower functions).
- Adjust Temperature: In combination with a thermostatic element (if present in your fixture), the AquaDimmer may also contribute to temperature selection or fine-tuning.
Refer to your specific GROHE fixture's user manual for detailed operating instructions, as the exact functionality can vary by model.
Maintenance
Proper maintenance ensures the longevity and optimal performance of your GROHE AquaDimmer cartridge.
- Regular Cleaning: Clean the exterior of your faucet or shower trim regularly with a soft cloth and mild soap. Avoid abrasive cleaners, scouring pads, or chemicals that can damage the finish or internal components.
- Check for Leaks: Periodically inspect the area around the faucet or shower for any signs of water leaks. Address any leaks promptly to prevent further damage.
- Water Quality: In areas with hard water, mineral deposits can affect cartridge performance over time. If you notice reduced flow or stiff operation, the cartridge may need to be cleaned or replaced.
- Lubrication: If the handle becomes stiff, a small amount of plumber's silicone grease can be applied to the moving parts of the cartridge (after shutting off water and disassembling the trim).
Troubleshooting
If you experience issues with your GROHE fixture after installing the AquaDimmer cartridge, consider the following common troubleshooting steps:
| Problem | Possible Cause | Solution |
|---|---|---|
| Water Leakage |
|
|
| Stiff Handle Operation |
|
|
| Improper Water Diversion |
|
|
If these steps do not resolve the issue, contact GROHE customer support or a qualified plumber.
Specifications
Key technical specifications for the GROHE 47364000 AquaDimmer Cartridge:
- Model Number: 47364000
- Brand: GROHE
- Material: Brass
- Exterior Finish: Chrome (referring to the fixture it's designed for, the cartridge itself is brass/plastic)
- Item Dimensions (L x W x H): 2.99 x 2.95 x 2.01 inches
- Item Weight: 0.1 Kilograms
- Inlet Connection Type: Gewinde (Thread)
- Outlet Connection Type: Compression
- Number of Ports: 2
- Valve Type: Globe Valve
- Connector Type: Threaded
- Thread Type: Standard
- Certifications: NSF, WRAS
Warranty and Support
For information regarding product warranty, please refer to the official GROHE website or contact GROHE customer service directly. As an original spare part, it is designed to meet GROHE's high-quality standards.
For further assistance, technical support, or to find authorized service providers, please visit the official GROHE website or contact their customer support line.
You can find more information and contact details on the GROHE Store on Amazon or the official GROHE corporate website.


