
1. Introduction
This manual provides comprehensive instructions for the installation, operation, and maintenance of your Raleigh RKD515 Rear Steel Side Pull Caliper Brake. Designed for reliable stopping power on bicycles, this brake features a centre mount design and is suitable for rear frame installation. Please read this manual thoroughly before installation and use to ensure proper function and safety.
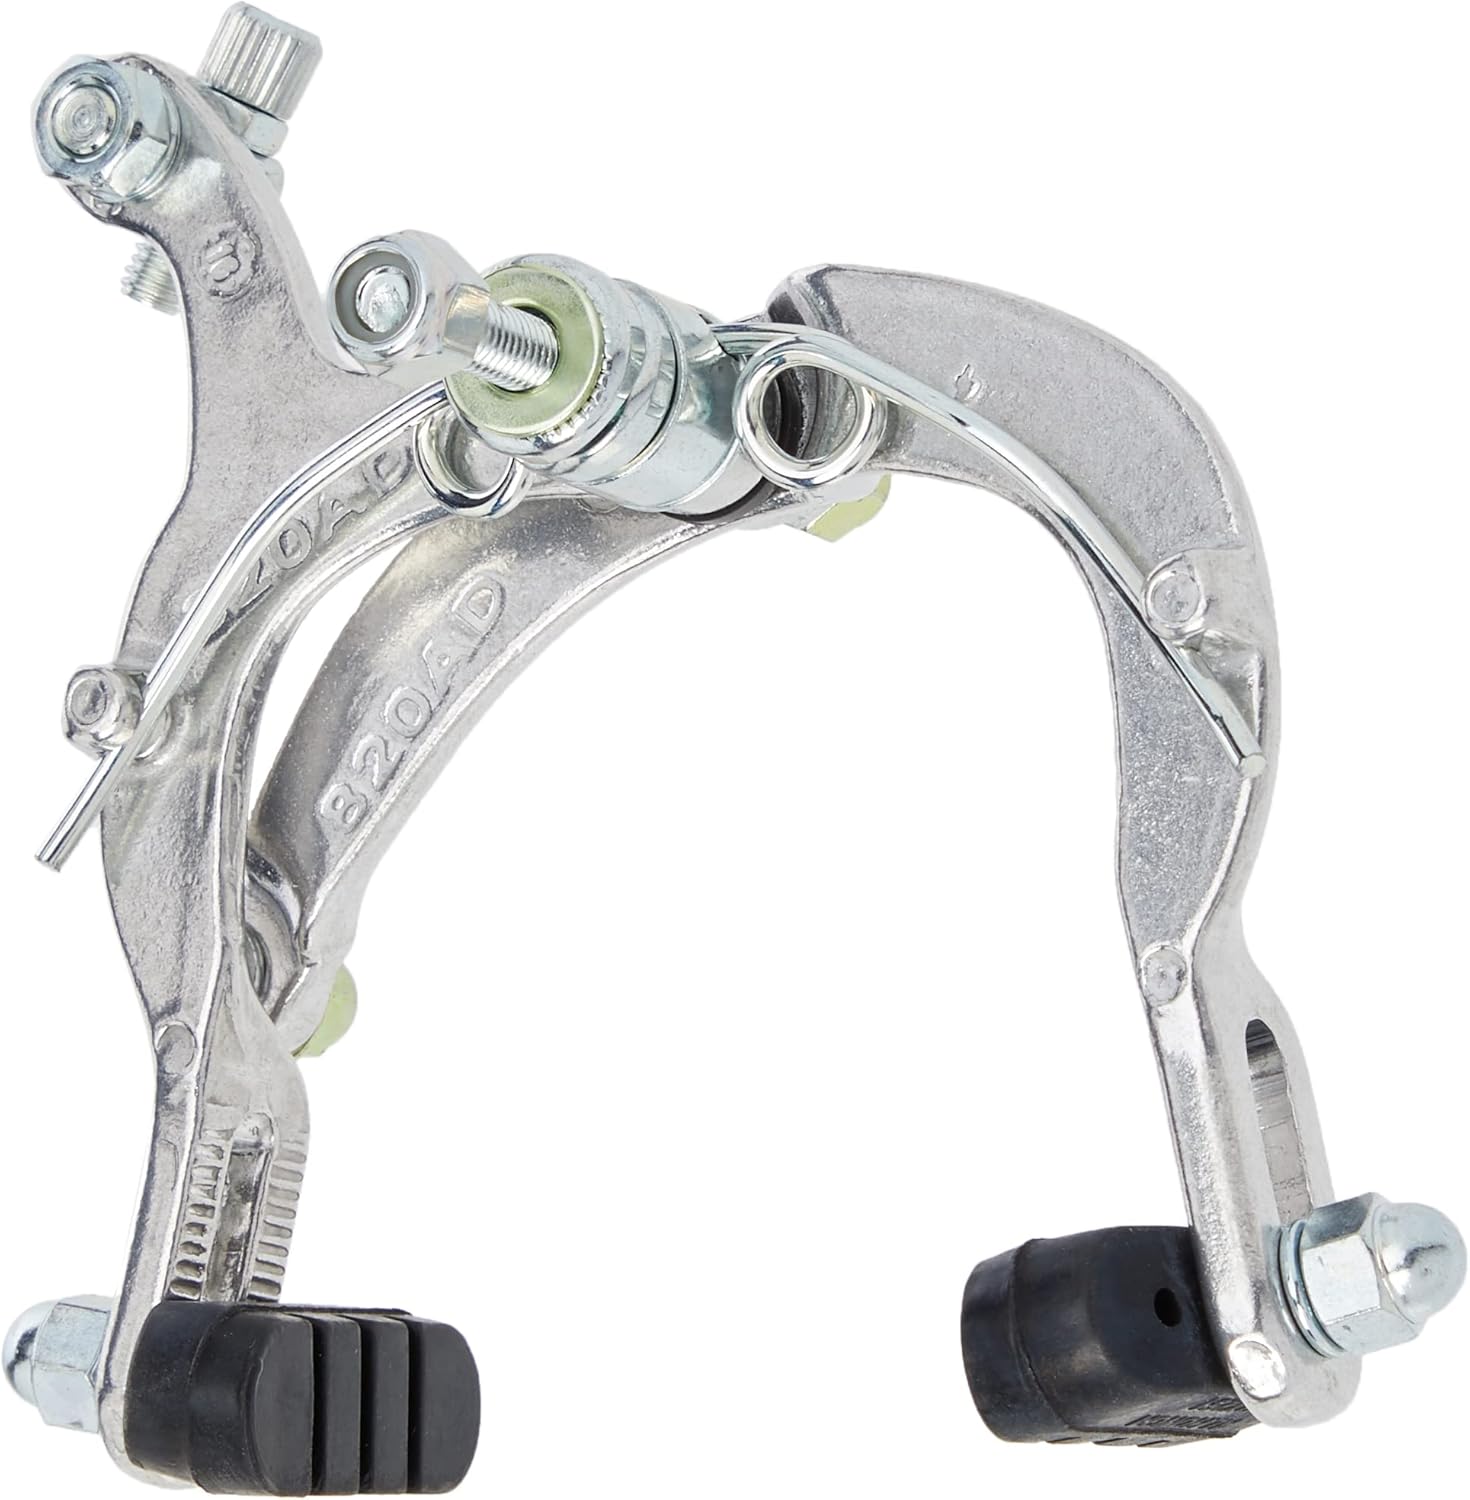
Figure 1: Full view of the Raleigh RKD515 Rear Side Pull Caliper Brake. This image displays the complete brake assembly, including the caliper arms, pivot points, and brake pads, ready for installation.
2. Safety Information
- Always ensure all bolts and nuts are securely tightened to the manufacturer's recommended torque specifications. Loose components can lead to brake failure.
- Regularly inspect brake pads for wear. Replace worn pads immediately to maintain effective braking performance.
- Ensure brake cables are free from fraying, kinks, or corrosion. Replace damaged cables promptly.
- Test brakes before each ride to confirm proper function.
- If you are unsure about any installation or maintenance procedure, consult a qualified bicycle mechanic.
3. Package Contents
The Raleigh RKD515 Rear Side Pull Caliper Brake package includes the following components:
- 1 x Raleigh RKD515 Rear Steel Side Pull Caliper Brake assembly
- Installation Hardware (nuts, washers, and mounting bolt)
- Brake pads (pre-installed on the caliper arms)
4. Setup and Installation
Follow these steps to properly install your Raleigh RKD515 Rear Side Pull Caliper Brake:
- Prepare the Mounting Area: Ensure the rear brake bridge on your bicycle frame is clean and free of obstructions. The RKD515 is designed for rear frame installation with a 52-72mm drop.
- Insert the Mounting Bolt: Insert the 31mm centre mounting bolt through the hole in the rear brake bridge from the front side of the frame.
- Attach the Caliper: Position the caliper brake assembly onto the mounting bolt at the rear of the brake bridge. Ensure the brake is oriented correctly, with the brake pads aligning with the wheel rim.
- Secure the Caliper: Place the washer and nut onto the mounting bolt from the rear side of the brake bridge. Hand-tighten the nut initially.
- Center the Caliper: Loosely tighten the mounting nut. Squeeze the brake arms together to center the brake pads over the wheel rim. Once centered, fully tighten the mounting nut securely.
- Install Brake Cable: Route your brake cable through the cable housing and into the brake caliper's cable anchor bolt. Secure the cable firmly, ensuring there is appropriate tension for effective braking without dragging.
- Adjust Brake Pads: Ensure the brake pads make full contact with the rim surface when the brake lever is applied, without touching the tire. Adjust the pad angle and height as needed using the pad mounting bolts.
- Final Check: Test the brake lever action. The lever should feel firm and return smoothly. Ensure the wheel spins freely when the brake is released.

Figure 2: Close-up view of the center bolt mechanism on the Raleigh RKD515 brake. This shows the bolt, washers, and adjustment nut, crucial for securing the brake to the frame.

Figure 3: Detailed view of a brake pad on the Raleigh RKD515 caliper. This highlights the rubber pad and its mounting bolt, which allows for precise adjustment against the wheel rim.
5. Operating Instructions
To operate the Raleigh RKD515 Rear Side Pull Caliper Brake, simply squeeze the corresponding brake lever on your handlebars. The brake pads will engage with the wheel rim, slowing or stopping the bicycle. Apply pressure gradually for controlled braking. For emergency stops, apply firm and steady pressure to the brake lever.
6. Maintenance
Regular maintenance ensures optimal performance and longevity of your brake system.
- Cleaning: Keep the brake caliper, pads, and wheel rims clean. Dirt and grime can reduce braking efficiency and accelerate pad wear. Use a damp cloth to wipe down components.
- Pad Inspection: Regularly check brake pads for wear indicators. Replace pads when they are worn down to the minimum thickness line or if they become hardened or glazed.
- Cable Inspection: Inspect the brake cable for fraying, rust, or kinks. Lubricate the cable periodically or replace it if damage is observed.
- Pivot Points: Apply a small amount of light grease to the caliper pivot points annually to ensure smooth operation.
- Bolt Tightness: Periodically check all mounting bolts and nuts for tightness.
7. Troubleshooting
- Poor Braking Performance:
- Check brake pad wear; replace if necessary.
- Ensure brake pads are clean and free of grease or oil. Clean rims if contaminated.
- Adjust cable tension.
- Verify brake pads are correctly aligned with the rim.
- Brake Squealing:
- Clean brake pads and rims.
- Adjust brake pad angle (toe-in) slightly.
- Ensure all components are securely tightened.
- Brake Dragging on Rim:
- Check if the caliper is centered over the rim. Adjust the mounting bolt if needed.
- Ensure the brake cable is not too tight.
- Inspect for bent caliper arms or damaged springs.
8. Specifications
| Model Number | RKD515 |
| Brand | RALEIGH |
| Type | Rear Side Pull Caliper Brake |
| Material | Alloy Steel |
| Color/Finish | Silver / Chrome |
| Mounting Bolt Length | 31mm (Centre Bolt) |
| Brake Drop Range | 52-72mm |
| Item Weight | 0.49 Pounds (approx. 0.22 kg) |
| Included Components | Installation Hardware |
9. Warranty and Support
For warranty information or technical support regarding your Raleigh RKD515 Rear Side Pull Caliper Brake, please contact Raleigh customer service. Keep your proof of purchase for any warranty claims.
You can find contact information on the official Raleigh website: Raleigh Contact Us