1. Introduction
Welcome to the user manual for your Honeywell Thera 3 T6001 Thermostatic Radiator Valve. This guide provides essential information for installation, operation, and maintenance to ensure optimal performance and longevity of your device. Please read this manual thoroughly before using the product.
2. Safety Information
- Read all instructions carefully before installation and use.
- Installation should be performed by a qualified professional if you are unsure.
- Ensure the heating system is depressurized and cooled before working on radiator valves.
- Do not attempt to modify the device.
- Keep packaging materials away from children.
3. Product Overview
The Honeywell Thera 3 T6001 is a thermostatic radiator valve designed to regulate room temperature by controlling the flow of hot water through the radiator. It features an integrated liquid element sensor for precise temperature control.
Key Features:
- Integrated liquid element sensor.
- Setpoint locking and limiting capabilities.
- "Memory Clip" for optical control of selected temperature.
- Temperature range: 6 °C to 28 °C.
- Threaded connection: M30 x 1.5.
Components:
The valve consists of a main body (not included, typically part of the radiator) and a thermostatic head with a rotating dial and a memory clip.
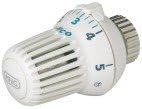
Image: Honeywell Thera 3 T6001 Thermostatic Radiator Valve. This image shows the white thermostatic head with a numbered dial (1-5) and a small 'MNG' logo on the side, indicating its compatibility.
4. Setup and Installation
Compatibility:
This thermostatic head is compatible with Honeywell thermostatic valves (manufactured since 1995), MNG, Heimeier, and Oventrop valves (manufactured since 1999), as well as MNG or Heimeier compact radiator valves.
Installation Steps:
- Preparation: Ensure the heating system is turned off and the radiator is cool. If replacing an existing head, remove it by unscrewing or releasing its locking mechanism.
- Mounting: Align the Thera 3 T6001 head with the valve body. The threaded connection is M30 x 1.5.
- Securing: Screw the thermostatic head onto the valve body until it is hand-tight. Do not overtighten.
- Verification: Once installed, turn the heating system back on and check for proper operation and any leaks.
5. Operating Instructions
Setting the Temperature:
The thermostatic head allows you to set your desired room temperature. The dial is marked with numbers, typically corresponding to temperature ranges:
- * (Frost Protection): Approximately 6 °C
- 1: Approximately 12 °C
- 2: Approximately 16 °C
- 3: Approximately 20 °C (Standard comfort setting)
- 4: Approximately 24 °C
- 5: Approximately 28 °C (Maximum heat)
Rotate the dial to align your desired setting with the indicator mark on the valve body.
Using the Memory Clip:
The "Memory Clip" feature allows for optical control and easy return to a preferred temperature setting.
- Set the dial to your desired temperature.
- Position the small clip (often a small plastic ring or marker) on the thermostatic head to visually mark this setting. This helps in quickly identifying and returning to your preferred temperature.
Setpoint Locking and Limiting:
The valve head includes mechanisms to lock or limit the temperature range. This is useful in public spaces or children's rooms to prevent unauthorized adjustments. Refer to the specific instructions provided with the physical product for details on how to engage these features, as they often involve small, internal clips or pins.
6. Maintenance
- Cleaning: Clean the thermostatic head periodically with a soft, damp cloth. Do not use abrasive cleaners or solvents.
- Function Check: Annually, turn the valve through its full range (from '*' to '5' and back) to ensure the internal pin moves freely. This helps prevent sticking.
- Avoid Obstruction: Ensure the thermostatic head is not covered by curtains, furniture, or other objects, as this can impair its ability to sense room temperature accurately.
7. Troubleshooting
| Problem | Possible Cause | Solution |
|---|---|---|
| Radiator remains cold | Valve stuck closed; air in system; system pressure low | Turn valve to max setting and back; bleed radiator; check system pressure |
| Room too cold/hot | Incorrect setting; valve obstructed; sensor faulty | Adjust setting; remove obstructions; contact support if sensor suspected |
| Leaks around valve | Loose connection; faulty seal | Tighten connection (carefully); replace valve or seal if necessary (professional assistance recommended) |
For issues not listed here or if problems persist, contact a qualified heating technician.
8. Specifications
- Brand: Honeywell
- Model Number: T6001 (Manufacturer Part Number: 1601001000000)
- Color: White
- Dimensions (Package): 10.8 x 6.8 x 6.8 cm
- Weight: 120 grams
- Voltage: 230 Volts (This specification likely refers to the broader heating system, not the thermostatic head itself, which is a mechanical device.)
- Special Features: Memory Clip, Tactile Interface
- Controller Type: Mechanical rotary knob, push button
- Temperature Control Type: Manual
- Included Components: Remote sensor with liquid element (integrated)
- Power Source: Self-powered by liquid element expansion (Note: The specification "Battery Powered" appears to be incorrect for this mechanical thermostatic head.)
- Shape: Round
- Display Type: Analog
- Temperature Range: 6 °C - 28 °C
- Threaded Connection: M30 x 1.5
9. Warranty and Support
Warranty information for the Honeywell Thera 3 T6001 Thermostatic Radiator Valve is typically provided with the product packaging or can be found on the official Honeywell website. Please retain your proof of purchase for warranty claims.
For technical support or service, please contact your local Honeywell representative or visit the Honeywell support portal.