1. Introduction
This manual provides comprehensive instructions for the safe installation, operation, and maintenance of your BG Electrical Single Weatherproof Outdoor Switched Power Socket, Model WP21-01. Designed for outdoor use, this robust power socket offers a reliable and safe electricity supply in various weather conditions. Please read this manual thoroughly before installation and use to ensure proper functionality and safety.
2. Safety Information
Important: Electrical installations should only be carried out by a qualified electrician in accordance with current wiring regulations. Failure to comply with these instructions could result in electric shock, fire, or serious injury.
- Always isolate the mains power supply before commencing any electrical work.
- Ensure the product is correctly earthed.
- Do not exceed the rated voltage (250V AC) or wattage (3250W).
- The product has an IP66 rating, indicating protection against dust ingress and powerful water jets. However, ensure all cable entries and covers are properly sealed after installation to maintain this rating.
- Regularly inspect the socket for any signs of damage or wear.
- Keep children away from electrical installations.
3. Package Contents
Verify that all components are present before beginning installation:
- 1 x BG Electrical Single Weatherproof Outdoor Switched Power Socket (Model WP21-01)
- 2 x Rubber Wall Fixing Seal Covers
- Instruction Manual
- Note: Wall fixings (screws, rawlplugs) are not supplied and must be sourced separately.
4. Setup and Installation
Follow these steps for proper installation of your outdoor power socket:
- Preparation: Isolate the mains power supply at the consumer unit/fuse box. Ensure the area for installation is clear and suitable for outdoor electrical equipment.
- Mounting Location: Choose a flat, stable surface for mounting. The socket is designed for wall mounting.
- Cable Entry: The unit features multiple knockouts (5 x 20mm entry points) for versatility, allowing cable entry from the rear, side, top, or bottom. Select the most appropriate entry point for your wiring.
- Fixing: Use appropriate wall fixings (not supplied) to securely mount the socket to the chosen surface. Ensure the two rubber wall fixing seal covers are used to maintain the IP66 rating and prevent water ingress at the screw points.
- Wiring: The socket features clearly marked terminals with backed-out captive screws and angled in-line colour-coded terminals for fast and easy installation. Connect the Live, Neutral, and Earth wires according to standard wiring practices.
- Sealing: After wiring, ensure all cable entries are properly sealed with appropriate glands to maintain the IP66 weatherproof and dustproof rating.
- Cover Closure: Close the clear cover securely. The large cover clip is designed for easier operation, allowing you to press to open and close without stiff clips or pinched fingers.
- Final Check: Once installed, double-check all connections and ensure the cover is fully closed and sealed. Restore power at the consumer unit/fuse box.

Image: Rear view of the socket highlighting the five 20mm cable entry points for flexible installation.

Image: Detail of the fast-fix installation process, showing the angled, color-coded terminals for simplified wiring.

Image: Demonstrating the large cover clip mechanism for easy opening and closing of the socket cover.

Image: The outdoor power socket demonstrating its IP66 weatherproof rating, protecting against dust and water ingress.
5. Operating Instructions
The BG Electrical Single Weatherproof Outdoor Switched Power Socket is straightforward to operate:
- Power On/Off: The socket features a switched mechanism. Use the switch on the front of the socket to control the power supply to the connected appliance.
- Power Indicator: A neon LED power indicator is present to show when the socket is live.
- Connecting Appliances: Open the clear cover, insert the plug of your appliance into the socket, and then close the cover securely. The design allows for the cover to be closed even with a plug inserted, maintaining the weatherproof seal.
- EV Charging Compatibility: This socket is suitable for EV charging with Mode 2 EV charging cables and is designed for long-term charging, meeting all EV regulations.
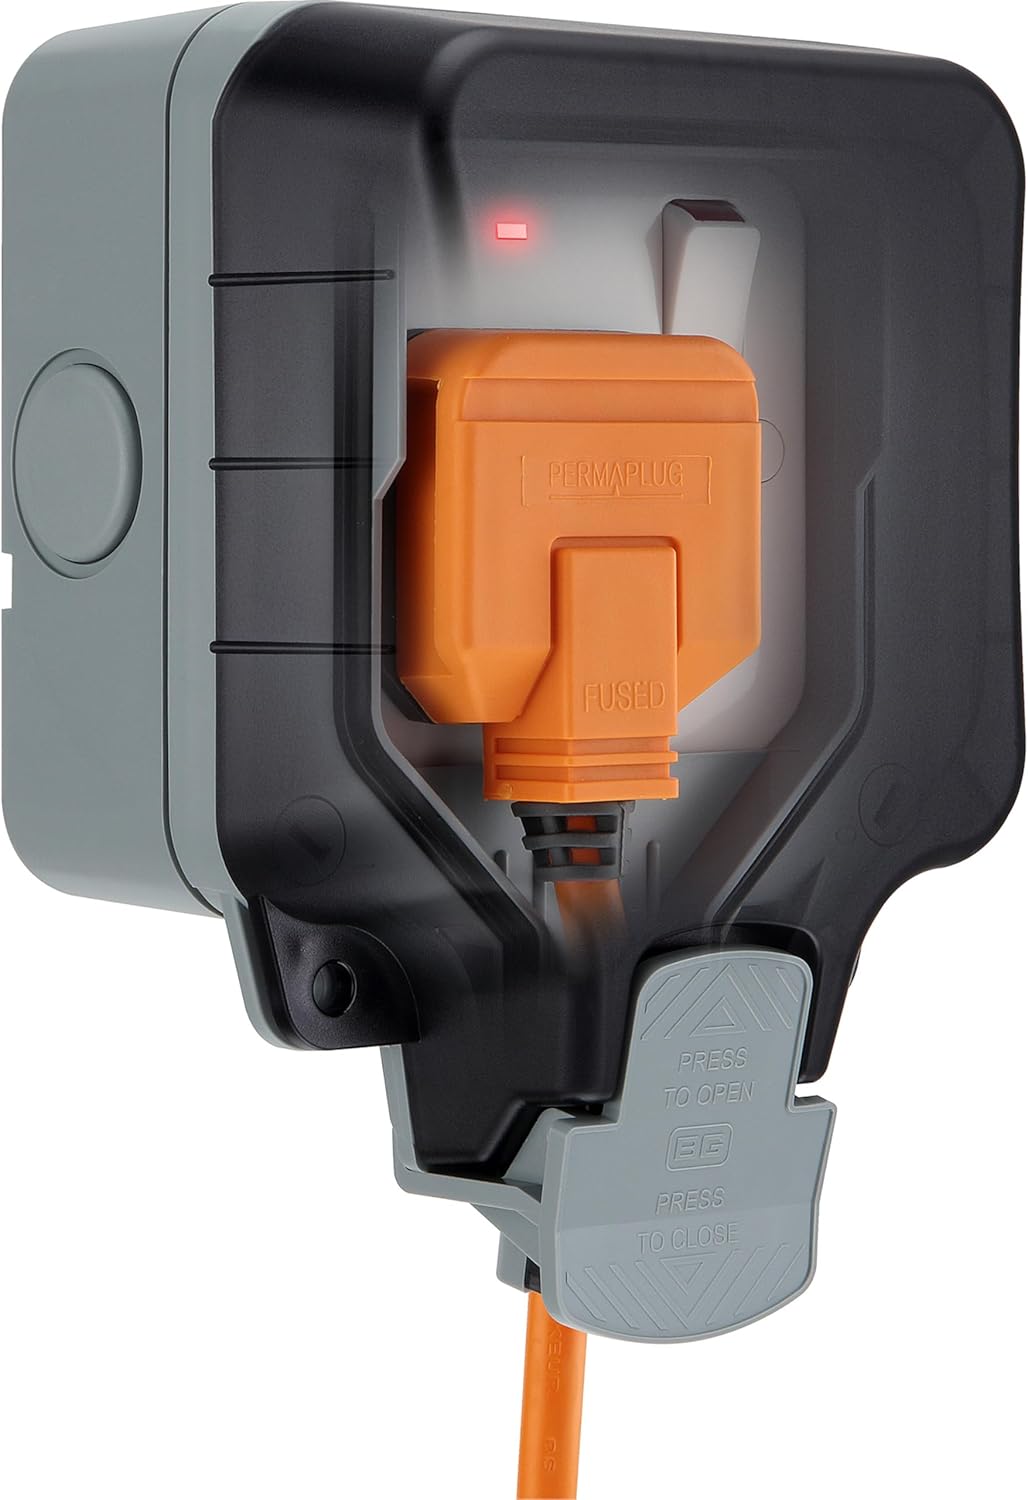
Image: The main product view, showing a plug securely inserted into the socket with the cover closed, and the power indicator illuminated.
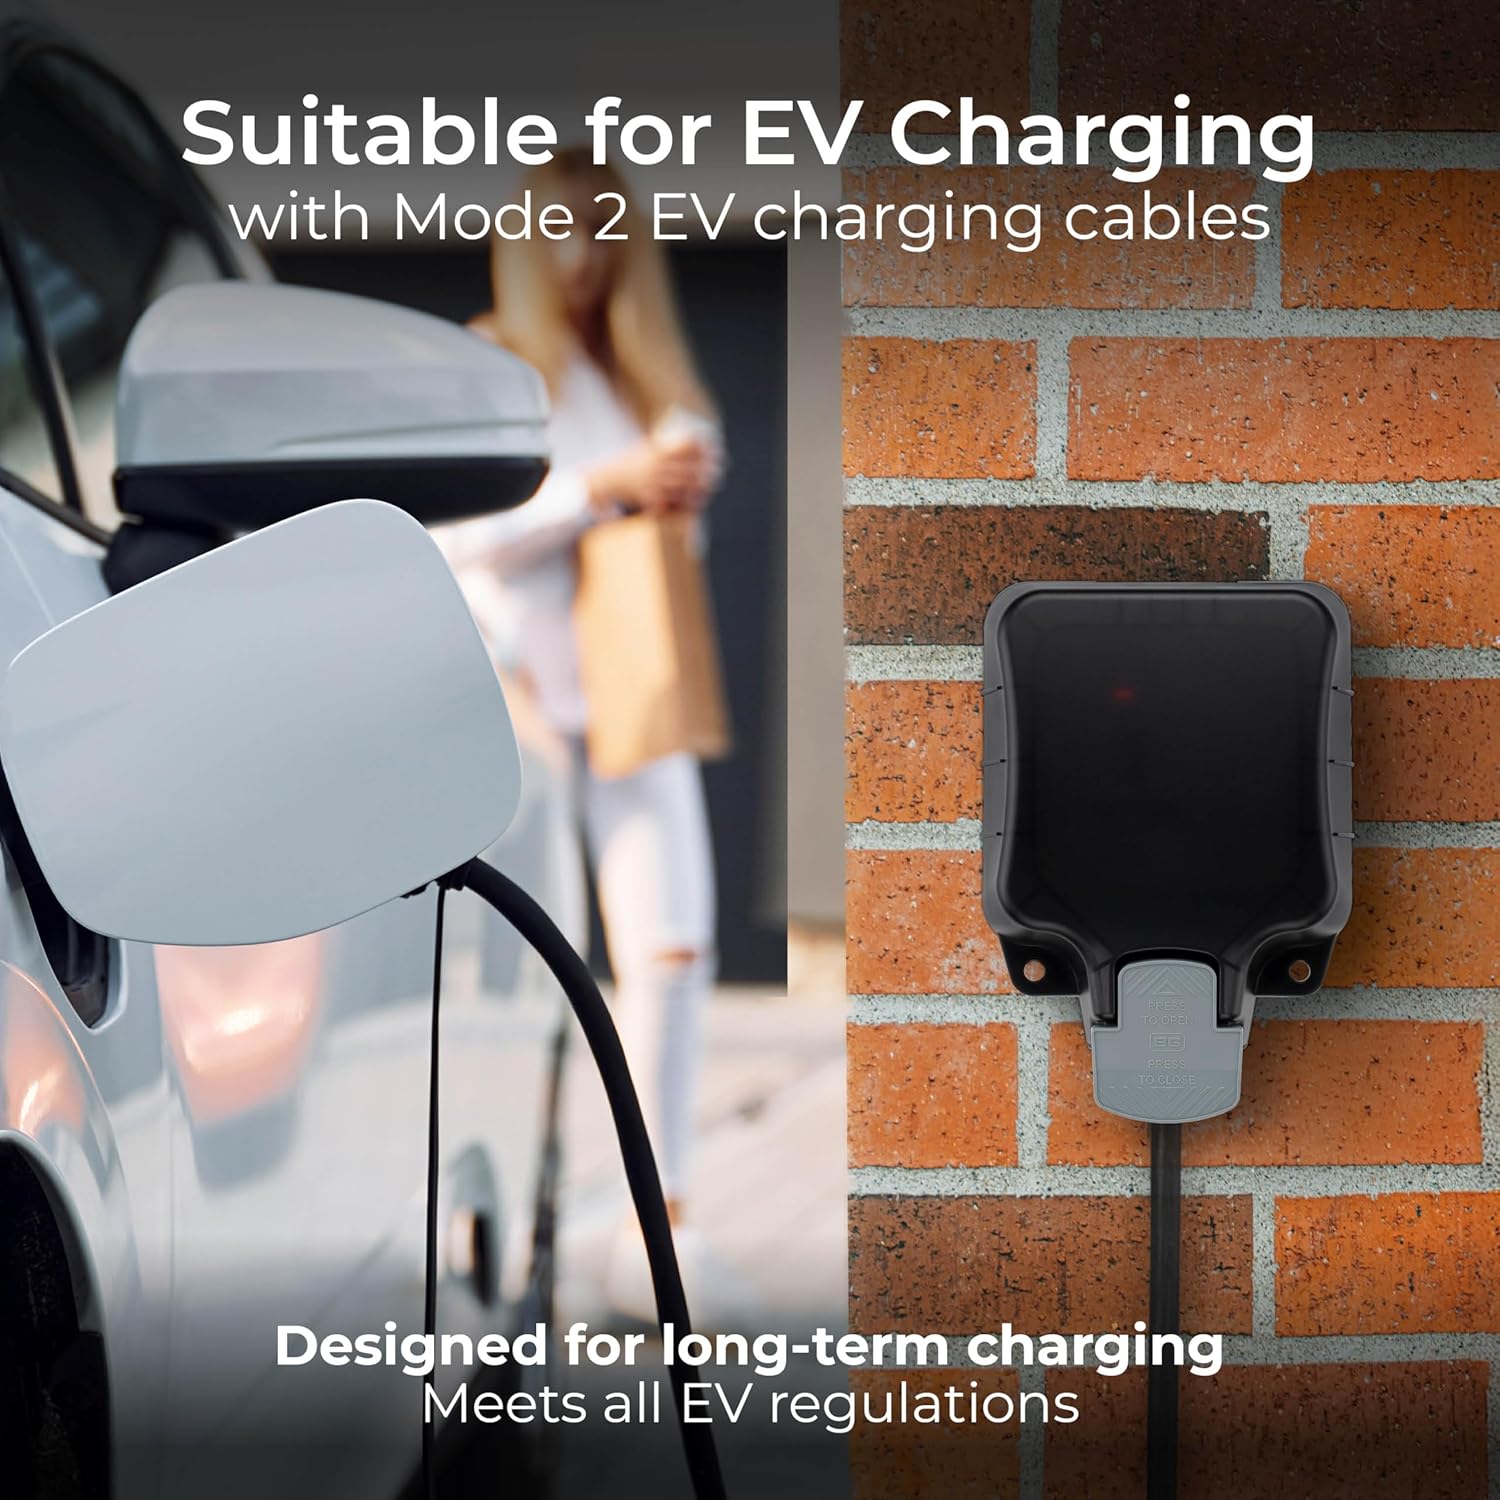
Image: The outdoor socket in use for EV charging, demonstrating its compatibility and suitability for long-term outdoor power supply.

Image: The weatherproof socket installed on an exterior wall, providing power to an electric vehicle even in rainy conditions.
6. Maintenance
To ensure the longevity and continued safe operation of your outdoor power socket:
- Cleaning: Periodically wipe the exterior of the socket with a damp cloth to remove dirt and debris. Do not use abrasive cleaners or solvents. Ensure the power is off before cleaning.
- Inspection: Regularly check the integrity of the housing, cover, and cable entries for any signs of cracks, damage, or degradation of seals.
- Cable Condition: Inspect any connected cables for fraying, cuts, or damage. Replace damaged cables immediately.
- Switch Functionality: Ensure the on/off switch operates smoothly and the neon indicator light functions correctly.
7. Troubleshooting
| Problem | Possible Cause | Solution |
|---|---|---|
| No power to appliance. |
|
|
| Water ingress inside the unit. |
|
|
| Neon indicator not lit. |
|
|
8. Specifications
| Model Number | WP21-01 |
| Brand | British General |
| Manufacturer | Nexus (Jiaxing) |
| Style | Single Weatherproof Outdoor Switched Power Socket |
| IP Rating | IP66 (Weatherproof and Dustproof) |
| Voltage | 250 Volts (AC) |
| Wattage | 3250 watts |
| Dimensions (L x W x H) | 16.9 x 11.7 x 0.1 cm |
| Item Weight | 380 g |
| Material | Rubber (for seals), High Impact Plastic (for housing) |
| Color | Black / Grey |
| Certification | CE |
9. Warranty and Support
Warranty: The BG Electrical Storm Weatherproof Range products are guaranteed against faulty materials and workmanship for 25 years from the date of purchase. This warranty covers defects in materials and manufacturing under normal use and service.
Support: For technical assistance, troubleshooting beyond this manual, or warranty claims, please contact British General customer support. Refer to the product packaging or the official British General website for the most current contact information.
Please retain your proof of purchase for warranty purposes.