
Introduction
This manual provides detailed instructions for the installation, operation, and maintenance of the Atwood 91603 Jade Pilot Water Heater Assembly. This component is designed as a replacement part for Atwood RV water heaters, ensuring reliable pilot ignition for your hot water system.
Safety Information
Please read and understand all safety warnings and instructions before attempting installation or operation. Failure to follow these instructions could result in property damage, personal injury, or death.
- Professional Installation Recommended: Installation should ideally be performed by a qualified RV technician or a licensed gas appliance professional.
- Gas Safety: Always turn off the gas supply to the RV water heater and disconnect 12V DC power before performing any service or installation.
- Leak Testing: After any gas connection is made or disturbed, always perform a thorough leak test using a non-corrosive leak detection solution. Never use an open flame to check for leaks.
- Ventilation: Ensure adequate ventilation when working with gas appliances.
- California Proposition 65 Warning: This product may contain materials cautioned by California Proposition 65.
Package Contents
The Atwood 91603 Jade Pilot Water Heater Assembly package typically includes the following components:
- One (1) Atwood 91603 Jade Pilot Assembly (includes pilot tube, thermocouple, and igniter electrode)
- Mounting bracket (may be integrated or separate)
- Fasteners (if applicable)
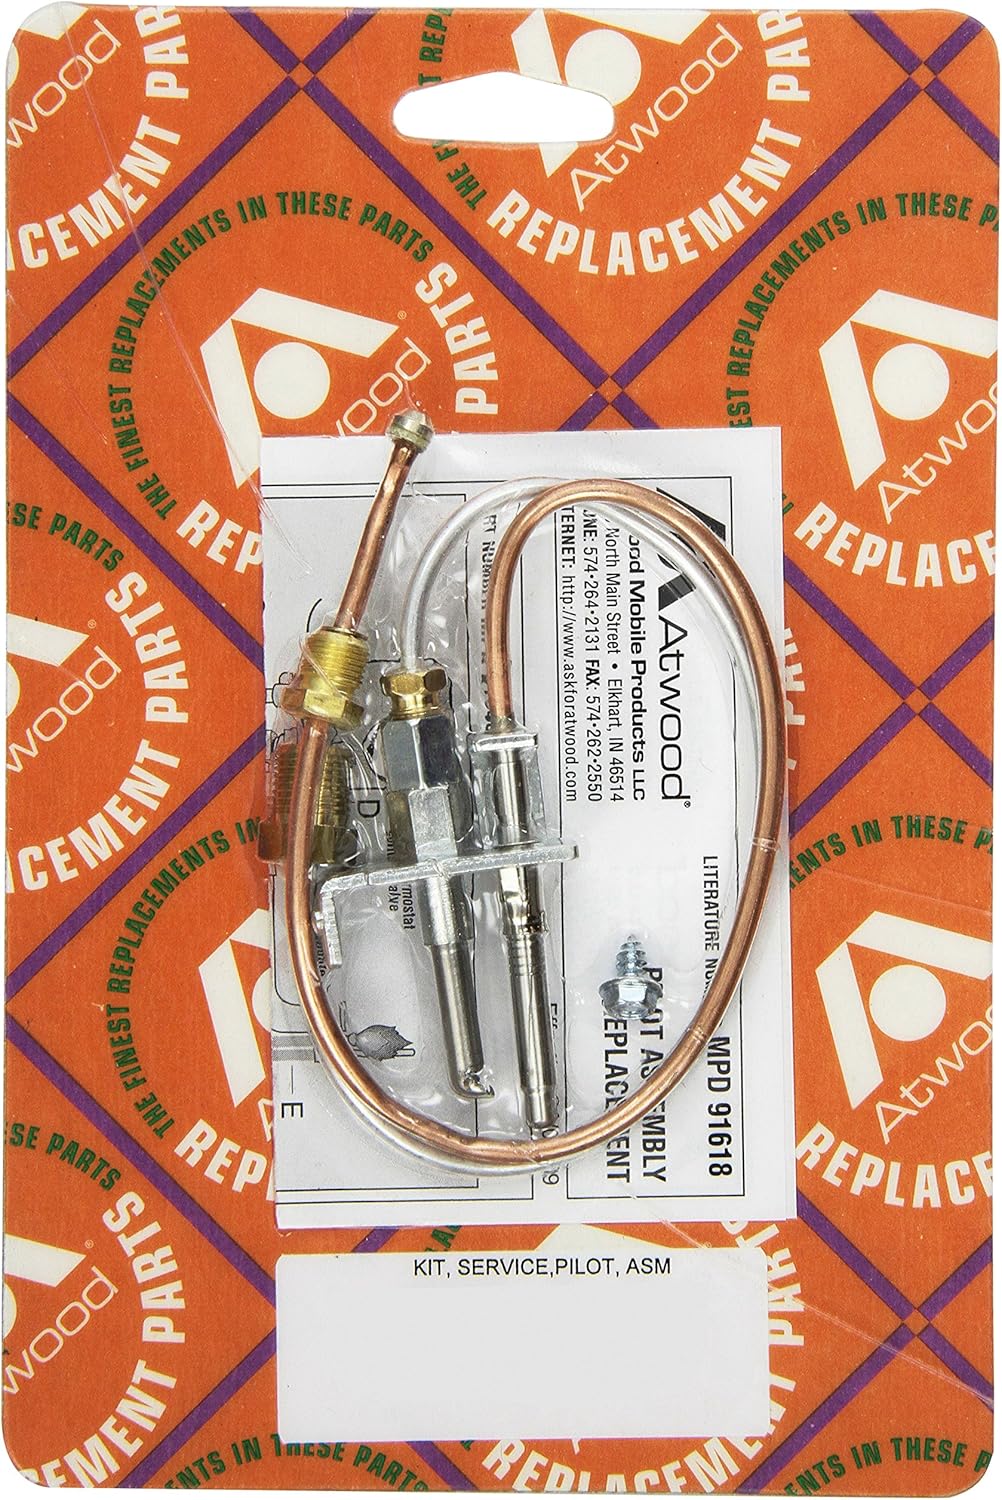
Image showing the Atwood 91603 Jade Pilot Water Heater Assembly, including the pilot tube, thermocouple, and igniter electrode, secured in its retail packaging.
Installation Instructions
These instructions are general guidelines. Always refer to your specific RV water heater's service manual for detailed, model-specific procedures.
- Preparation: Turn off the gas supply to the RV water heater at the main tank or appliance valve. Disconnect the 12V DC power supply to prevent accidental ignition. Allow the water heater to cool completely before proceeding.
- Access: Locate and remove the exterior access panel for your RV water heater. This will expose the burner assembly area.
- Disconnect Old Assembly: Carefully disconnect the gas line from the old pilot assembly. Disconnect the thermocouple and igniter wires. Pay close attention to how these components are routed and connected for proper reassembly.
- Remove Old Assembly: Unfasten and remove the old pilot assembly from its mounting bracket. Note the orientation and position.
- Install New Assembly: Position the new Atwood 91603 Jade Pilot Assembly into the existing mounting bracket. Secure it with the appropriate fasteners. Ensure the pilot flame will be correctly positioned to ignite the main burner when operational.
- Connect Components: Reconnect the gas line to the new pilot assembly, ensuring a tight and secure fit. Connect the thermocouple and igniter wires according to the original configuration.
- Leak Test: Turn on the gas supply. Apply a non-corrosive leak detection solution (e.g., soapy water) to all gas connections made during installation. Look for bubbles, which indicate a gas leak. If a leak is detected, immediately turn off the gas, tighten the connections, and re-test until no bubbles appear.
- Test Operation: Restore 12V DC power to the water heater. Follow your water heater's specific instructions for lighting the pilot and main burner. Observe the pilot flame and main burner ignition to ensure proper function.
- Final Steps: Once proper operation is confirmed and no leaks are present, replace the water heater access panel securely.
Operation
The Atwood 91603 Jade Pilot Assembly is a critical component of your RV water heater's manual ignition system. Its primary function is to provide a continuous pilot flame that ignites the main burner when hot water is demanded.
Lighting the Pilot (Manual Ignition Systems)
- Ensure the gas supply to the water heater is open.
- Turn the water heater control knob to the "PILOT" position.
- Press and hold the control knob in to allow gas to flow to the pilot burner.
- While holding the knob, use a long lighter or match to ignite the pilot flame.
- Continue to hold the knob for approximately 30-60 seconds after the pilot lights. This allows the thermocouple to heat up and generate enough voltage to hold the pilot valve open.
- Release the knob. If the pilot remains lit, turn the control knob to the "ON" position. If it extinguishes, repeat the process, holding the knob longer if necessary.
Maintenance
Regular maintenance helps ensure the longevity and reliable operation of your pilot assembly.
- Regular Inspection: Periodically inspect the pilot assembly for any signs of corrosion, physical damage, or blockages from dirt, dust, or insect nests.
- Cleaning: Gently clean any dust or debris from the pilot tube and igniter electrode using a soft brush or compressed air. Ensure the pilot orifice is clear and unobstructed.
- Flame Check: Observe the pilot flame during operation. It should be a strong, steady blue flame that fully engulfs the tip of the thermocouple. A weak, yellow, or flickering flame may indicate a problem with gas supply or a partially blocked pilot orifice.
Troubleshooting
If you encounter issues with your pilot assembly, consider the following common troubleshooting steps:
Pilot Light Does Not Stay Lit
- Thermocouple Issue: The thermocouple may be faulty, damaged, or not properly heated by the pilot flame. Ensure the pilot flame fully engulfs the tip of the thermocouple. If the pilot lights but extinguishes shortly after releasing the control knob, the thermocouple may need replacement.
- Gas Supply: Check if there is adequate gas pressure and flow to the pilot assembly. Ensure the gas valve is fully open and that there are no obstructions in the gas line.
- Pilot Orifice: A partially clogged pilot orifice can cause a weak flame that is insufficient to heat the thermocouple. Clean the orifice if necessary.
No Spark/Ignition
- Igniter Electrode: Check the igniter electrode for cracks, damage, or excessive carbon buildup. Ensure the gap between the electrode and the ground is correct according to your water heater's specifications.
- Wiring: Verify all igniter wires are securely connected and free from damage or corrosion.
Specifications
| Feature | Detail |
|---|---|
| Model Number | 91603 |
| Brand | Atwood |
| Item Weight | 2.4 ounces |
| Product Dimensions | 8 x 5.5 x 0.3 inches |
| Manufacturer Part Number | 91603 |
| Compatibility | Standard Atwood RV Water Heaters |
Note: Specifications are subject to change without notice.
Warranty and Support
For specific warranty information regarding your Atwood 91603 Jade Pilot Water Heater Assembly, please refer to the documentation provided with your original Atwood water heater or contact Atwood Mobile Products directly.
Manufacturer Contact Information:
- Brand: Atwood Mobile Products LLC
- Address: North Main Street, Elkhart, IN 46514
- Website: askforatwood.com
- Phone: 574-264-2131
- Fax: 574-262-2550