AUDIX M1255B
Audix M1255B Miniature High-Output Cardioid Condenser Microphone
Instruction Manual

1. Introduction
The Audix M1255B is a professional miniature high-output cardioid condenser microphone designed for a wide range of applications, including choir, overhead, stage, and instrument miking. Its compact size and excellent sound reproduction make it a versatile tool for various audio environments. This manual provides essential information for the proper setup, operation, and maintenance of your M1255B microphone.

Figure 1: The Audix M1255B Miniature High-Output Cardioid Condenser Microphone. This image displays the sleek black finish and compact design of the microphone, highlighting its professional appearance.
2. Key Features
- Miniature Design: The M1255B features a compact and unobtrusive form factor, ideal for applications where microphone visibility needs to be minimized.
- High-Output Performance: Delivers a strong signal, ensuring clear and robust audio capture.
- Cardioid Polar Pattern: Primarily picks up sound from the front, reducing pickup from the sides and rear, which helps in isolating the desired sound source and minimizing feedback.
- Condenser Technology: Provides a wide frequency response and excellent transient response, capturing subtle nuances in sound.
- XLR Connectivity: Standard 3-pin XLR connector for professional audio connections.
- Lightweight Construction: Easy to position and mount without adding significant weight to stands or fixtures.
- Versatile Applications: Suitable for use with PA systems and personal computers (with appropriate interfaces).
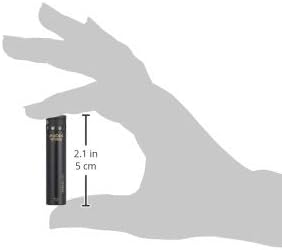
Figure 2: The Audix M1255B microphone shown in hand with approximate dimensions. This image illustrates the compact size of the microphone, measuring approximately 2.1 inches (5 cm) in length, emphasizing its miniature design.
3. What's in the Box
Upon unboxing your Audix M1255B, please verify that all the following components are included:
- Audix M1255B Miniaturized Condenser Microphone (Cardioid Standard)
- Microphone Clip (typically included for mounting)
- Foam Windscreen (for reducing plosives and wind noise)
- XLR Cable (may be included depending on package)

Figure 3: Contents of the Audix M1255B package. This image displays the M1255B microphone along with its standard accessories, including a microphone clip, foam windscreen, and an XLR cable, ready for setup.
4. Setup Instructions
- Mounting the Microphone:
Attach the M1255B microphone to the provided microphone clip. Secure the clip to a microphone stand or appropriate mounting hardware. Ensure the microphone is firmly seated in the clip.

Figure 4: Bottom view of the Audix M1255B showing the XLR connector. This image highlights the 3-pin XLR output, which is standard for professional audio connections.
- Connecting the Cable:
Connect one end of a standard 3-pin XLR microphone cable to the XLR output on the bottom of the M1255B. Connect the other end of the XLR cable to a mixer, audio interface, or preamplifier that provides 48V phantom power.
- Phantom Power:
The M1255B is a condenser microphone and requires 48V phantom power to operate. Ensure that phantom power is enabled on your mixer or audio interface channel connected to the microphone. Refer to your audio equipment's manual for instructions on enabling phantom power.
- Initial Placement:
For initial testing, position the microphone approximately 1-2 feet from the sound source, pointing directly at it. Adjust as needed during operation.
5. Operating the Microphone
- Gain Staging: Set the input gain on your mixer or audio interface. Start with the gain knob at its lowest setting and gradually increase it until you achieve a strong signal without clipping (distortion). Most mixers have a peak indicator light; adjust gain so this light only flashes occasionally on the loudest sounds.
- Microphone Placement: The cardioid polar pattern is directional. For optimal sound capture and rejection of unwanted noise, position the microphone with its front (the end with the grille) facing the desired sound source. Experiment with distance and angle to achieve the best sound.
- Using the Windscreen: If experiencing plosive sounds (harsh 'p' or 'b' sounds) or light wind noise, attach the foam windscreen over the microphone grille. This helps to reduce such artifacts.
- Monitoring: Always monitor the microphone's output through headphones or speakers to ensure proper sound quality and to identify any issues.
6. Care and Maintenance
- Cleaning: Use a soft, dry cloth to wipe the microphone body. Do not use liquid cleaners, solvents, or abrasive materials, as these can damage the finish or internal components. For the grille, a soft brush can be used to gently remove dust.
- Storage: When not in use, store the M1255B in its protective pouch or case to prevent dust accumulation and physical damage. Avoid storing in extreme temperatures or high humidity.
- Handling: Handle the microphone with care. Avoid dropping it or subjecting it to strong impacts, as this can affect its performance and durability.
- Cable Management: Always disconnect cables by pulling on the connector, not the cable itself, to prevent damage to the cable or microphone connector. Coil cables neatly after use to prevent tangles and damage.
7. Troubleshooting
| Problem | Possible Cause | Solution |
|---|---|---|
| No Sound Output |
|
|
| Distorted Sound |
|
|
| Excessive Background Noise/Hum |
|
|
8. Technical Specifications
| Specification | Detail |
|---|---|
| Microphone Form Factor | Ceiling Array |
| Item Dimensions (L x W x H) | 10.8 x 2.45 x 2.25 inches |
| Power Source | Corded Electric (Requires Phantom Power) |
| Signal-to-Noise Ratio | 74 dB |
| Number of Channels | 1 |
| Manufacturer | Audix |
| UPC | 687471291573 |
| Item Weight | 9.9 ounces |
| Item Model Number | M1255B |
| Color | Black |
| Connectivity Technology | XLR |
| Connector Type | XLR |
| Special Feature | Lightweight |
| Compatible Devices | PA System, Personal Computer |
| Included Components | Audix M1255B Miniaturized Condenser Microphone Cardioid Standard |
| Polar Pattern | Cardioid |
| Audio Sensitivity | 38 dB |
Note: Some specifications like "Microphone Form Factor: Ceiling Array" and "Polar Pattern: Multipattern" (if present in broader product data) may refer to general categories or variations within the Audix M1255 series. The specific M1255B model detailed in this manual is a miniature cardioid condenser microphone.
9. Warranty and Support
Audix products are manufactured to high standards and are designed for reliable performance. Specific warranty terms and conditions are typically provided with your product purchase documentation. Please retain your proof of purchase for warranty claims.
For technical support, service, or detailed warranty information, please visit the official Audix website or contact their customer service department. You can find contact information and support resources on the Audix Official Website.
Always refer to the latest information available from the manufacturer for the most accurate and up-to-date support details.