1. Introduction
This manual provides detailed instructions for the assembly, operation, and maintenance of your Broyhill Northern Lights Dining Table with Extension Legs, Model 5312-31. Please read this manual thoroughly before assembly and use to ensure proper setup and safe operation. Keep this manual for future reference.
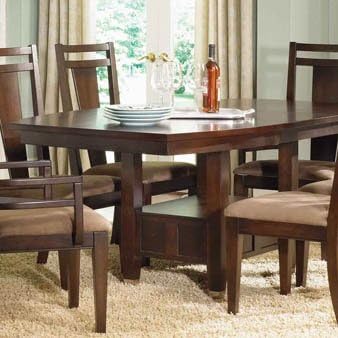
Image 1.1: The Broyhill Northern Lights Dining Table in a dining setting. This image illustrates the table's design, featuring a dark walnut finish and its overall appearance when assembled with chairs.
2. Safety Information
Always follow basic safety precautions when assembling and using this product to reduce the risk of injury or damage.
- Read all instructions carefully before assembly.
- Assemble the table on a soft, clean surface to prevent scratching.
- Ensure all bolts and screws are securely tightened before use. Periodically check and re-tighten as necessary.
- Do not stand or sit on the table.
- Keep small parts away from children during assembly.
- Use only the provided hardware. Substituting hardware may compromise the table's stability.
3. Package Contents
Verify that all components are present before beginning assembly. If any parts are missing or damaged, contact Broyhill customer support.
- Dining Table Top (1)
- Extension Legs (4)
- 18-inch Apron Leaf (1)
- Assembly Hardware Kit (bolts, washers, Allen wrench) (1)
4. Setup and Assembly
Tools required: Phillips head screwdriver (not included), Allen wrench (included).
- Unpack Components: Carefully remove all parts from the packaging and lay them out on a soft, clean surface to prevent damage.
- Attach Legs to Table Top:
- Align each extension leg with the pre-drilled holes on the underside of the table top.
- Insert the provided bolts through the leg brackets and into the table top.
- Hand-tighten all bolts initially. Once all legs are in place, use the Allen wrench to fully tighten them securely. Do not overtighten.
- Insert Apron Leaf (Optional):
- If you wish to extend the table, gently pull the two halves of the table top apart.
- Carefully place the 18-inch apron leaf into the opening, ensuring the alignment pins on the leaf fit into the corresponding holes on the table halves.
- Push the table halves together until they are flush with the leaf and the locking mechanisms (if present) engage.
- Adjust Table Height: The extension legs allow for adjustable height from a regular dining table to counter height.
- To adjust, locate the height adjustment mechanism on each leg (specific mechanism may vary, refer to visual guides if available).
- Carefully lift the table slightly and adjust each leg to the desired height setting. Ensure all four legs are set to the same height for stability.
- Confirm that all locking pins or screws for height adjustment are securely fastened before placing any weight on the table.
- Final Check: Ensure the table is stable and all connections are secure before use.
5. Operating Instructions
This section details how to utilize the table's adjustable features.
5.1. Extending the Table
To expand the table's surface area:
- Clear the table surface of all items.
- Locate the table locks (if present) underneath the table and disengage them.
- Gently pull the two main table halves apart until there is enough space to insert the apron leaf.
- Carefully place the 18-inch apron leaf into the gap, aligning the pins and holes.
- Push the table halves back together firmly until they are flush with the leaf and the table is securely closed. Re-engage any table locks.
5.2. Adjusting Table Height
The table can be adjusted between standard dining height and counter height:
- Remove all items from the table surface.
- With assistance, carefully lift one side of the table.
- Adjust the extension mechanism on each leg to the desired height. Ensure the locking pins or screws are fully engaged at the new height.
- Repeat for the remaining legs, ensuring all legs are set to the same height for a level and stable surface.
- Verify the table's stability before use.
6. Maintenance and Care
Proper care will help maintain the beauty and longevity of your Broyhill Northern Lights Dining Table.
- Cleaning: Wipe the table surface with a soft, damp cloth. Avoid using harsh chemicals, abrasive cleaners, or polishes that may damage the wood finish.
- Spills: Immediately wipe up spills to prevent staining or water damage.
- Heat and Moisture: Use coasters under hot dishes and glasses to protect the surface from heat marks and moisture rings.
- Sunlight: Avoid prolonged exposure to direct sunlight, which can cause fading or cracking of the wood.
- Hardware: Periodically check all bolts and screws and tighten them as needed to ensure the table remains stable.
7. Troubleshooting
If you encounter issues with your dining table, refer to the following common solutions:
- Table Wobbles:
- Ensure all leg attachment bolts are securely tightened.
- Verify that all extension legs are set to the same height.
- Check if the floor surface is even. Use furniture glides or shims if necessary.
- Difficulty Extending/Retracting Leaf:
- Ensure the table locks (if present) are fully disengaged.
- Check for any obstructions in the slide mechanism.
- Ensure the alignment pins on the leaf and table are not bent or damaged.
8. Specifications
| Brand | Broyhill |
| Model Name | Northern Lights |
| Model Number | 5312-31 |
| UPC | 662675118857 |
| Product Dimensions (D x W x H) | 60"D x 35"W x 42"H (extended) |
| Item Weight | 147 Pounds |
| Material Type | Wood (Walnut Wood Top) |
| Color | Brown (Walnut Finish) |
| Seating Capacity | 4 (expandable) |
| Table Design | Dining Table with Extension Legs |
9. Warranty and Support
For warranty information or customer support, please refer to the warranty card included with your purchase or visit the official Broyhill website. You may also contact Broyhill customer service directly for assistance with parts, assembly, or product inquiries.
Broyhill Customer Support: www.broyhill.com/customer-service