Introduction
The Peavey KB 2 is a versatile 50-watt keyboard amplifier designed for musicians requiring multiple input options and clear sound reproduction. This amplifier features four separate channels, with Channels 1 and 2 offering 1/4-inch inputs and 2-band equalization. Channel 3 includes both XLR and 1/4-inch inputs, along with 3-band equalization for enhanced tone shaping. Channel 4 provides a 1/4-inch monitor input with level control. A dedicated headphone output is also included for private practice.

Front view of the Peavey KB 2 50-Watt Keyboard Amplifier, showcasing the speaker grille and control panel.
Product Features
- Output Power: 50 Watts (Biamped: 45 watts for woofer, 12 watts for tweeter)
- Channels: 4 separate input channels for multiple instruments or microphones.
- Channel 1 & 2 Inputs: Equipped with 1/4-inch inputs.
- Channel 1 & 2 EQ: Features 2-band equalization (Low, High).
- Channel 3 Inputs: Features both XLR and 1/4-inch inputs.
- Channel 3 EQ: Features 3-band equalization (Low, Mid, High).
- Channel 4 Input: Dedicated 1/4-inch monitor input with level control.
- Headphone Output: For private monitoring.
- Speaker Configuration: 1x10 inch speaker.
- Amplifier Type: Solid State.
Setup
- Unpacking: Carefully remove the amplifier from its packaging. Inspect for any signs of damage during transit.
- Placement: Place the amplifier on a stable, flat surface. Ensure adequate ventilation around the unit to prevent overheating. Avoid placing it near heat sources or in direct sunlight.
- Power Connection: Connect the provided power cord to the amplifier's power inlet and then to a grounded AC power outlet. Ensure the power switch on the amplifier is in the "OFF" position before connecting.
- Instrument/Microphone Connection:
- For keyboards or other line-level instruments, use 1/4-inch cables to connect to Channel 1 or 2 inputs.
- For microphones, use an XLR cable to connect to Channel 3's XLR input, or a 1/4-inch cable for line-level signals to Channel 3.
- For external monitor feeds, connect to Channel 4's 1/4-inch monitor input.
- Initial Settings: Before powering on, set all channel level controls and EQ knobs to their minimum (fully counter-clockwise) positions. Set the Master volume to minimum.
Operating Instructions
- Power On: Flip the power switch to the "ON" position. The power indicator light should illuminate.
- Adjusting Channel Levels:
- Begin playing your instrument or speaking into the microphone connected to a channel.
- Slowly increase the "LEVEL" knob for that specific channel until the desired volume is achieved. Avoid setting the level too high to prevent distortion.
- Equalization (EQ) Adjustment:
- Use the "LOW" and "HIGH" (and "MID" for Channel 3) knobs to shape the tone of each channel.
- Adjust these controls to enhance or cut specific frequencies to achieve your desired sound.
- Master Volume: Once individual channel levels are set, use the "MASTER" volume knob to control the overall output volume of the amplifier.
- Headphone Use: Connect headphones to the "HEADPHONE" jack for silent practice. The headphone volume is controlled by a dedicated knob. Note that connecting headphones may mute the main speaker output.
- Power Off: Before disconnecting any cables or moving the amplifier, turn the "MASTER" volume to minimum, then flip the power switch to "OFF".
Maintenance
- Cleaning: Regularly wipe the amplifier's exterior with a soft, dry cloth. For stubborn dirt, use a slightly damp cloth and mild soap, then dry thoroughly. Avoid abrasive cleaners or solvents.
- Ventilation: Ensure that the ventilation openings are clear of dust and debris to maintain proper airflow and prevent overheating.
- Storage: When not in use, store the amplifier in a dry, cool environment, away from extreme temperatures and humidity.
- Cable Care: Always handle power and instrument cables carefully. Avoid sharp bends or kinks that can damage internal wiring.
- Inspection: Periodically check all connections and cables for wear or damage. If any issues are found, replace damaged components immediately.
Troubleshooting
| Problem | Possible Cause | Solution |
|---|---|---|
| No sound output. | Power not connected, power switch off, volume knobs at minimum, faulty cable, headphones connected. | Check power connection and switch. Increase Master and Channel levels. Ensure cables are securely connected and functional. Disconnect headphones if main speaker output is desired. |
| Distorted sound. | Input level too high, Master volume too high, faulty instrument/microphone. | Reduce individual channel "LEVEL" knobs. Reduce "MASTER" volume. Test with a different instrument or microphone. |
| Humming or buzzing noise. | Ground loop, faulty cable, interference from other electronics. | Ensure all equipment is on the same electrical circuit. Try different cables. Move amplifier away from other electronic devices. |
| Uneven sound across channels. | Individual channel EQ settings, differing input signal strengths. | Adjust individual channel "LEVEL" and EQ settings to balance the sound. |
If you experience persistent issues not covered here, please contact Peavey customer support.
Specifications
- Brand: Peavey
- Model Name: KB 2
- Output Wattage: 50 Watts
- Speaker Size: 10 Inches
- Number of Bands (EQ): 2 (Channels 1 & 2), 3 (Channel 3)
- Output Channel Quantity: 4
- Amplifier Type: Solid State
- Compatible Devices: Keyboard
- Connector Type: 1/4-inch, XLR
- Power Source: Corded Electric
- Material: Stainless Steel (Enclosure)
- Item Dimensions (D x W x H): 16.62"D x 8.31"W x 8.71"H
- Item Weight: 38.36 Pounds
- Color: Black
- UPC: 014367115949, 014367097306
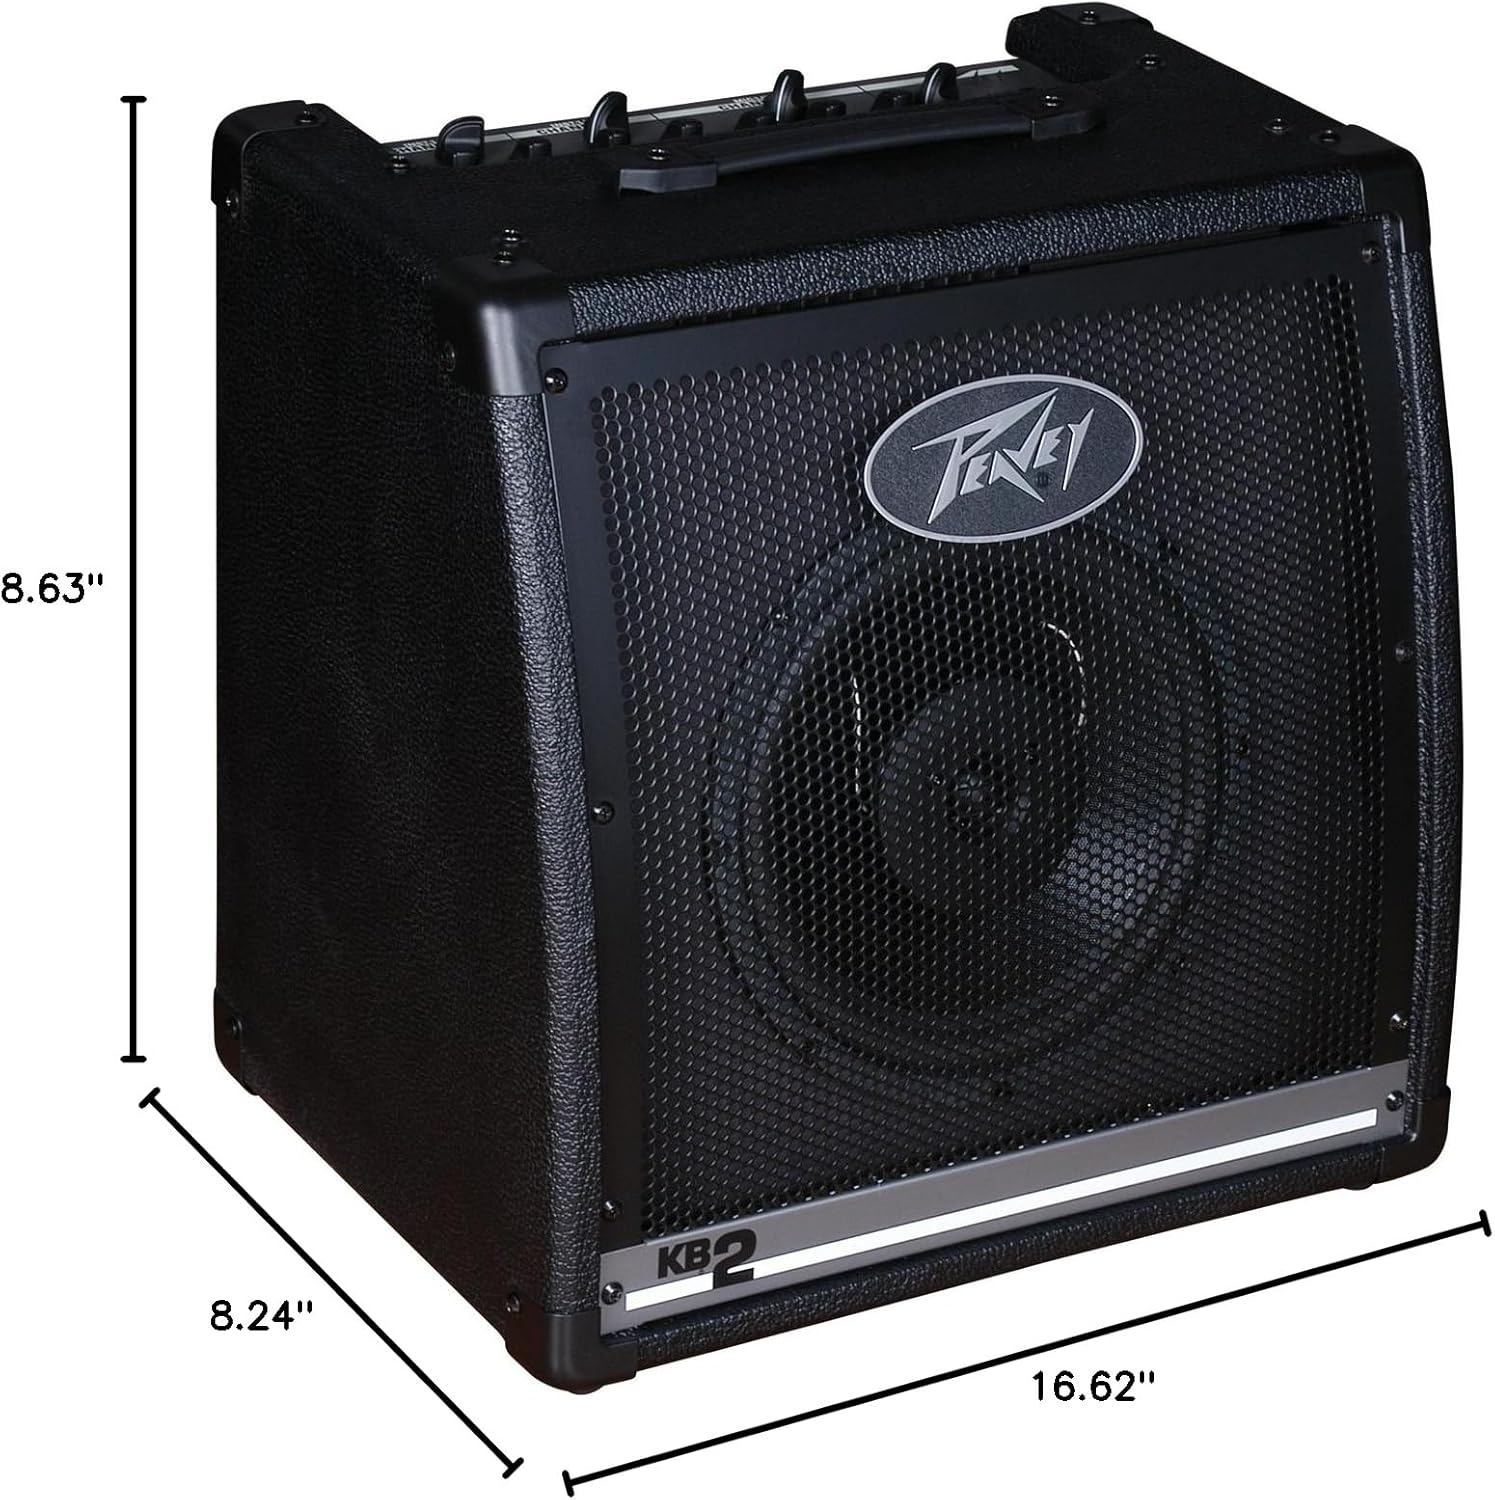
Dimensions of the Peavey KB 2 Keyboard Amplifier: 16.62 inches deep, 8.31 inches wide, and 8.71 inches high.
Warranty Information
The Peavey KB 2 Keyboard Amplifier comes with a 90-day warranty from the date of purchase. This warranty covers manufacturing defects and malfunctions under normal use. Please retain your proof of purchase for any warranty claims. For detailed terms and conditions, refer to the official Peavey warranty documentation or contact customer support.
Support
For technical assistance, troubleshooting beyond this manual, or warranty service, please contact Peavey customer support. You can find contact information on the official Peavey website or through your authorized dealer.
Online Resources: Visit the official Peavey Store for additional product information and support.