1. Introduction
This manual provides essential information for the proper installation, operation, and maintenance of your Yamaha Starter Relay Assembly, model 68N-81940-00-00. This is a genuine Yamaha factory original equipment part, designed for reliable performance in compatible Yamaha marine applications. Please read this manual thoroughly before installation and operation to ensure safety and optimal functionality.
2. Safety Information
Always observe the following safety precautions to prevent injury or damage to the product and associated equipment:
- Professional Installation Recommended: Installation of electrical components should ideally be performed by a qualified marine technician.
- Disconnect Power: Before beginning any installation or maintenance, ensure all power to the vehicle's electrical system is disconnected to prevent electrical shock or short circuits.
- Use Correct Tools: Employ appropriate tools for installation to avoid damaging the relay or surrounding components.
- Verify Fitment: Always confirm that this relay is the correct part for your specific Yamaha model and year before installation. Refer to your vehicle's service manual.
- Avoid Water Exposure: While designed for marine environments, ensure connections are properly sealed and protected from excessive water ingress.
3. Product Overview
The Yamaha Starter Relay Assembly (68N-81940-00-00) is a critical electrical component responsible for transmitting power from the battery to the starter motor when the ignition key is turned. It acts as a switch, allowing a small current from the ignition to control a larger current flow to the starter, protecting the ignition switch from high electrical loads.

Figure 3.1: Yamaha Starter Relay Assembly (Model 68N-81940-00-00) as supplied in its original packaging.
Components:
- Relay Body: The main housing containing the electromagnetic switch.
- Power Terminals: Two large terminals (typically threaded posts) for connecting the main battery and starter motor cables.
- Control Terminals: Smaller terminals (often a bullet connector and a ring eye terminal) for connecting to the ignition switch and ground.
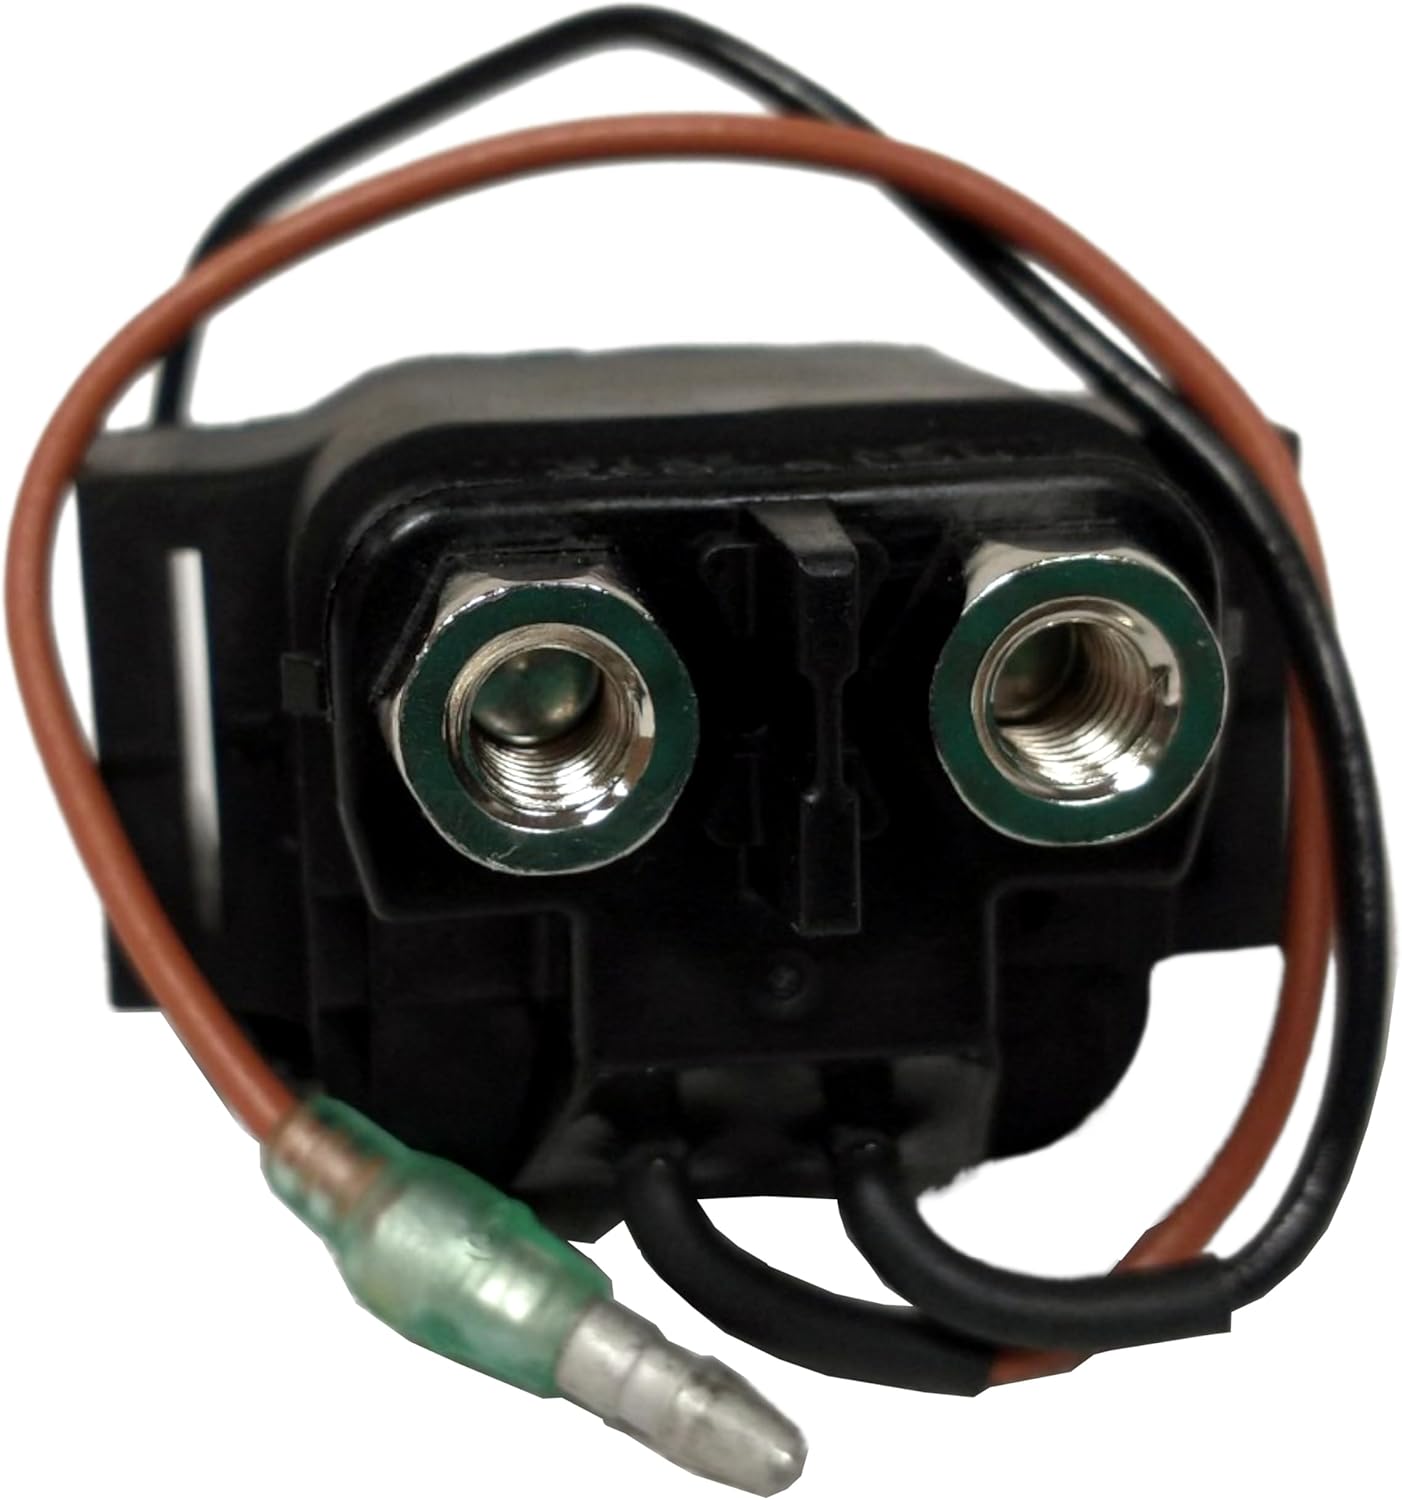
Figure 3.2: Top view of the relay, highlighting the two main power terminals with threaded posts for secure cable attachment.
4. Setup and Installation
This section provides general guidelines for installing the starter relay. Always consult your specific Yamaha vehicle's service manual for detailed, model-specific instructions and wiring diagrams.
- Preparation:
- Ensure the engine is off and the ignition key is removed.
- Disconnect the negative (-) terminal of the battery to prevent accidental electrical discharge.
- Locate the existing starter relay on your Yamaha vehicle.
- Removal of Old Relay:
- Carefully disconnect all wires connected to the old relay. Note their positions and connections, taking photos if necessary for reference.
- Unmount the old relay from its bracket or mounting point.
- Installation of New Relay:
- Mount the new Yamaha Starter Relay Assembly (68N-81940-00-00) in the same location as the old one. Ensure it is securely fastened.
- Connect the main power cables to the large threaded terminals. Typically, one connects to the battery positive (+) and the other to the starter motor. Ensure connections are tight and secure.
- Connect the control wires (ignition signal and ground) to the smaller terminals. Refer to your vehicle's wiring diagram for correct polarity and connection points.
- Ensure all connections are clean, free of corrosion, and properly insulated.
- Final Steps:
- Reconnect the negative (-) terminal of the battery.
- Test the starter operation by turning the ignition key. The engine should crank normally.
- If the engine does not crank, re-check all connections and consult the troubleshooting section or your vehicle's service manual.

Figure 4.1: Side view of the relay, illustrating the various wiring connections including the main power terminals and control wires.
5. Operating Instructions
The starter relay operates automatically as part of your vehicle's starting system. No direct user interaction with the relay itself is required during normal operation.
- When the ignition key is turned to the "START" position, a low-current signal is sent to the relay's control terminals.
- This signal energizes an electromagnet within the relay, which closes a high-current switch.
- The closed switch allows a large current from the battery to flow directly to the starter motor, causing it to engage and crank the engine.
- Once the key is released from the "START" position, the control signal is removed, the electromagnet de-energizes, and the high-current switch opens, stopping power to the starter motor.
6. Maintenance
The Yamaha Starter Relay Assembly is designed for durability and typically requires minimal maintenance. However, periodic inspection can help ensure its longevity and reliable operation.
- Inspect Connections: Periodically check all electrical connections to the relay for tightness and corrosion. Loose or corroded connections can impede current flow and cause starting issues.
- Clean Terminals: If corrosion is present, disconnect the battery and carefully clean the terminals and wire ends using a wire brush or fine-grit sandpaper. Apply a dielectric grease to protect against future corrosion.
- Check Wiring: Inspect the wiring connected to the relay for any signs of fraying, cracking, or damage. Replace damaged wires as necessary.
- Environmental Protection: Ensure the relay remains protected from excessive moisture and physical damage.
7. Troubleshooting
If you experience issues with your vehicle's starting system, the starter relay may be a contributing factor. Here are some common symptoms and troubleshooting steps:
| Symptom | Possible Cause | Action |
|---|---|---|
| Engine does not crank when ignition is turned to START. |
|
|
| Clicking sound from relay but engine does not crank. |
|
|
| Relay gets hot during operation. |
|
|
If troubleshooting steps do not resolve the issue, it is recommended to consult a qualified marine technician.
8. Specifications
Key specifications for the Yamaha Starter Relay Assembly 68N-81940-00-00:
- Model Number: 68N-81940-00-00
- Brand: Yamaha Motor
- Connector Type: Solder Or Screw Terminals
- Contact Material: Silver
- Mounting Type: Surface Mount
- Operation Mode: Automatic
- Number of Terminals: 2 (main power) plus control terminals
- Specification Met: OEM
- Item Weight: Approximately 2.11 ounces (60 grams)
- Product Dimensions: Approximately 10 x 6 x 6 inches (packaging dimensions, actual relay dimensions are smaller)
- UPC: 782708103381
9. Warranty and Support
Specific warranty details for the Yamaha Starter Relay Assembly 68N-81940-00-00 are not provided within this manual. For information regarding warranty coverage, claims, or technical support, please contact Yamaha Motor directly or refer to the documentation provided with your original Yamaha vehicle.
You can visit the official Yamaha Motor website for further assistance: www.yamaha-motor.com