1. Introduction
Thank you for choosing the Comelit Bravo Series 5701 Black and White Video Intercom. This manual provides essential information for the safe and efficient installation, operation, and maintenance of your new video intercom system. Please read this manual thoroughly before use and retain it for future reference.
The Comelit Bravo Series 5701 is a handset-version monitor with a 4-inch black and white screen, featuring a glossy white finish and a silver lower shell. It includes standard door opener buttons, two additional function buttons, a signal LED, and controls for brightness, contrast, and call volume. The privacy function, which temporarily excludes video intercom calls, is standard and activated by setting the call volume to zero. This unit can be converted into a desktop version with article 5712. Dimensions: 212x225x55 mm.
2. Safety Information
Important Safety Instructions:
- Read all instructions carefully before installation and use.
- Installation should only be performed by qualified personnel in accordance with local electrical codes.
- Do not expose the unit to rain or moisture.
- Do not open the unit casing; there are no user-serviceable parts inside. Refer all servicing to qualified service personnel.
- Ensure the power supply is disconnected before performing any maintenance or installation work.
3. Package Contents
Verify that all components are present in the package:
- Comelit Bravo Series 5701 Black and White Video Intercom Monitor (1 unit)
- User Manual (this document)
- Mounting accessories (screws, wall plugs)
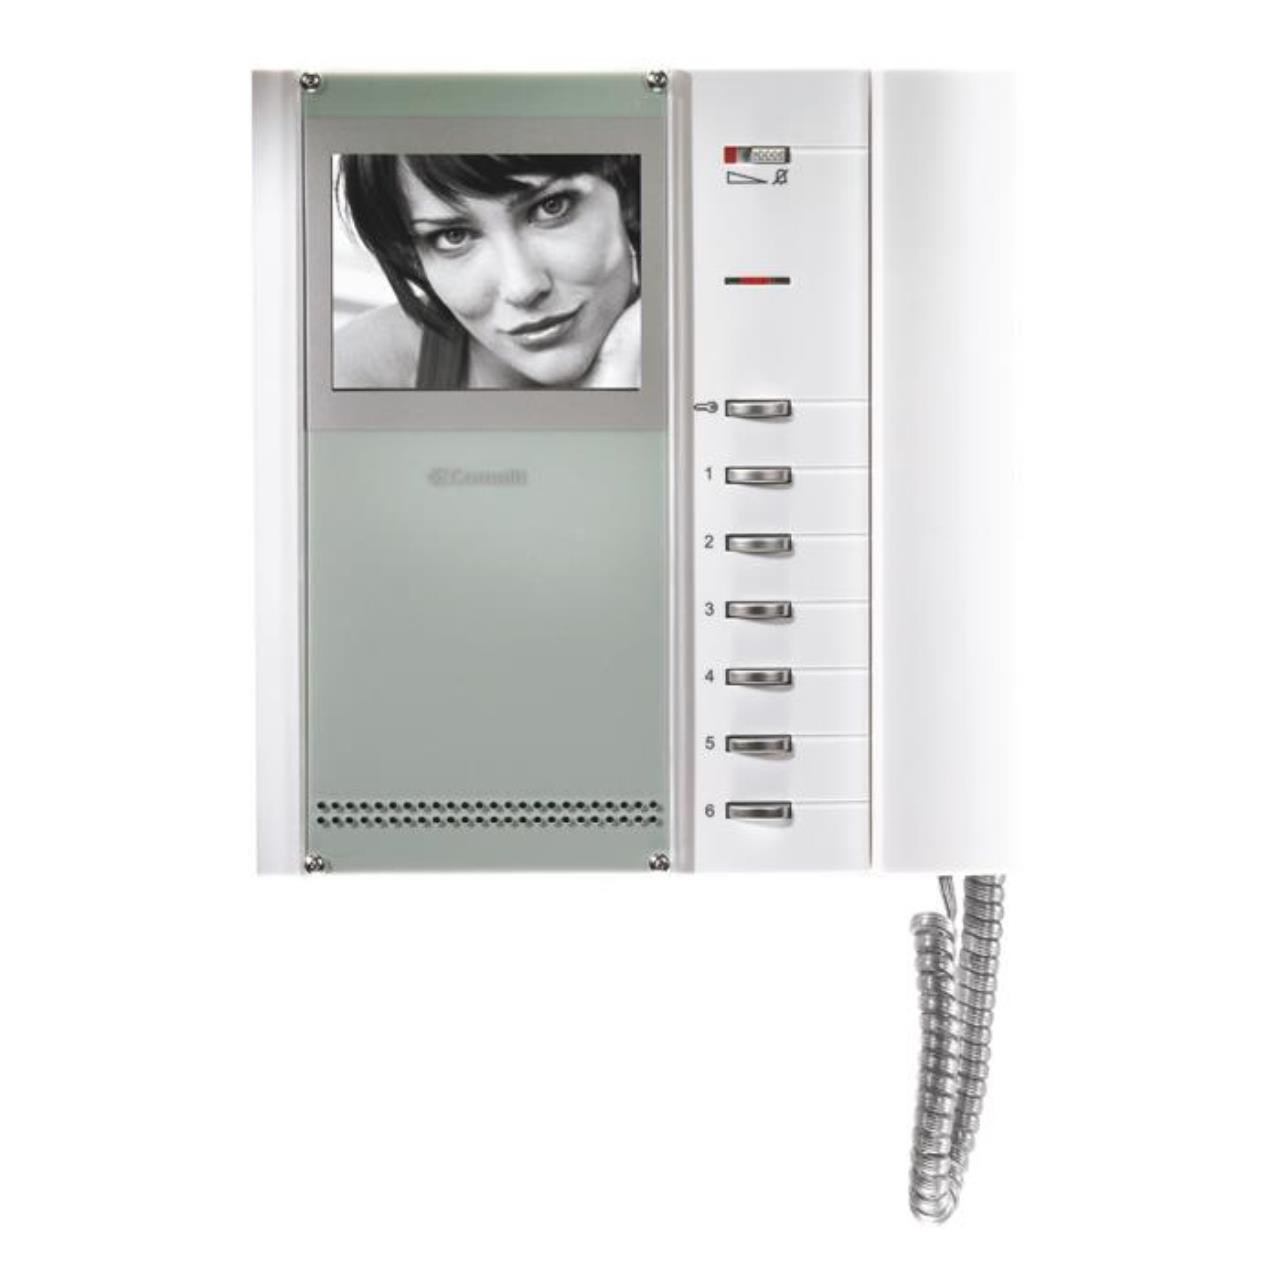
Figure 1: Comelit Bravo Series 5701 Black and White Video Intercom Monitor. This image shows the front view of the monitor with its handset, 4-inch black and white screen, and control buttons.
4. Setup and Installation
This section outlines the general steps for setting up your video intercom. For detailed wiring diagrams and specific installation instructions, please refer to the separate installation guide provided with your system or consult a qualified electrician.
4.1 Mounting the Monitor
- Choose a suitable location for the monitor, typically near the entrance or in a central area of the property.
- Mark the drilling points on the wall using the mounting bracket (if supplied) or the monitor's backplate as a template.
- Drill holes and insert wall plugs.
- Secure the mounting bracket or monitor backplate to the wall with screws.
4.2 Wiring Connections
WARNING: Ensure power is disconnected before making any electrical connections.
- Connect the system's main bus wires to the designated terminals on the monitor.
- Connect the power supply wires according to the system's wiring diagram.
- Ensure all connections are secure and correctly polarized.
4.3 Initial Power-Up
- Once all wiring is complete and checked, restore power to the system.
- The monitor should power on, and you may hear an initial tone or see a display.
- Test the basic functions such as receiving a call and opening the door.
5. Operating Instructions
5.1 Receiving a Call
- When a visitor calls from the outdoor station, the monitor will ring, and the screen will display the visitor's image.
- Lift the handset to answer the call and speak with the visitor.
5.2 Opening the Door
- During a call, press the door opener button (usually marked with a key symbol) to unlock the entrance.
- The door will remain unlocked for a short period, then automatically re-lock.
5.3 Adjusting Settings
- Brightness Control: Use the dedicated knob or slider to adjust the screen brightness.
- Contrast Control: Use the dedicated knob or slider to adjust the screen contrast.
- Call Volume: The slide control allows adjustment of the incoming call volume.
- Privacy Function: Set the call volume to zero using the slide control to activate the privacy function. This will temporarily disable incoming call ringing.
- Additional Function Buttons: The two extra buttons can be programmed for various functions depending on your system configuration (e.g., activating a secondary gate, turning on a light). Refer to your system's main manual for specific programming details.
6. Maintenance
Regular maintenance ensures optimal performance and longevity of your Comelit Bravo Series 5701 video intercom.
- Cleaning: Clean the monitor's screen and casing with a soft, dry, or slightly damp cloth. Do not use abrasive cleaners, solvents, or aerosol sprays.
- Inspection: Periodically check all visible cables and connections for any signs of wear or damage.
- Software Updates: This model typically does not require software updates. If your system is part of a larger network, consult your installer for any system-wide updates.
7. Troubleshooting
If you encounter issues with your video intercom, refer to the following common problems and solutions:
| Problem | Possible Cause | Solution |
|---|---|---|
| No image on screen | No power; loose connection; brightness/contrast too low. | Check power supply; verify wiring connections; adjust brightness/contrast controls. |
| No sound from speaker/microphone | Volume too low; faulty handset connection. | Adjust call volume; ensure handset is properly seated; check wiring. |
| Door opener not working | Wiring issue; faulty door strike; system not in call mode. | Verify door opener wiring; ensure you are in an active call before pressing the button. |
| Monitor not ringing | Call volume set to zero (privacy mode); faulty outdoor station. | Increase call volume; check outdoor station functionality. |
If the problem persists after attempting these solutions, please contact qualified technical support.
8. Specifications
Key technical specifications for the Comelit Bravo Series 5701 Video Intercom:
- Model Number: 5701
- Screen Type: Black and White (B/W)
- Screen Size: 4 inches
- Color: Glossy White with Silver lower shell
- Features: Door opener button, 2 additional function buttons, signal LED, brightness adjustment, contrast adjustment, slide call volume control, privacy function.
- Dimensions (HxWxD): 212 x 225 x 55 mm
- Weight: 700 grams
- Power Source: System powered (not battery-operated)
- Efficiency: A
- Special Functions: Tweeter
- Convertible: Can be transformed into a desktop version with article 5712.


