1. Product Overview
This instruction manual provides essential information for the proper installation and maintenance of the Earthtec AR RMW2.2G24 Pump Repair Kit. This kit is designed for specific Annovi Reverberi RMW series pumps to replace worn or damaged seals, ensuring optimal performance and preventing leaks.
The kit contains three seals, one for each plunger in the compatible pump models. Regular inspection and timely replacement of these seals are crucial for the longevity and efficiency of your pressure washer pump.
Compatible Pump Models:
- RMW2G20
- RMW2.2G24
- RMW2G23B
- RMW2G24

Image 1.1: The three individual pump seals included in the repair kit.
2. Safety Information
Always prioritize safety when performing maintenance on pressure washer pumps. Failure to follow safety guidelines can result in injury or damage to equipment.
- Disconnect Power: Ensure the pressure washer is completely turned off and disconnected from its power source (electrical or fuel) before beginning any repair work.
- Release Pressure: Relieve all pressure from the system by squeezing the trigger gun until water stops flowing.
- Wear Protective Gear: Use appropriate personal protective equipment (PPE), including safety glasses and gloves, to protect against chemical exposure or mechanical injury.
- Consult Pump Manual: Refer to your specific pressure washer pump's original instruction manual for detailed disassembly and reassembly procedures.
- Work in a Well-Ventilated Area: If using any cleaning agents or lubricants, ensure adequate ventilation.
3. Preparation and Setup
Before installing the new seals, gather the necessary tools and prepare your workspace.
3.1 Tools Required:
- Wrenches or sockets (appropriate sizes for your pump)
- Screwdrivers (flathead and Phillips, if needed)
- Pliers
- Seal pick or small flathead screwdriver (for removing old seals)
- Clean rags
- Grease or lubricant (compatible with pump seals)
3.2 Workspace Preparation:
- Choose a clean, well-lit, and stable work surface.
- Lay down a clean cloth or mat to prevent losing small parts.
- Have a container ready for old parts and any drained fluids.
4. Seal Replacement Procedure
This section outlines the general steps for replacing the seals. Always refer to your specific pump's service manual for exact disassembly and reassembly instructions.
4.1 Disassembly:
- Ensure all safety precautions from Section 2 are followed.
- Carefully remove the pump head or manifold from the pump body. This usually involves unbolting it from the crankcase.
- Locate the old seals around the plungers. There will be three seals, one for each plunger.
- Using a seal pick or small flathead screwdriver, carefully pry out the old seals. Be gentle to avoid scratching the plunger or pump housing.
- Clean the seal seating areas thoroughly, removing any debris, mineral deposits, or old lubricant.
4.2 Installation of New Seals:
- Inspect the new seals for any defects or damage.
- Apply a thin layer of compatible grease or lubricant to the new seals. This aids in installation and helps prevent initial wear.
- Carefully press each new seal into its respective seating area. Ensure they are seated squarely and fully. Do not force them, as this can damage the seals.
- Verify that all three seals are correctly installed and oriented according to your pump's specifications.
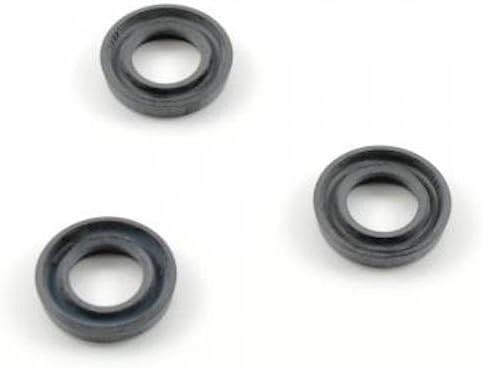
Image 4.1: New seals ready for installation into the pump head.
4.3 Reassembly and Testing:
- Carefully reattach the pump head or manifold to the pump body, ensuring all bolts are tightened to the manufacturer's recommended torque specifications.
- Reconnect all hoses and accessories.
- Reconnect the pressure washer to its power source.
- Turn on the water supply and allow it to flow through the pump to purge any air.
- Start the pressure washer and check for any leaks around the pump head.
- If leaks are present, immediately shut down the unit and re-inspect the seal installation.
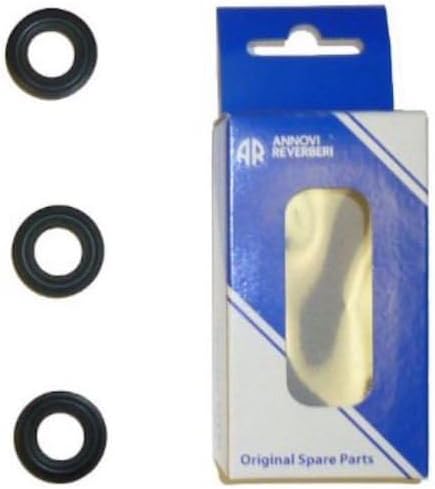
Image 4.2: The repair kit packaging, indicating it contains original spare parts for Annovi Reverberi pumps.
5. Maintenance
Proper maintenance extends the life of your pump seals and overall pressure washer performance.
- Regular Inspection: Periodically check the pump head for any signs of water leaks or drips, which indicate failing seals.
- Proper Storage: When storing the pressure washer, especially in freezing temperatures, ensure the pump is drained of all water or treated with pump protector to prevent damage to seals and other components.
- Use Clean Water: Always use clean, filtered water to prevent abrasive particles from damaging the seals and plungers.
- Avoid Dry Running: Never run the pump without a water supply, as this can quickly overheat and damage the seals.
6. Troubleshooting Common Issues
This section addresses common problems related to pump seals and potential solutions.
| Problem | Possible Cause | Solution |
|---|---|---|
| Water leaking from pump head | Worn or improperly seated seals | Replace seals (refer to Section 4). Ensure seals are correctly installed. |
| Loss of pressure | Damaged or leaking seals, air in the pump | Inspect and replace seals if necessary. Purge air from the system by running water through the pump before starting. |
| Pump making unusual noises | Air in the pump, damaged internal components (including seals) | Ensure adequate water supply and purge air. If noise persists, further inspection of internal components may be required. |
If troubleshooting steps do not resolve the issue, consult a qualified service technician or contact the manufacturer for assistance.
7. Product Specifications
- Product Name: AR RMW2.2G24 Pump Repair Kit
- Brand: Earthtec
- Model Number: AR42122
- OEM Equivalent Part Number: AR42122
- Compatible Pump Series: Annovi Reverberi RMW series
- Kit Contents: 3 seals (one for each plunger)
- Material: Plastic (Seal material typically a durable rubber or synthetic polymer, but product data lists "Plastic" for general material)
- Item Dimensions (L x W x H): Approximately 9 x 7 x 1 inches (packaging dimensions)
- Item Weight: Approximately 13.61 g
- GTIN/UPC: 709257511559
- Manufacturer: AR North America
8. Warranty and Support
Specific warranty information for this repair kit is not provided in the product details. For warranty inquiries or technical support, please contact the manufacturer, AR North America, or your original point of purchase.
Always retain your proof of purchase for any warranty claims.