Product Overview
The Parts Master 125309 Front Brake Rotor is a high-quality replacement component designed for various import and domestic vehicle applications. Manufactured by Uquality Automotive Products, Corp., this rotor is engineered to meet or exceed Original Equipment (OE) fit, form, and function, ensuring reliable and safe braking performance.
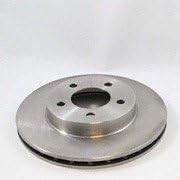
Image: A single Parts Master 125309 Front Brake Rotor, shown from a slightly elevated angle, highlighting its smooth, metallic surface and central hub with bolt holes.
Key Features:
- Install Ready: Features a non-directional swirl finish, eliminating the need for machining and aiding in faster friction material "break-in."
- OE Quality: Manufactured in ISO/TS16949 certified facilities to meet or exceed Original Equipment specifications.
- Precision Engineering: Designed with tight-tolerance specifications to reduce thickness variations and lateral run-out, ensuring a balanced rotor.
- Material Standards: Manufactured to match SAE J431 metallurgical engineering standards for consistent quality, strength, and performance.
- Vane Design: Exact OEM vane design and configuration are followed for optimal cooling and performance.
Installation Guide
Proper installation of brake rotors is critical for vehicle safety and performance. It is highly recommended that installation be performed by a qualified automotive technician. The following steps provide a general overview; always refer to your vehicle's specific service manual for detailed procedures and torque specifications.
- Safety First: Ensure the vehicle is securely lifted and supported on jack stands. Disconnect the battery if working near electrical components. Wear appropriate personal protective equipment.
- Remove Wheel: Loosen lug nuts, lift the vehicle, and remove the wheel.
- Remove Brake Caliper: Carefully unbolt and remove the brake caliper from its mounting bracket. Do not let the caliper hang by the brake hose; support it with a wire or bungee cord.
- Remove Caliper Bracket: Unbolt and remove the caliper mounting bracket.
- Remove Old Rotor: Remove any retaining screws or clips, then slide the old brake rotor off the wheel hub. If stuck, use a rubber mallet or penetrating oil as needed.
- Clean Hub Surface: Thoroughly clean the wheel hub mounting surface to remove any rust, dirt, or debris. A clean, flat surface is essential for proper rotor seating and to prevent run-out.
- Install New Rotor: Carefully slide the new Parts Master 125309 Front Brake Rotor onto the wheel hub. Ensure it sits flush against the hub.
- Reinstall Caliper Bracket: Reattach the caliper mounting bracket and torque bolts to manufacturer specifications.
- Reinstall Brake Caliper: Compress the caliper piston(s) if necessary (e.g., using a C-clamp or specialized tool) to accommodate new brake pads (if replacing). Reinstall the caliper over the rotor and new pads, then torque bolts to manufacturer specifications.
- Bleed Brakes (if necessary): If brake lines were opened, or air entered the system, bleed the brake system according to vehicle manufacturer guidelines.
- Reinstall Wheel: Reattach the wheel and hand-tighten lug nuts. Lower the vehicle and torque lug nuts to manufacturer specifications in a star pattern.
- Bed-in Procedure: Follow the recommended brake pad and rotor bed-in procedure to ensure optimal performance and longevity. This typically involves a series of moderate stops from varying speeds.
Operation and Function
The Parts Master 125309 Front Brake Rotor is a critical component of your vehicle's disc brake system. When the brake pedal is pressed, hydraulic pressure forces the brake caliper to clamp the brake pads against the rotating rotor. This friction converts the vehicle's kinetic energy into thermal energy, slowing and stopping the vehicle.
The design of this rotor, including its precise dimensions and vane configuration, ensures efficient heat dissipation and consistent braking performance under various driving conditions. Its non-directional swirl finish promotes rapid and effective "bed-in" with new brake pads, contributing to optimal braking from the start.
Maintenance and Care
Regular inspection and maintenance of your vehicle's braking system are essential for safety and longevity. While brake rotors are designed for durability, proper care can extend their lifespan and ensure consistent performance.
- Routine Inspection: Have your brake system, including rotors, pads, and calipers, inspected by a qualified technician during routine vehicle maintenance, typically every 10,000 to 15,000 miles or as recommended by your vehicle manufacturer.
- Check for Wear: Look for signs of excessive wear, such as deep grooves, scoring, cracks, or significant rust. Rotors have a minimum thickness specification; if worn below this, they must be replaced.
- Monitor Brake Performance: Pay attention to any changes in braking feel, such as pulsation, squealing, grinding, or a spongy pedal. These can indicate issues with the rotors or other brake components.
- Keep Clean: While in use, rotors will naturally accumulate brake dust. During wheel removal, you can gently wipe down the rotor surface, but avoid using harsh chemicals that could contaminate the brake pads.
- Avoid Overheating: Aggressive driving and prolonged braking (e.g., long descents) can lead to rotor overheating, which can cause warping or glazing. Use lower gears when descending steep hills to reduce reliance on brakes.
Troubleshooting Common Brake Issues
If you experience any of the following symptoms, it may indicate an issue with your brake rotors or other brake system components. Always consult a qualified mechanic for diagnosis and repair.
| Symptom | Possible Cause | Action |
|---|---|---|
| Brake Pedal Pulsation / Steering Wheel Shake | Warped or unevenly worn rotors, excessive rotor run-out. | Inspect rotors for run-out and thickness variation. Replace if necessary. Ensure proper hub cleaning during installation. |
| Squealing or Grinding Noise | Worn brake pads (wear indicators), foreign material between pad and rotor, glazed rotors, or improper pad/rotor bed-in. | Inspect brake pads for wear. Clean rotors and pads. Perform bed-in procedure. If grinding, immediate inspection is required as metal-on-metal contact is occurring. |
| Reduced Braking Performance | Overheated rotors (glazing), worn pads, contaminated pads/rotors, or issues with other brake system components (calipers, fluid). | Inspect entire brake system. Ensure proper cooling. Replace components as needed. |
| Excessive Rust on Rotor Surface | Normal surface rust can form when the vehicle is parked, especially in humid conditions. | Typically, this rust is removed after a few brake applications. If rust is severe or causes noise/vibration, inspection is warranted. |
Product Specifications
| Attribute | Detail |
|---|---|
| Brand | Parts Master |
| Model Number | 125309 |
| Manufacturer Part Number | 125309 |
| Item Weight | 13.17 pounds |
| Package Dimensions | 11.8 x 11.8 x 2.6 inches |
| Vehicle Service Type | Cars |
| Fitment | Front |
| Applicable Years (Examples) | 1994-1997 Chrysler LHS; 1993-1997 Concorde; 1993-1997 Eagle Vision; 1993-1997 Intrepid; 1993-1997 Intrepid (Canada); 1994-1997 New Yorker (Please verify application for your specific vehicle) |
| UPC | 401061070429, 677255053558 |
Warranty and Support
For specific warranty information regarding your Parts Master 125309 Front Brake Rotor, please refer to the documentation provided with your purchase or contact Parts Master directly. Warranty terms typically cover manufacturing defects and material flaws under normal operating conditions.
If you require technical assistance, have questions about installation, or need to report a product issue, please contact the manufacturer or your authorized Parts Master dealer. Always provide your product model number (125309) and purchase details when seeking support.
For general automotive repair and maintenance advice, it is recommended to consult a certified automotive technician or refer to your vehicle's official service manual.