1. Introduction
This manual provides detailed instructions for the installation, operation, and maintenance of your Foxconn TSAA725 ATX Tower Case. Please read this manual thoroughly before beginning installation to ensure proper setup and safe use of the product. Keep this manual for future reference.
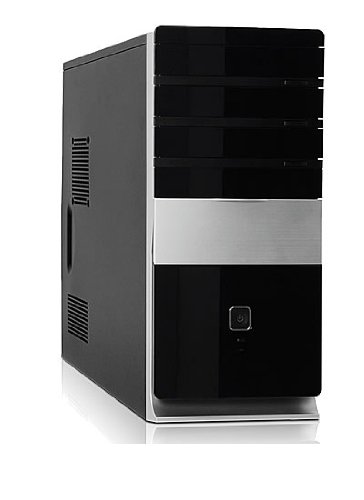
Image: Front view of the Foxconn TSAA725 ATX Tower Case, showcasing its design and front panel ports.
2. Safety Information
Observe the following safety precautions to prevent damage to the product or injury to yourself:
- Always disconnect the power supply from the wall outlet before opening the computer case or performing any installation/maintenance.
- Handle internal components with care to avoid electrostatic discharge (ESD) damage. Use an anti-static wrist strap if available.
- Ensure proper ventilation around the case to prevent overheating.
- Do not expose the case to moisture or extreme temperatures.
- Keep small parts away from children.
3. Package Contents
Verify that all items are present in the package:
- Foxconn TSAA725 ATX Tower Case
- 350W Power Supply (pre-installed)
- Accessory kit (screws, standoffs, cable ties)
- This instruction manual
4. Key Features
The Foxconn TSAA725 ATX Tower Case offers the following features:
- Material: 0.5mm SGCC Alloy Steel construction for durability.
- Motherboard Support: Compatible with ATX and Micro ATX motherboards.
- Drive Bays:
- 3x 5.25" External Bays
- 2x 3.5" External Bays
- 4x 3.5" Internal Bays
- Cooling System:
- 1x 80/92/120mm rear fan support (fan not included)
- Optional 1x 80/92/120mm front fan support (fan not included)
- 80mm Air Duct for CPU cooling.
- Front I/O Panel:
- 2x USB 2.0 ports
- 1x Headphone jack
- 1x Microphone jack
- Power Supply: Integrated 350W Power Supply.
5. Setup and Component Installation
Follow these steps to install your computer components into the Foxconn TSAA725 case:
- Prepare the Case:
Place the case on a flat, stable surface. Remove the side panel(s) by unscrewing the thumbscrews at the rear of the case and sliding the panel backward.
- Install Motherboard:
Install the necessary standoffs onto the motherboard tray according to your motherboard's form factor (ATX or Micro ATX). Carefully place the motherboard onto the standoffs, aligning the screw holes. Secure the motherboard with screws provided in the accessory kit.
- Install Drives (HDD/SSD):
For 3.5" internal drives, slide the drive into an available 3.5" internal bay and secure it with screws from the side. For 5.25" external drives (e.g., optical drives), remove the front panel bay cover, slide the drive in from the front, and secure it with screws.
- Install Expansion Cards:
Remove the appropriate expansion slot covers at the rear of the case. Insert your graphics card or other expansion cards into the PCIe/PCI slots on the motherboard and secure them with screws.
- Connect Cables:
Connect the power supply cables to the motherboard (24-pin ATX, 4/8-pin CPU), graphics card (if applicable), and drives (SATA power). Connect the front panel cables (USB, audio, power switch, reset switch, LED indicators) to the corresponding headers on the motherboard. Refer to your motherboard manual for header locations.
- Cable Management:
Route cables neatly to improve airflow and aesthetics. Use cable ties from the accessory kit if needed.
- Close the Case:
Once all components are installed and cables are connected, reattach the side panel(s) and secure them with the thumbscrews.
6. Operating Instructions
After successful assembly, connect your peripherals (monitor, keyboard, mouse) and power cable to the case. Press the power button on the front panel to start your computer.
Front Panel I/O Ports:
- USB 2.0 Ports: For connecting USB devices such as keyboards, mice, and external storage.
- Headphone Jack: For connecting headphones or speakers.
- Microphone Jack: For connecting a microphone.
- Power Button: To turn the computer on or off.
- Reset Button: To restart the computer.
7. Maintenance
Regular maintenance helps ensure optimal performance and longevity of your computer case:
- Dust Cleaning: Periodically clean dust from inside the case, especially from fans and heatsinks, using compressed air. Ensure the computer is powered off and unplugged before cleaning.
- External Cleaning: Wipe the exterior of the case with a soft, damp cloth. Avoid abrasive cleaners or solvents.
- Cable Management: Periodically check cable routing to ensure no cables are obstructing airflow or fan operation.
8. Troubleshooting
If you encounter issues, refer to the following common solutions:
- Computer does not power on:
- Ensure the power cable is securely connected to both the case's power supply and the wall outlet.
- Check if the power supply switch (if present) is in the 'ON' position.
- Verify that the front panel power button cable is correctly connected to the motherboard.
- No display on monitor:
- Ensure the monitor is powered on and connected to the correct video output on your graphics card or motherboard.
- Reseat the graphics card and RAM modules.
- USB ports not working:
- Verify that the front panel USB cables are correctly connected to the motherboard's USB headers.
- Try connecting the device to a different USB port.
9. Specifications
| Feature | Detail |
|---|---|
| Brand | FOXCONN |
| Model | TSAA725-ISO450 |
| Material | 0.5mm SGCC Alloy Steel |
| Motherboard Compatibility | ATX, Micro ATX |
| Drive Bays (External) | 3x 5.25", 2x 3.5" |
| Drive Bays (Internal) | 4x 3.5" |
| Cooling System Support | 1x 80/92/120mm rear fan, 1x 80/92/120mm front fan (optional), 80mm Air Duct |
| Front I/O Ports | 2x USB 2.0, 1x Headphone, 1x Microphone |
| Power Supply | 350W (Integrated) |
| Product Dimensions (LxWxH) | 50.17 x 24.13 x 54.61 cm |
| Item Weight | 6.96 kg |
10. Warranty and Support
For warranty information and technical support, please refer to the official Foxconn website or contact your local retailer. Keep your proof of purchase for warranty claims.
Online Resources: For additional support and updated drivers, visit the official Foxconn support page.
Note: Warranty terms may vary by region.