

1. Introduction
This instruction manual provides detailed information for the proper installation, operation, and maintenance of the Velvac 747129 Door Mirror Switch 4 Way Remote Mirror Control Switch Assembly. Please read this manual thoroughly before attempting any installation or operation to ensure safe and correct usage. This switch is designed to provide precise control over your vehicle's remote mirrors.
2. Product Overview
The Velvac 747129 is a four-way remote control switch designed for adjusting vehicle mirrors. It includes wire assemblies for both left and right mirror connections, facilitating comprehensive mirror control.
Key Features:
- Four-way remote control for mirror adjustment.
- Includes 4-inch wire assemblies for left and right mirror connections.
- Designed for use with remote-controlled mirrors.
Package Contents:
- 1 x Velvac 747129 Door Mirror Switch Assembly
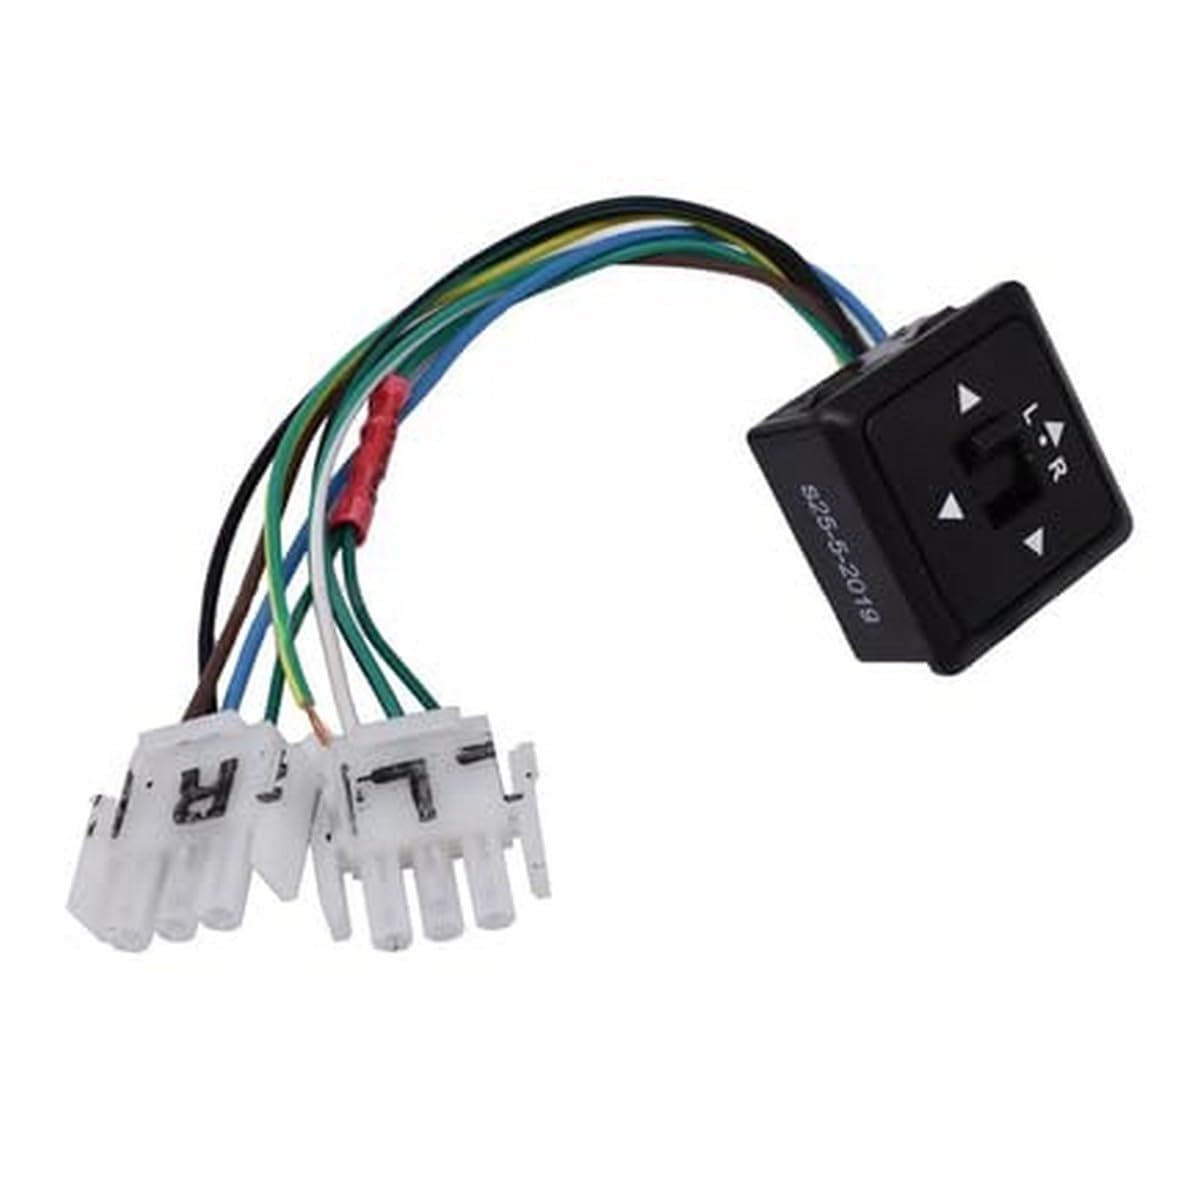
Image 2.1: Velvac 747129 Door Mirror Switch Assembly.
3. Setup and Installation
Installation of the Velvac 747129 mirror control switch requires basic electrical knowledge and tools. If you are not comfortable with electrical wiring, it is recommended to seek professional assistance.
General Installation Steps:
- Safety First: Disconnect the vehicle's battery before beginning any electrical work to prevent short circuits or electrical shock.
- Access Existing Switch: Carefully remove the trim panel or dashboard section where the existing mirror switch is located. Refer to your vehicle's service manual for specific instructions on panel removal.
- Disconnect Old Switch: Unplug the electrical connector(s) from the old mirror switch. Note the wiring configuration if the new switch requires custom wiring.
- Prepare Wiring: The Velvac 747129 switch comes with 4-inch wire assemblies. In some applications, the existing vehicle connectors may not be a direct match. In such cases, wiring modification (cutting and splicing) may be necessary to connect the new switch to the vehicle's wiring harness. Ensure proper wire gauge and use appropriate connectors (e.g., butt connectors, solder) for secure and reliable connections.
- Connect New Switch: Connect the wire assemblies from the Velvac 747129 switch to the vehicle's wiring. Ensure all connections are secure and insulated.
- Mount New Switch: Install the new mirror switch into its designated opening in the trim panel or dashboard.
- Test Functionality: Reconnect the vehicle's battery. Test the functionality of the mirror switch to ensure both left and right mirrors can be adjusted in all four directions (up, down, left, right).
- Reassemble: Once confirmed operational, reassemble the trim panels and secure all components.
Note: Due to variations in vehicle models and existing wiring, direct plug-and-play compatibility is not always guaranteed. Wiring diagrams for your specific vehicle and the Velvac 747129 switch may be required for complex installations.
Video 3.1: Demonstration of a 4-way mirror adjust switch, showing its physical appearance and connectors. This video provides a visual reference for the type of switch and its components.
Video 3.2: Another view of a 4-way mirror adjust switch, highlighting its design and connection points. Useful for understanding the physical aspects of installation.
4. Operating Instructions
The Velvac 747129 mirror control switch provides intuitive control over your vehicle's remote mirrors.
Mirror Adjustment:
- Select Mirror: Locate the 'L' (Left) and 'R' (Right) buttons or selector on the switch. Press 'L' to adjust the driver's side mirror or 'R' to adjust the passenger's side mirror.
- Adjust Position: Use the directional joystick or arrows (up, down, left, right) to move the selected mirror to the desired position.
- Confirm Adjustment: Release the directional control once the mirror is in the correct position. The mirror will hold its setting.
Video 4.1: A brief demonstration of a car rear view mirror control switch, showing the selection of left/right mirrors and directional adjustment. This illustrates the basic operation.
Video 4.2: This video shows the physical manipulation of a power mirror control switch, demonstrating how the directional pad is used to adjust mirror position.
Video 4.3: A detailed view of a left door 4-way mirror adjust switch in operation, providing a clear visual guide to its functionality.
5. Maintenance
The Velvac 747129 Door Mirror Switch is designed for durability and requires minimal maintenance.
General Maintenance Tips:
- Cleaning: Periodically wipe the surface of the switch with a soft, damp cloth to remove dust and grime. Avoid using harsh chemicals or abrasive cleaners, which can damage the plastic.
- Inspection: Occasionally inspect the switch for any signs of physical damage, loose connections, or unusual operation.
- Avoid Liquid Exposure: Prevent liquids from entering the switch mechanism, as this can cause electrical malfunctions.
6. Troubleshooting
If you encounter issues with your Velvac 747129 Door Mirror Switch, refer to the following troubleshooting guide:
| Problem | Possible Cause | Solution |
|---|---|---|
| Mirror does not move or moves intermittently. | Loose or corroded wiring connection. No power to the switch. Faulty mirror motor. Faulty switch. | Check all wiring connections for tightness and corrosion. Clean or re-secure as needed. Verify power supply to the switch using a multimeter. Test the mirror motor directly if possible. If other solutions fail, the switch may need replacement. |
| Only one mirror adjusts, or only certain directions work. | Incorrect mirror selection (L/R). Partial wiring fault. Faulty switch. | Ensure the correct mirror (Left or Right) is selected on the switch. Inspect wiring specific to the non-functional mirror or direction. If specific functions are consistently failing, the switch may be defective. |
| Switch feels loose or unresponsive. | Improper installation. Internal mechanical failure. | Ensure the switch is securely mounted in its housing. If the switch mechanism itself feels broken, replacement is necessary. |
If troubleshooting steps do not resolve the issue, it is recommended to consult a qualified automotive technician.
7. Specifications
| Specification | Detail |
|---|---|
| Brand | Velvac |
| Model / Manufacturer Part Number | 747129 |
| Product Type | Door Mirror Control Switch Assembly |
| Control Type | 4-Way Remote |
| Included Components | Switch with 4-inch wire assemblies |
| Item Weight | 2.11 ounces |
| Product Dimensions | 10 x 11 x 2 inches (Packaging/Overall) |
| ASIN | B00460DVZ6 |
| Date First Available | October 5, 2010 |
Typical Applications:


8. Warranty and Support
Velvac products are manufactured to high-quality standards. For specific warranty information, please refer to the warranty documentation included with your purchase or visit the official Velvac website. For technical support or assistance with installation and troubleshooting, please contact Velvac customer service directly.
Contact Information: Refer to your product packaging or the official Velvac website for the most current contact details.