
1. Introduction
The Craftsman Programmable Digital Tire Gauge is designed to provide accurate and convenient tire pressure readings. Maintaining correct tire pressure is crucial for vehicle safety, fuel efficiency, and tire longevity. This manual provides instructions for the proper use and care of your digital tire gauge.
2. Product Components
Your Craftsman Programmable Digital Tire Gauge includes the following key components:
- Digital Display: Large, backlit screen for clear pressure readings.
- Nozzle: Straight-push design for easy application to tire valve stems.
- Air Bleed Button: Allows for precise pressure adjustment.
- Set Button: Used for programming target tire pressures.
- Up/Down Buttons: For navigating menus and adjusting settings.
- LED Flashlight: Integrated light for visibility in low-light conditions.
- Battery Compartment: Houses the included batteries.
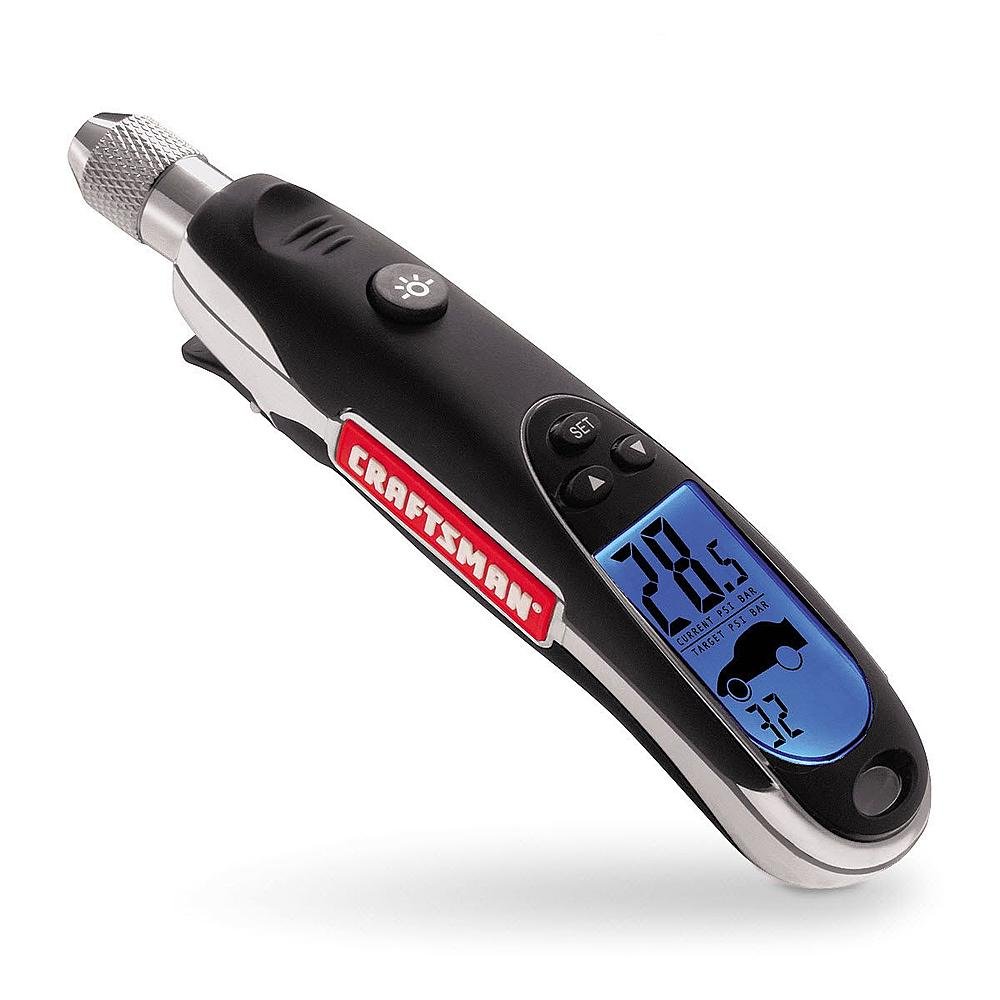
Image 1: Craftsman Programmable Digital Tire Gauge in use. The gauge is held against a tire valve stem, displaying a current pressure of 28.5 PSI and a target pressure of 32 PSI on its backlit screen. The user's hand is visible, and the tire and wheel are in the background.
3. Setup
3.1. Battery Installation
The Craftsman Digital Tire Gauge comes with batteries included. If replacement is needed:
- Locate the battery compartment cover on the back of the device.
- Remove the cover.
- Insert new batteries, ensuring correct polarity (+/-).
- Replace the battery compartment cover securely.
3.2. Initial Power On and Unit Selection
The gauge automatically powers on when pressure is detected. To select your preferred unit of measurement (PSI, BAR, kPa):
- With the gauge off, press and hold the SET button for approximately 3 seconds.
- The display will show the current unit. Use the Up or Down buttons to cycle through available units.
- Press the SET button again to confirm your selection.
3.3. Programming Target Tire Pressure
You can program target tire pressures for your vehicle's front and rear tires:
- Press the SET button once to enter programming mode. A tire icon will appear.
- Use the Up or Down buttons to adjust the target pressure for the front tires.
- Press SET again to switch to the rear tire setting.
- Use the Up or Down buttons to adjust the target pressure for the rear tires.
- Press SET one more time to save the settings and exit programming mode.
4. Operating Instructions
4.1. Checking Tire Pressure
For accurate readings, check tire pressure when tires are cold (driven less than a mile). Refer to your vehicle's owner's manual or the sticker on the driver's side door jamb for recommended tire pressures.
- Remove the valve cap from the tire.
- Firmly press the gauge's nozzle straight onto the tire valve stem. Ensure a tight seal to prevent air leakage.
- The gauge will automatically power on and display the current tire pressure. A beep will sound when the reading is locked.
- Remove the gauge from the valve stem. The reading will remain on the display for a few seconds before automatically shutting off.
- Replace the valve cap.
4.2. Adjusting Tire Pressure (Air Bleed Function)
If your tire pressure is too high, you can use the Air Bleed function to release air:
- With the gauge nozzle pressed onto the valve stem and displaying pressure, locate the Air Bleed button (often on the side or back of the gauge).
- Press and hold the Air Bleed button to release air. The display will show the pressure decreasing in real-time.
- Release the button when the desired pressure is reached. If a target pressure was programmed, the gauge may beep when the target is met.
- Remove the gauge and replace the valve cap.
4.3. Using the LED Flashlight
The integrated LED flashlight can be activated for use in low-light conditions:
- Press the flashlight button (often marked with a light bulb icon) to turn the LED on.
- Press the button again to turn the LED off.
5. Maintenance
5.1. Cleaning
Wipe the gauge with a soft, dry cloth. Do not use abrasive cleaners or immerse the device in water.
5.2. Storage
Store the tire gauge in a cool, dry place, away from direct sunlight and extreme temperatures. If storing for extended periods, it is recommended to remove the batteries to prevent leakage.
6. Troubleshooting
| Problem | Possible Cause | Solution |
|---|---|---|
| Gauge does not turn on. | Dead or incorrectly installed batteries. | Check battery polarity or replace batteries. |
| Inaccurate readings. | Poor seal with valve stem; gauge malfunction. | Ensure nozzle is firmly pressed onto valve stem. If problem persists, contact customer support. |
| Air leaks when checking pressure. | Nozzle not properly seated on valve stem. | Press the nozzle more firmly and straight onto the valve stem. |
| Display is dim or flickering. | Low battery power. | Replace batteries. |
7. Specifications
- Brand: Craftsman
- Model: Programmable Digital Tire Gauge
- Dimensions (L x W x H): 5.9 x 1.6 x 1.5 inches
- Weight: 0.17 Pounds
- Included Components: Batteries
- Measurement Units: PSI, BAR, kPa (selectable)
- Display: Backlit Digital LED
- Features: Programmable target pressure, Air Bleed function, LED flashlight, Automatic shut-off.
8. Warranty & Support
8.1. Warranty Information
Craftsman products are known for their quality and durability. For specific warranty details regarding your Programmable Digital Tire Gauge, please refer to the warranty card included with your purchase or visit the official Craftsman website. Keep your purchase receipt as proof of purchase for any warranty claims.
8.2. Customer Support
If you encounter any issues or have questions not covered in this manual, please contact Craftsman Customer Support. You can typically find contact information on the product packaging or the official Craftsman website:
Website: www.craftsman.com
(Note: Specific contact numbers or email addresses may vary by region and are subject to change. Please check the official website for the most current information.)