Introduction
Welcome to the user manual for your new BLACK+DECKER Countertop Convection Toaster Oven, Model CTO6335S. This appliance is designed to provide versatile cooking options with its convection technology and eight one-touch cooking functions. Please read this manual thoroughly before operating your new toaster oven to ensure safe and efficient use. Keep this manual for future reference.
Important Safeguards
When using electrical appliances, basic safety precautions should always be followed to reduce the risk of fire, electric shock, and/or injury, including the following:
- Read all instructions before use.
- Do not touch hot surfaces. Use handles or knobs.
- To protect against electrical shock, do not immerse cord, plugs, or appliance in water or other liquid.
- Close supervision is necessary when any appliance is used by or near children.
- Unplug from outlet when not in use and before cleaning. Allow to cool before putting on or taking off parts.
- Do not operate any appliance with a damaged cord or plug, or after the appliance malfunctions or has been damaged in any manner.
- The use of accessory attachments not recommended by the appliance manufacturer may cause injuries.
- Do not use outdoors.
- Do not let cord hang over edge of table or counter, or touch hot surfaces.
- Do not place on or near a hot gas or electric burner, or in a heated oven.
- Extreme caution must be used when moving an appliance containing hot oil or other hot liquids.
- To disconnect, turn any control to OFF, then remove plug from wall outlet.
- Do not use appliance for other than intended use.
- A fire may occur if the oven is covered or touching flammable material, including curtains, draperies, walls, and the like, when in operation.
- Do not place any of the following materials in the oven: paper, cardboard, plastic, and the like.
- Do not store any materials, other than manufacturer's recommended accessories, in this oven when not in use.
- Do not place a metal scouring pad on the heating elements. Pieces can break off the pad and touch electrical parts, creating a risk of electric shock.
- Always wear protective, insulated oven mitts when inserting or removing items from the hot oven.
- This appliance is for household use only.
For a complete list of safety instructions, please refer to the full PDF user manual available on the manufacturer's website.
Product Overview
The BLACK+DECKER CTO6335S Countertop Convection Toaster Oven features a sleek design with intuitive digital controls and a spacious interior.
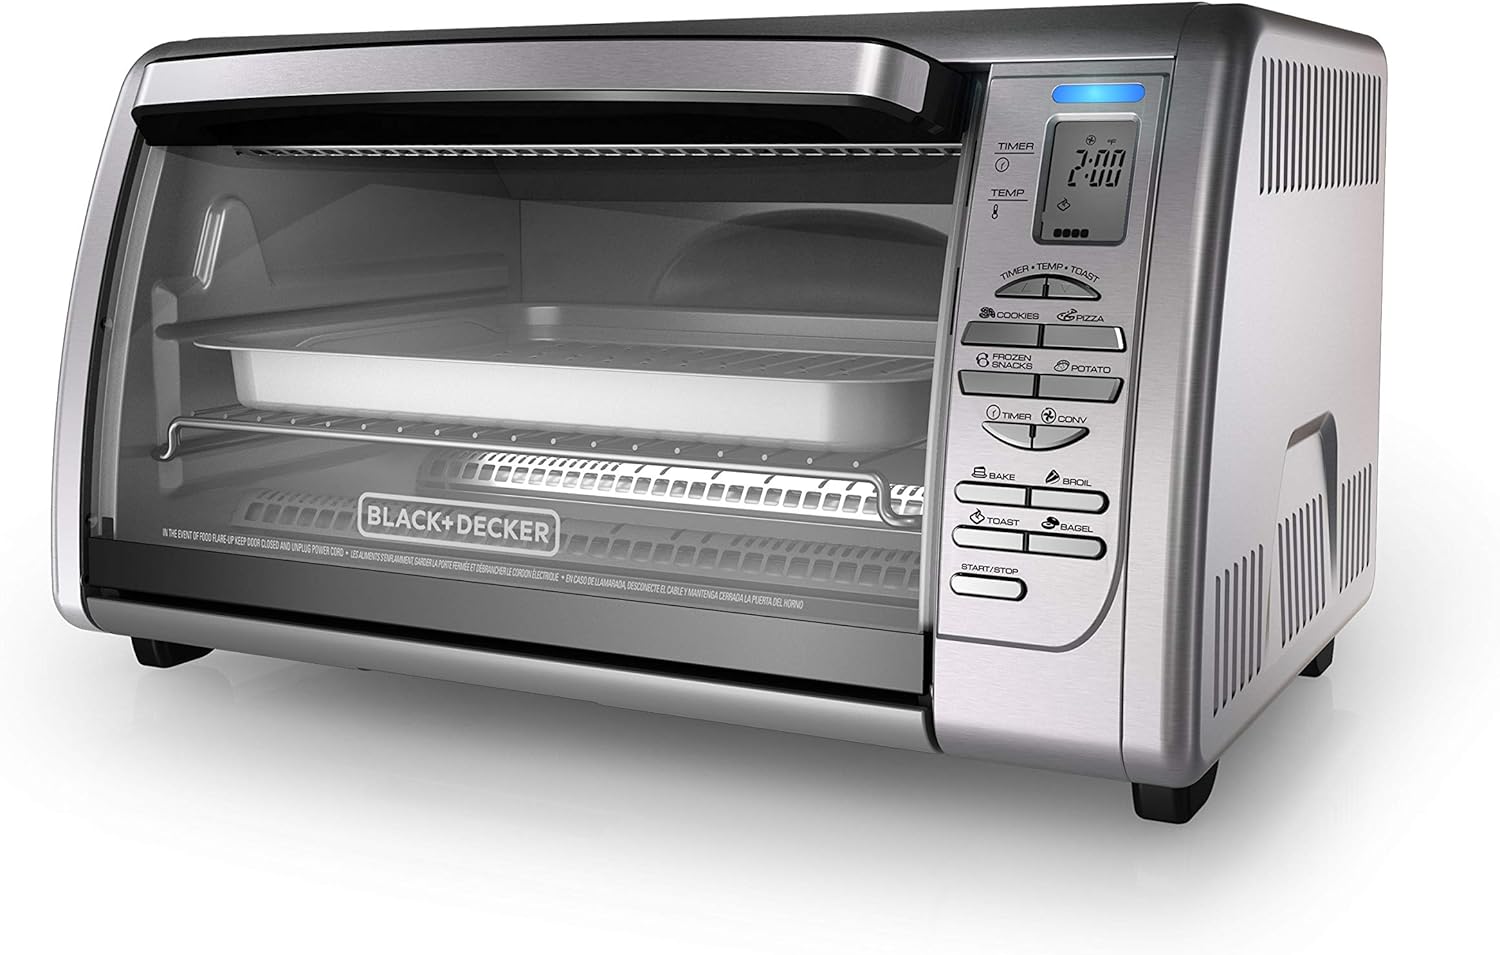
Components
- Oven Housing: The main body of the appliance.
- Glass Door: Provides visibility into the cooking chamber.
- Control Panel: Digital display and buttons for setting functions, temperature, and time.
- Heating Elements: Located at the top and bottom of the oven.
- Convection Fan: Circulates hot air for even cooking (located inside).
- Wire Rack: For holding food items.
- Bake Pan: For baking and roasting.
- Broil Rack: Fits into the bake pan for broiling.
- Removable Crumb Tray: Collects crumbs and drips for easy cleaning.
Control Panel

The control panel features a digital display for time and temperature, along with dedicated buttons for various cooking functions and settings:
- TIMER/TEMP/TOAST: Adjusts cooking time, temperature, or toast shade.
- COOKIES/PIZZA/FROZEN SNACKS/POTATO: One-touch preset functions.
- TIMER/CONV: Activates the convection fan or sets the timer.
- BAKE/BROIL/TOAST/BAGEL: One-touch preset functions.
- START/STOP: Initiates or cancels a cooking cycle.


Setup and First Use
Unpacking
- Remove all packaging materials, stickers, and plastic bands from the toaster oven.
- Remove all accessories from inside the oven.
- Wipe the exterior with a damp cloth. Dry thoroughly.
- Wash the wire rack, bake pan, broil rack, and crumb tray in warm, soapy water. Rinse and dry thoroughly.
Placement
- Place the toaster oven on a level, stable, heat-resistant surface.
- Ensure there is at least 4 inches (10 cm) of space on all sides of the oven for proper ventilation.
- Do not place the oven directly under cabinets or near flammable materials.
Initial Burn-Off
Before using your toaster oven for the first time, it is recommended to run an initial burn-off cycle to eliminate any manufacturing odors:
- Plug the appliance into a standard electrical outlet.
- Set the function to BAKE and the temperature to 450°F (230°C).
- Set the timer for approximately 15 minutes.
- A slight odor and some smoke may be present during this process; this is normal.
- Ensure the area is well-ventilated.
- After 15 minutes, turn the oven off and unplug it. Allow it to cool completely.
Operating Instructions
Your toaster oven offers a variety of cooking functions to suit your needs. Always ensure the crumb tray is properly inserted before operation.

General Operation
- Place food on the wire rack or in the bake pan, then slide into the appropriate rack position.
- Select the desired cooking function by pressing the corresponding button (e.g., BAKE, BROIL, PIZZA).
- Adjust the temperature using the TEMP buttons (if applicable for the selected function).
- Set the cooking time using the TIMER buttons. The digital timer allows for precise control up to 120 minutes.
- Press the START/STOP button to begin cooking. The oven will preheat if necessary.
- The oven will beep and automatically shut off when the timer expires.
One-Touch Cooking Functions
- Bake: Ideal for general baking tasks like casseroles, cakes, and roasted vegetables. Use the bake pan.
- Broil: For quick cooking and browning the top of food. Use the broil rack within the bake pan to catch drips.
- Toast: For toasting bread slices. Adjust the toast shade using the TIMER/TEMP/TOAST buttons.
- Bagel: Specifically designed for toasting bagels, typically toasting the cut side.
- Pizza: Optimized settings for cooking pizzas up to 12 inches.
- Frozen Snacks: Preset for convenience when cooking frozen appetizers or snacks.
- Potatoes: Suitable for baking potatoes.
- Cookies: Preset for baking cookies.
Convection Cooking

The convection feature circulates hot air throughout the oven, resulting in faster and more even cooking. To activate convection, press the CONV button after selecting a function like BAKE. This is particularly useful for baking and roasting, as it can reduce cooking times and promote uniform browning.
Rack Positions and Usage
The toaster oven is equipped with dual rack positions to accommodate various food sizes and cooking methods.

- Upper Rack Position: Ideal for broiling, toasting, or cooking thinner items that require closer proximity to the top heating elements.
- Lower Rack Position: Suitable for baking, roasting larger items like whole chickens, or when using the bake pan for casseroles and pizzas. This position provides more space above the food.
Always select the appropriate rack position based on the food item and cooking function to ensure optimal results and prevent burning.
Cleaning and Maintenance
Regular cleaning and maintenance will help prolong the life of your toaster oven and ensure optimal performance.
Before Cleaning
- Always unplug the toaster oven from the electrical outlet and allow it to cool completely before cleaning.
Cleaning the Interior
- The interior surfaces are non-stick for easy cleaning. Wipe with a damp cloth or sponge using mild soap.
- Do not use abrasive cleaners, scrubbing brushes, or chemical cleaners, as these can damage the non-stick coating.
- For stubborn stains, a small amount of baking soda paste can be applied, then wiped clean.
- Do not attempt to clean the heating elements.
Cleaning the Exterior
- Wipe the exterior surfaces with a damp cloth or sponge and dry thoroughly.
- Do not use abrasive cleaners or polishes on the exterior.
Crumb Tray
- Pull out the removable crumb tray from the bottom of the oven.
- Discard crumbs and wipe the tray with a damp cloth. It can also be washed in warm, soapy water.
- Ensure the crumb tray is completely dry before reinserting it into the oven.
Accessories
- The wire rack, bake pan, and broil rack can be washed in warm, soapy water or placed in the dishwasher.
- Avoid using metal scouring pads or harsh abrasives on the bake pan to prevent damage to its coating.
Troubleshooting
If you encounter any issues with your toaster oven, refer to the following common problems and solutions:
| Problem | Possible Cause | Solution |
|---|---|---|
| Oven does not turn on. | Not plugged in; power outage; faulty outlet. | Ensure the oven is securely plugged into a working outlet. Check circuit breaker. |
| Food is not cooking evenly. | Incorrect rack position; convection fan off; food too close to heating elements. | Adjust rack position. Ensure convection is enabled for even baking. Rotate food halfway through cooking if necessary. |
| Oven produces smoke or odor during first use. | Residual manufacturing oils. | This is normal during the initial burn-off. Ensure good ventilation. Odor should dissipate after first use. |
| Oven exterior gets very hot. | Normal operation for toaster ovens. | This is expected. Always use oven mitts when handling hot items or adjusting controls. Keep clear of flammable materials. |
| Digital display is not working. | Power issue; internal malfunction. | Unplug the oven for a few minutes, then plug it back in. If the issue persists, contact customer support. |
Specifications
Key specifications for the BLACK+DECKER Countertop Convection Toaster Oven CTO6335S:
- Model: CTO6335S
- Brand: BLACK+DECKER
- Color: Silver
- Product Dimensions (D x W x H): 15.5" x 22.8" x 13.4"
- Power Source: Corded Electric
- Control Type: Digital Buttons
- Special Features: Convection, 8 One-Touch Cooking Functions, 120-Minute Digital Timer, Dual Rack Positions, Removable Crumb Tray
- Included Components: Baking Pan, Crumb Tray, Stainless Steel Countertop Convection Oven
- Item Weight: 15.76 pounds
- UPC: 050875805613

Warranty and Support
For warranty information and customer support, please refer to the official BLACK+DECKER website or the documentation included with your purchase. You can also find additional resources, including a detailed user guide, at the following link:
Official User Guide (PDF): https://m.media-amazon.com/images/I/91+BHXpxLSL.pdf
For service, repairs, or any questions regarding your appliance, please contact BLACK+DECKER customer service directly.