
Introduction
The Aria AT-150C Tuning Pegs are designed for classical guitars, providing reliable and precise tuning. These machine heads feature a durable gold-plated finish and a gear ratio of 1:14, which allows for fine adjustments to string tension. This manual provides instructions for the proper installation, operation, and maintenance of your AT-150C tuning pegs.
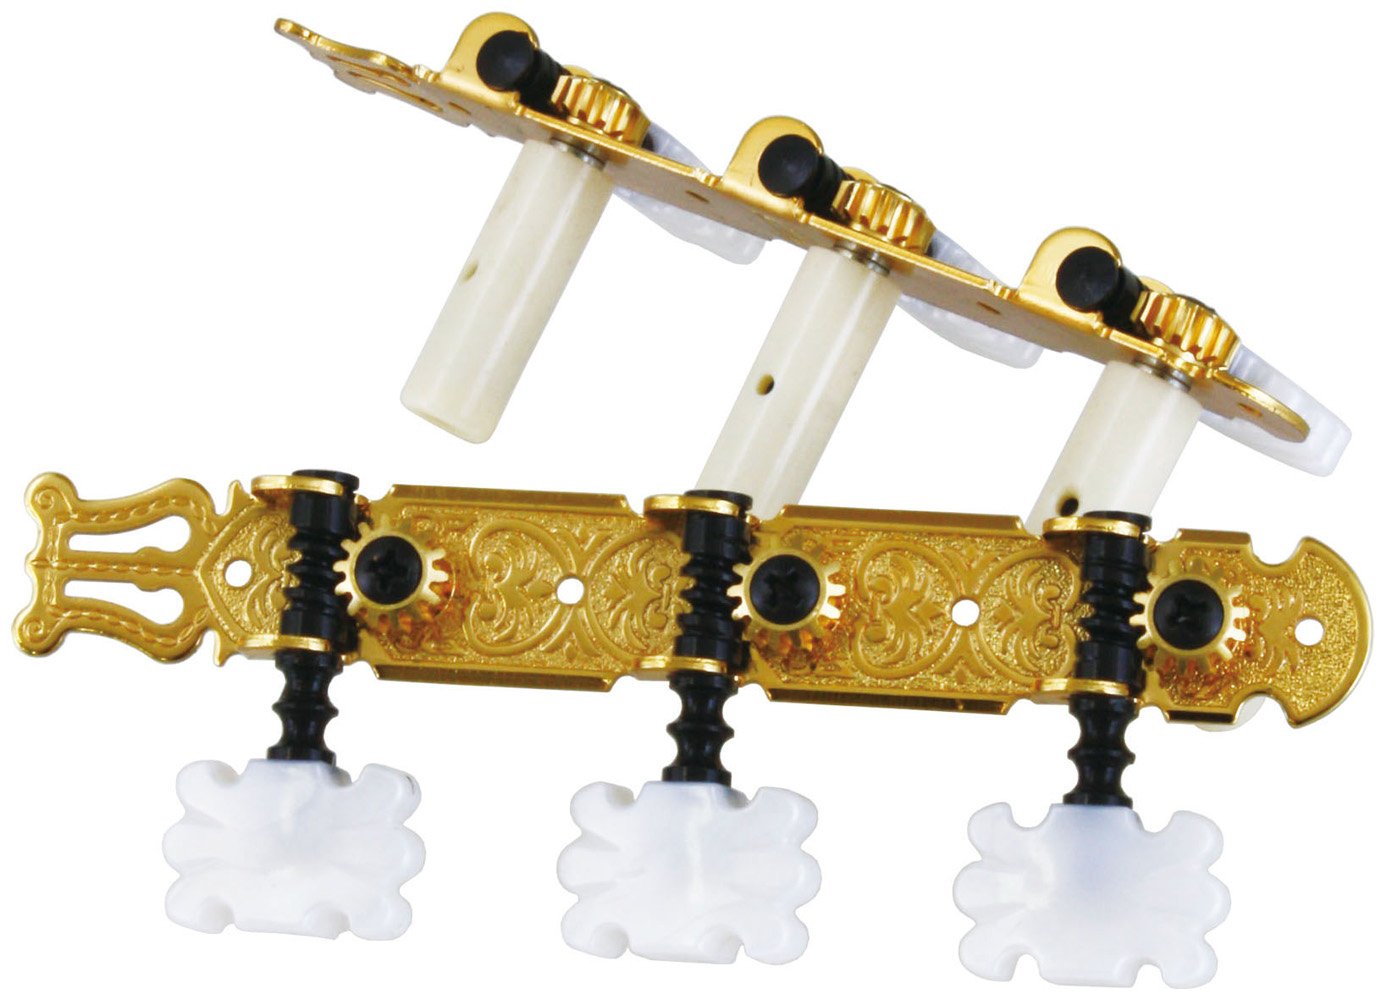
Image 1: Aria AT-150C Classical Guitar Tuning Pegs. This image displays the overall appearance of the tuning pegs, highlighting their gold-plated finish and classical design.
Setup and Installation
Proper installation is crucial for the performance and longevity of your tuning pegs. It is recommended to have this procedure performed by a qualified guitar technician if you are unfamiliar with guitar maintenance.
Required Tools:
- Small Phillips head screwdriver
- String cutters
- New set of classical guitar strings
- Soft cloth
- Optional: Small drill (for pilot holes if needed)
Installation Steps:
- Prepare the Guitar: Lay the classical guitar on a stable, padded surface. Loosen and remove all existing strings.
- Remove Old Tuning Pegs: Using a Phillips head screwdriver, carefully unscrew and remove the screws holding the old tuning pegs to the headstock. Gently remove the old tuning peg assemblies.
- Inspect Headstock: Clean any dust or debris from the headstock's tuning peg holes and screw mounting areas.
- Position New Tuning Pegs: Place the Aria AT-150C tuning peg assemblies into the corresponding holes on the headstock. Ensure the gear mechanisms are facing the correct direction (typically towards the back of the headstock).
- Align and Secure: Align the screw holes on the new tuning pegs with the existing pilot holes on the headstock. If new pilot holes are required, mark their positions carefully and drill small pilot holes to prevent wood splitting. Secure the tuning pegs with the provided screws, tightening them just enough to hold the pegs firmly without overtightening.
- Install New Strings: Thread new classical guitar strings through the bridge and then through the string rollers of the tuning pegs. Follow standard classical guitar stringing techniques, ensuring strings are wound neatly and securely.
- Initial Tuning: Gently bring the strings up to pitch. Allow the strings to stretch and settle for a period before final tuning.
Note: For precise measurements and compatibility, always refer to a technical diagram of the tuning pegs and your guitar's headstock. The Aria AT-150C features standard dimensions for classical guitars, but variations can occur.
Operating Instructions
The Aria AT-150C tuning pegs are designed for smooth and accurate tuning.
- Tuning: To tune a string, turn the corresponding tuning peg knob. Turning the knob clockwise typically increases the pitch, while turning it counter-clockwise decreases the pitch.
- Fine Adjustments: The 1:14 gear ratio means that for every 14 rotations of the tuning knob, the string roller completes one full rotation. This high gear ratio allows for very fine and precise adjustments to achieve accurate pitch.
- String Winding: Ensure strings are wound evenly and securely around the roller to prevent slippage and maintain tuning stability. Typically, 2-3 wraps around the roller are sufficient for classical guitar strings.
Maintenance
Regular maintenance will help preserve the appearance and functionality of your tuning pegs.
- Cleaning: Wipe the gold-plated finish with a soft, dry, lint-free cloth to remove fingerprints and dust. Avoid abrasive cleaners or harsh chemicals, as these can damage the finish.
- Lubrication: The internal gears are typically pre-lubricated. If the pegs become stiff over time, a very small amount of specialized gear lubricant (designed for musical instrument hardware) can be applied to the visible gear teeth. Avoid over-lubrication.
- Screw Tightness: Periodically check the mounting screws for tightness. Loose screws can affect tuning stability. Tighten them gently to prevent stripping the wood.
Troubleshooting
If you encounter issues with your tuning pegs, consider the following common solutions:
- Strings Slipping Out of Tune:
- Ensure strings are properly installed and wound around the roller.
- Check for worn or old strings; replace if necessary.
- Verify that the mounting screws are tight.
- Stiff Tuning Pegs:
- Check for any debris or string fragments caught in the gear mechanism.
- Apply a minimal amount of appropriate gear lubricant if stiffness persists (see Maintenance section).
- Loose Tuning Pegs:
- Gently tighten the mounting screws. Be careful not to overtighten.
- If the screw holes are stripped, professional repair may be required.
Specifications
| Model Number: | AT-150C |
| Brand: | Aria |
| Compatibility: | Classical Guitars |
| Finish: | Gold Plated |
| Gear Ratio: | 1:14 |
| Item Weight: | 6 ounces (approx. 170 grams) |
| Package Dimensions: | 8.66 x 4.92 x 1.57 inches (approx. 22 x 12.5 x 4 cm) |
Warranty and Support
For specific warranty information regarding your Aria AT-150C Tuning Pegs, please refer to the documentation included with your purchase or contact the retailer.
For further product support or inquiries, you may visit the official Aria store or contact their customer service.
Aria Store: Visit the Aria Store on Amazon