1. Introduction
The ConnectPRO UD-12+KIT is a 2-port USB DVI KVM switch designed to allow users to control two computers from a single console (keyboard, mouse, and DVI monitor). This device incorporates ConnectPRO's patented Dynamic Device Mapping (DDM) technology, which ensures a continuous connection between your keyboard, mouse, and the connected computers. This feature enables instant switching between systems without delays typically associated with KVM switches.
The UD-12+KIT supports DVI video resolutions up to 1920x1080 and includes USB 2.0 support for peripherals. Its All-Time Full DDC (Display Data Channel) functionality prevents computers from losing monitor connection, even when not actively selected, ensuring stable display configurations.
2. Package Contents
Please verify that all items listed below are included in your package. If any items are missing or damaged, contact ConnectPRO support.
- 1 x ConnectPRO UD-12+ KVM Switch (2-port USB DVI)
- 1 x Serial Control/Firmware Update Cable
- 2 x KVM Cables (combined DVI and USB, available in 6, 10, or 15 ft lengths)
- 1 x Power Adapter
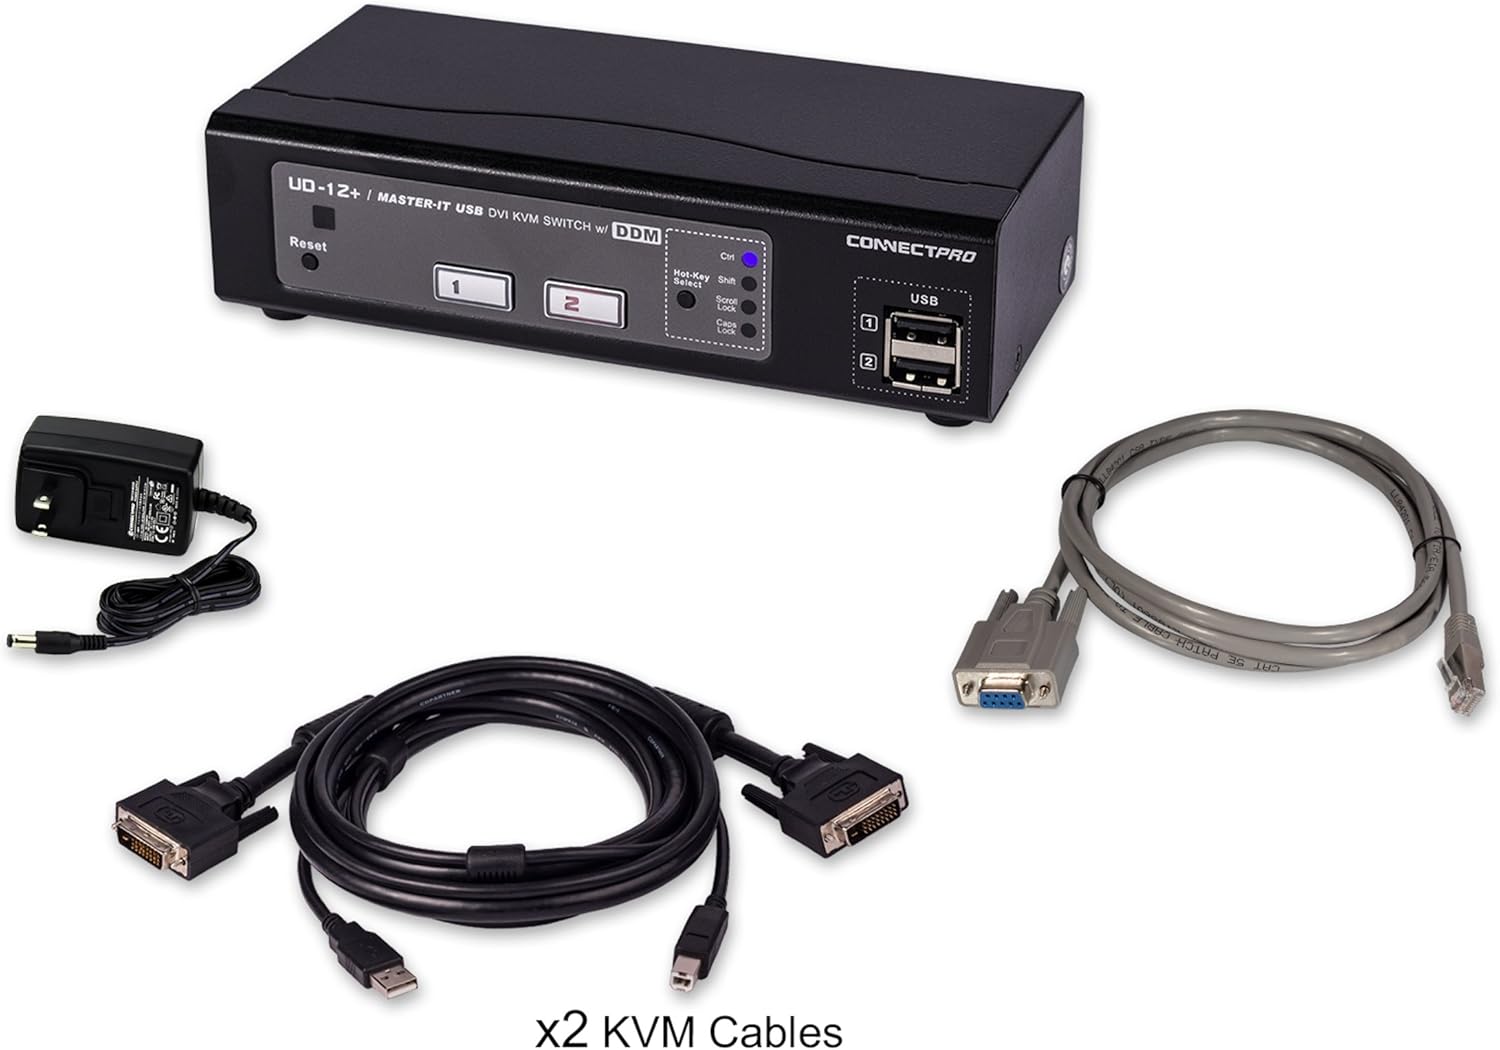
Image: The UD-12+ KVM switch shown with its power adapter and two combined DVI and USB KVM cables.
3. Setup Instructions
Follow these steps to properly set up your ConnectPRO UD-12+KIT KVM switch:
- Power Off Computers: Ensure both computers you intend to connect are powered off.
- Connect Console Devices:
- Connect your DVI monitor to the DVI-I 'Console' port on the rear of the KVM switch.
- Connect your USB keyboard and USB mouse to the dedicated 'Console' USB ports on the rear of the KVM switch.
- Connect Computers to KVM: Use the provided combined KVM cables. Each cable has a DVI and USB connector at one end and a Y-split into DVI and USB connectors at the other. Connect one KVM cable to 'Computer 1' ports (DVI and USB) on the KVM switch and the corresponding DVI and USB ports on your first computer. Repeat this step for 'Computer 2'.
- Connect Power Adapter: Plug the included power adapter into the '5V DC In' port on the rear of the KVM switch, then plug the adapter into a power outlet.
- Power On: Power on the KVM switch. Then, power on your connected computers. The KVM will automatically detect the active computer.

Image: Rear panel of the UD-12+ KVM switch, illustrating the console and computer connection ports.
4. Operating Instructions
The UD-12+KIT offers multiple methods for switching between connected computers:
4.1. Front Panel Buttons
Press the numbered buttons (1 or 2) on the front panel of the KVM switch to directly select the corresponding computer. The active port will be indicated by a green LED.

Image: Front panel of the UD-12+ KVM switch with the '1' button illuminated, indicating the active computer.
4.2. Hot-Key Switching
You can switch between computers using keyboard hot-key commands. The default hot-key sequence is typically a double-tap of the Scroll Lock key followed by the port number (e.g., Scroll Lock, Scroll Lock, 1 for Computer 1). Refer to the full ConnectPRO manual or website for advanced hot-key configurations and options.
4.3. LED Indicators
The KVM switch features multi-colored LEDs to provide status information:
- Green LED: Indicates a computer is connected and active on that port.
- Red LED: Indicates a computer is connected but not powered on, or there is an issue with the DVI connection.
- Different Shades of Green: Distinguish between the currently active port and other connected, but inactive, ports.
5. Maintenance
To ensure optimal performance and longevity of your UD-12+KIT KVM switch, consider the following maintenance guidelines:
- Cleaning: Use a soft, dry cloth to clean the exterior of the KVM switch. Avoid using liquid cleaners or abrasive materials.
- Ventilation: Ensure the KVM switch is placed in a well-ventilated area to prevent overheating. Do not block any ventilation openings.
- Cable Management: Organize cables neatly to prevent strain on connectors and accidental disconnections.
- Firmware Updates: Periodically check the ConnectPRO website for available firmware updates. Firmware updates can improve compatibility and performance. The included serial control cable is used for this purpose.
6. Troubleshooting
If you encounter issues with your UD-12+KIT KVM switch, refer to the following common problems and solutions:
6.1. No Display on Monitor
- Check DVI Cables: Ensure all DVI cables are securely connected between the monitor, KVM, and computers.
- Power Cycle: Power off the KVM switch and all connected computers. Then, power on the KVM, followed by the computers.
- Verify DDC: The UD-12+KIT features All-Time Full DDC. If issues persist, ensure your monitor and graphics card drivers are up to date.
- Cable Type: Note that the included DVI cables are DVI-D. If your setup requires DVI-I (which supports analog VGA signals), you may need to acquire separate DVI-I cables.
6.2. Keyboard or Mouse Not Responding
- Check USB Connections: Ensure your keyboard and mouse are connected to the dedicated 'Console' USB ports on the KVM, and the KVM cables are securely connected to the computers' USB ports.
- KVM Reset Button: Press the 'Reset' button on the front panel of the KVM switch. This can resolve temporary communication issues.
- Specialized Peripherals: Some specialized gaming keyboards or mice with advanced features may not function optimally through a KVM switch due to their unique drivers or communication protocols. ConnectPRO's DDM technology aims to minimize these issues, but direct connection may be required for certain devices.
- USB 2.0 Compatibility: Ensure your peripherals are compatible with USB 2.0 standards.
6.3. Switching Delays or Instability
- Firmware: Ensure your KVM switch has the latest firmware installed.
- Cable Quality: Use the provided ConnectPRO KVM cables. Lower quality or excessively long cables can introduce signal degradation.
7. Specifications
| Feature | Specification |
|---|---|
| Model Number | UD-12+KIT |
| Number of Ports | 2 |
| Video Connector Type | DVI |
| USB Connectivity | USB 2.0 |
| Maximum Resolution | 1920x1080 |
| Operating Voltage | 5 Volts |
| Control Method | Push Button, Hot-Key |
| Compatible Devices | PC, Mac |
| Dimensions (L x W x H) | 2.99 x 6.5 x 1.73 inches |
| Item Weight | 1.17 pounds |
| Color | Black |
8. Warranty and Support
ConnectPRO products are designed for reliability and performance. For specific warranty terms and conditions, please refer to the warranty card included with your purchase or visit the official ConnectPRO website. Warranty details typically cover manufacturing defects for a specified period from the date of purchase.
For technical support, troubleshooting assistance, or to inquire about firmware updates, please contact ConnectPRO directly. You can find contact information and additional resources on the ConnectPRO Store on Amazon or their official company website.