TP-Link TL-MR3420 Wireless N300 3G/4G Router User Manual
Model: TL-MR3420
1. Introduction
The TP-Link TL-MR3420 Wireless N300 3G/4G Router is designed to share a 3G/4G mobile broadband connection wirelessly. By connecting a compatible UMTS/HSPA/EVDO USB modem to the router, a Wi-Fi hotspot is instantly established, allowing multiple devices to access the internet. This router also features a 3G/WAN connection backup strategy, ensuring a continuous internet connection by switching between 3G/4G and WAN (Ethernet) connections as needed. It supports wireless N speeds of up to 300Mbps, suitable for various online activities.
2. Package Contents
- TP-Link TL-MR3420 Wireless N300 3G/4G Router
- Power Adapter
- Ethernet Cable
- Quick Installation Guide
3. Hardware Overview
3.1 Front Panel and LEDs
The front panel of the router features LED indicators that provide information about the device's status, including power, system, WLAN, WAN, LAN, and 3G/4G connection status.

Image: Front view of the TL-MR3420 router, showing the TP-Link logo and status LEDs.
3.2 Side Panel (USB Port)
The side panel includes a USB 2.0 port, primarily used for connecting a compatible 3G/4G USB modem.
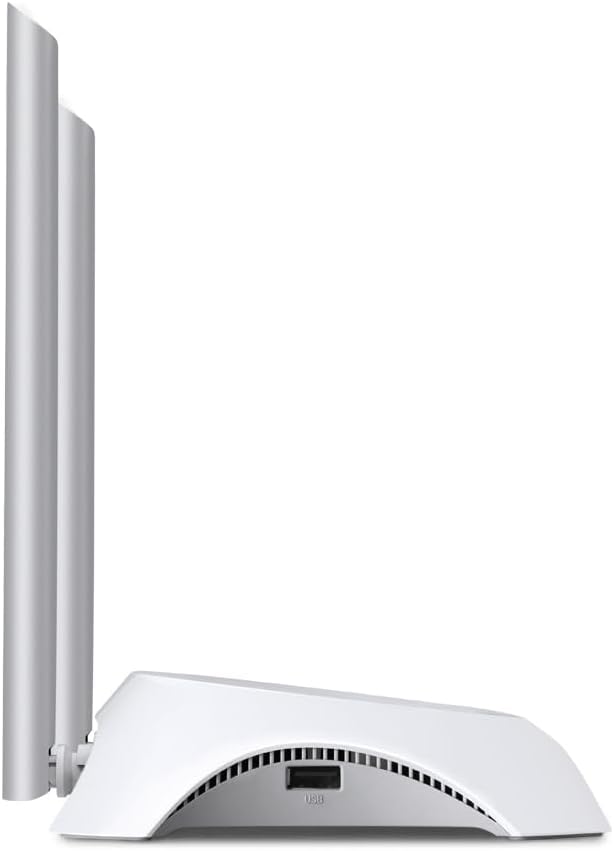
Image: Side view of the TL-MR3420 router, highlighting the USB port for modem connection.
3.3 Rear Panel (Ports and Buttons)
The rear panel provides various ports and buttons for connectivity and control.
- Power Port: Connects to the power adapter.
- Power On/Off Button: Turns the router on or off.
- WAN Port (Blue): Connects to a DSL/Cable modem for traditional internet access.
- LAN Ports (Yellow): Four ports for connecting wired devices like computers or switches.
- WPS/Reset Button: Press for WPS function; press and hold for factory reset.
- Antenna Connectors: For attaching the two external antennas.

Image: Rear view of the TL-MR3420 router, displaying the power port, WAN port, LAN ports, WPS/Reset button, and antenna connectors.
4. Setup Guide
4.1 Physical Connection
- Attach Antennas: Screw the two detachable antennas firmly into their connectors on the rear panel.
- Connect 3G/4G USB Modem: Insert your compatible 3G/4G USB modem into the USB port on the side of the router.
- Power On: Connect the power adapter to the router's power port and plug it into a wall outlet. Press the Power On/Off button if necessary.
- (Optional) Connect to WAN: If using a wired internet connection as a backup or primary, connect an Ethernet cable from your DSL/Cable modem to the blue WAN port on the router.
- (Optional) Connect Wired Devices: Connect your computer or other wired devices to the yellow LAN ports using Ethernet cables.

Image: The TL-MR3420 router with a 3G USB modem connected to its side USB port.
4.2 Initial Configuration (Web Interface)
- Connect to the Router: Connect your computer to the router either via an Ethernet cable to a LAN port or wirelessly using the default Wi-Fi SSID printed on the router's label (e.g., TP-Link_XXXX).
- Access Web Browser: Open a web browser (e.g., Chrome, Firefox) and type
http://tplinkwifi.netorhttp://192.168.0.1(orhttp://192.168.1.1) into the address bar. Press Enter. - Login: Enter the default username and password, which are typically
adminfor both. If these do not work, check the label on the bottom of your router. - Run Quick Setup: Follow the on-screen Quick Setup Wizard to configure your internet connection and wireless settings.
4.3 3G/4G Connection Setup
During the Quick Setup, select 3G/4G Router mode. The router will automatically detect your USB modem. You may need to select your region and ISP, and enter APN (Access Point Name) details if prompted. Ensure your 3G/4G USB modem is compatible with the TL-MR3420.
4.4 WAN Connection Setup (Optional)
If you are using a wired internet connection, configure the WAN settings. This can be done via Dynamic IP, Static IP, or PPPoE, depending on your Internet Service Provider (ISP) requirements. The TL-MR3420 supports a 3G/WAN failover strategy, allowing you to set a preferred connection (3G/4G or WAN) and use the other as a backup.
4.5 Wireless Network Setup
Set your desired Wireless Network Name (SSID) and a strong password (WPA/WPA2 Personal recommended) for your Wi-Fi network. This will secure your wireless connection.
5. Operating the Router
5.1 Understanding LED Indicators
| LED | Status | Indication |
|---|---|---|
| Power | On | Router is powered on. |
| System | Flashing | Router is working normally. |
| WLAN | On/Flashing | Wireless function is enabled/data is being transmitted. |
| WAN | On/Flashing | WAN port is connected/data is being transmitted. |
| LAN (1-4) | On/Flashing | Corresponding LAN port is connected/data is being transmitted. |
| 3G/4G | On/Flashing | 3G/4G modem is connected and working/data is being transmitted. |
5.2 Connecting Devices
- Wireless Devices: Search for your Wi-Fi network (SSID) on your device and enter the password you configured.
- Wired Devices: Connect an Ethernet cable from your device to any of the yellow LAN ports on the router.
5.3 3G/WAN Failover
The router can be configured to use either 3G/4G or WAN as the primary internet connection, with the other serving as a backup. If the primary connection fails, the router will automatically switch to the backup, ensuring continuous internet access. This setting can be managed in the router's web interface under Network > WAN Backup.
6. Maintenance
6.1 Firmware Upgrade
Regularly check for and install firmware updates from the TP-Link official website. Firmware updates can improve performance, add new features, and fix bugs. Download the correct firmware for your model and follow the instructions provided on the TP-Link support page for upgrading via the web interface (System Tools > Firmware Upgrade).
6.2 Backup and Restore Configuration
You can back up your router's configuration settings to a file on your computer. This allows you to restore your settings quickly after a factory reset or if you need to revert to a previous configuration (System Tools > Backup & Restore).
6.3 System Reboot
If the router is experiencing issues, a simple reboot can often resolve them. You can reboot the router from the web interface (System Tools > Reboot) or by unplugging and replugging the power adapter.
6.4 Factory Reset
A factory reset will revert all settings to their default values. This can be done by pressing and holding the WPS/Reset button on the rear panel for approximately 5-10 seconds until the System LED flashes rapidly, or via the web interface (System Tools > Factory Defaults).
7. Troubleshooting
- Cannot access the internet:
- Check LED indicators: Ensure Power, System, WLAN, and 3G/4G (or WAN) LEDs are on or flashing correctly.
- Verify physical connections: Ensure all cables are securely connected.
- Check 3G/4G modem: Ensure it is properly inserted and recognized by the router.
- Confirm ISP settings: Verify that your 3G/4G or WAN settings (APN, connection type) are correct in the router's web interface.
- Reboot the router and modem.
- Wireless connection issues:
- Ensure WLAN LED is on/flashing.
- Verify correct Wi-Fi SSID and password.
- Move closer to the router to check signal strength.
- Change wireless channel in router settings to avoid interference.
- Slow internet speed:
- Check your 3G/4G signal strength or WAN connection speed.
- Ensure no other devices are heavily using bandwidth.
- Update router firmware.
8. Specifications
| Feature | Detail |
|---|---|
| Model Name | TL-MR3420 |
| Wireless Standard | IEEE 802.11n, 802.11g, 802.11b |
| Wireless Speed | Up to 300Mbps |
| Frequency Band | 2.4 GHz |
| Antenna Type | 2x 5dBi Detachable Omni Directional Antennas |
| Interfaces | 1x 10/100Mbps WAN Port, 4x 10/100Mbps LAN Ports, 1x USB 2.0 Port |
| Buttons | WPS/Reset Button, Power On/Off Button |
| Dimensions (W x D x H) | 11.34 x 8.9 x 2.8 inches (Product Dimensions) |
| Item Weight | 9.5 ounces |
| Power Supply | 12VDC / 1A (External Power Adapter) |
| Wireless Security | 64/128-bit WEP, WPA/WPA2, WPA-PSK/WPA2-PSK encryption |
| Compatible Devices | Personal Computer, UMTS/HSPA/EVDO USB Modems |
9. Warranty and Support
9.1 Product Warranty
The TP-Link TL-MR3420 Wireless N300 3G/4G Router typically comes with a 2-year limited warranty. Please refer to the warranty card included in your package or visit the official TP-Link website for detailed warranty terms and conditions specific to your region.
9.2 Technical Support
For technical assistance, troubleshooting, or further inquiries, please visit the official TP-Link support website. You can find FAQs, firmware updates, and contact information for customer support.
- TP-Link Support Website: www.tp-link.com/support/