1. Introduction
This manual provides essential instructions for the safe and effective use of the Mitutoyo 543-264B Absolute LCD Digimatic Indicator ID-C. This precision instrument is designed for accurate measurement in bore gage applications, featuring an absolute encoder for reliable readings. Please read this manual thoroughly before operation and retain it for future reference.
2. Safety Precautions
- Always handle the indicator with care to prevent damage to the precision components.
- Do not expose the indicator to extreme temperatures, humidity, or direct sunlight.
- Avoid dropping or subjecting the instrument to strong impacts.
- Keep the measuring surfaces clean and free from dust, oil, or other contaminants.
- Do not attempt to disassemble or modify the indicator, as this may void the warranty and cause malfunction.
3. Product Overview
The Mitutoyo 543-264B is a compact and robust digital indicator. It features an LCD display for clear readings and an absolute sensor that retains the origin point even when the power is turned off. The lug back design allows for versatile mounting options, particularly for bore gage setups.
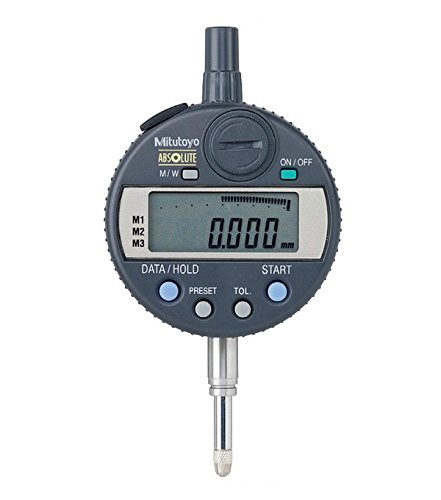
This image displays a side view of the Mitutoyo 543-264B Absolute LCD Digimatic Indicator ID-C. Key components visible include the main body, the stem, the measuring contact point, and the knurled adjustment knob at the top. The digital display area is on the opposite side, not visible in this view.
4. Setup
- Unpacking: Carefully remove the indicator from its packaging. Inspect for any visible damage.
- Battery Installation: If not already installed, open the battery cover (usually on the back or side) and insert the specified battery type, ensuring correct polarity.
- Mounting: Attach the indicator to your bore gage or fixture using the lug back. Ensure it is securely fastened to prevent movement during measurement. The 8mm stem diameter is standard for many mounting solutions.
- Power On: Press the ON/OFF button to power on the indicator. The LCD display should illuminate.
- Initial Zero Setting: Before taking measurements, ensure the indicator is properly zeroed according to your application's requirements. This may involve setting it against a master ring or a known reference point.
5. Operating Instructions
- Zero Setting: Press the ZERO/ABS button to set the current spindle position as the zero reference point. In ABS mode, this button switches between absolute and incremental measurement.
- Measurement: Gently bring the measuring contact point into contact with the workpiece. The displacement will be displayed on the LCD. For bore gage applications, ensure the indicator is properly aligned within the bore.
- Reading the Display: Read the measurement value directly from the LCD. The indicator provides a 0.001mm graduation for precise readings.
- Hold Function (if available): Some models may have a HOLD button to freeze the displayed value.
- Unit Conversion (if available): If your model supports it, use the mm/inch button to switch between metric and imperial units.
- Power Off: Press the ON/OFF button to turn off the indicator when not in use to conserve battery life. The absolute position will be retained.
6. Maintenance
- Cleaning: Wipe the indicator body and measuring surfaces with a clean, dry, lint-free cloth. For stubborn dirt, a cloth lightly dampened with isopropyl alcohol may be used, avoiding the display area.
- Storage: Store the indicator in its original case or a protective container in a dry, stable environment, away from direct sunlight and extreme temperatures.
- Battery Replacement: When the low battery indicator appears on the display, replace the battery promptly with the specified type (e.g., SR44). Ensure correct polarity.
- Calibration: Regular calibration by a qualified technician is recommended to maintain accuracy, especially for critical applications.
7. Troubleshooting
| Problem | Possible Cause | Solution |
|---|---|---|
| Display does not turn on | Dead battery; Incorrect battery installation | Replace battery; Check battery polarity |
| Inaccurate readings | Dirty measuring surfaces; Loose mounting; Indicator not zeroed correctly; Environmental factors | Clean surfaces; Secure mounting; Re-zero indicator; Ensure stable environment |
| Display shows error message | Internal malfunction; Sensor issue | Try turning off and on; If persistent, contact customer support |
8. Specifications
- Model Number: 543-264B
- Range: 0-12.7mm
- Graduation: 0.001mm
- Accuracy: -0.003mm
- Thread: M2.5X0.45
- Stem Diameter: 8mm
- Back Type: Lug Back
- Item Weight: 290 g
- Product Dimensions: 19.3 x 10.92 x 7.62 cm
9. Warranty Information
Mitutoyo products are manufactured to high standards and typically come with a manufacturer's warranty against defects in materials and workmanship. Please refer to the warranty card included with your product or visit the official Mitutoyo website for specific warranty terms and conditions applicable to the 543-264B model. Keep your proof of purchase for warranty claims.
10. Customer Support
For technical assistance, service, or inquiries regarding your Mitutoyo 543-264B Absolute LCD Digimatic Indicator ID-C, please contact your local Mitutoyo distributor or visit the official Mitutoyo website. Provide the model number (543-264B) and a detailed description of your issue when seeking support.