Introduction
Thank you for choosing the tectake Ice Maker Model 400162. This appliance is designed to produce clear, high-quality ice cubes efficiently for your home or small office use. Please read this manual carefully before operating the device to ensure safe and correct usage. Keep this manual for future reference.

Image: The tectake Ice Maker Model 400162 in silver finish.
Important Safety Instructions
- Read all instructions before use.
- Do not immerse the appliance, power cord, or plug in water or other liquids.
- Supervise children when the appliance is in use.
- Unplug from the outlet when not in use and before cleaning.
- Do not operate any appliance with a damaged cord or plug, or after the appliance malfunctions or has been damaged in any manner.
- Use only manufacturer-recommended attachments.
- Do not use outdoors.
- Ensure the appliance is placed on a stable, level surface.
- Do not block ventilation openings.
Product Features
- Produces 24 clear, bubble-free ice cubes per cycle.
- Fast ice production: 15-30 minutes per cycle.
- Daily production capacity of up to 13 kg.
- Intuitive LED control panel for easy operation.
- Automatic shut-off when ice basket is full or water tank is empty.
- Compact and elegant silver design.
- Quiet operation (approx. 40 dB).
- Includes an ice bucket and ice scoop.

Image: Key features including clear ice, high capacity, and included accessories.
Setup
- Unpacking: Carefully remove the ice maker from its packaging. Retain packaging for future transport or storage.
- Placement: Place the ice maker on a firm, level surface away from direct sunlight and heat sources. Ensure adequate ventilation around the unit.
- Initial Cleaning: Before first use, clean the interior of the ice maker, including the water tank, ice basket, and ice scoop, with a mild detergent and warm water. Rinse thoroughly and dry.
- Power Connection: Plug the power cord into a grounded electrical outlet (220V).
- Water Fill: Open the water tank lid and fill the tank with potable water up to the MAX fill line. Do not overfill.

Image: Rear view of the ice maker, highlighting the water drainage point and non-slip feet for stable placement.
Operating Instructions
- Power On: Press the 'ON/OFF' button on the control panel to start the ice making process. The 'ICE' indicator light will illuminate.
- Ice Production: The machine will automatically begin producing ice. The first cycle may take slightly longer. Ice cubes will be deposited into the ice basket.
- Monitoring: The LED display will indicate the status of the machine.
- 'ADD WATER' indicator: Illuminates when the water tank needs refilling.
- 'FULL ICE' indicator: Illuminates when the ice basket is full, and the machine will pause operation.
- Collecting Ice: Use the provided ice scoop to remove ice cubes from the basket.
- Power Off: Press the 'ON/OFF' button again to turn off the machine.

Image: Close-up of the intuitive control panel with LED indicators for water level and ice basket status.
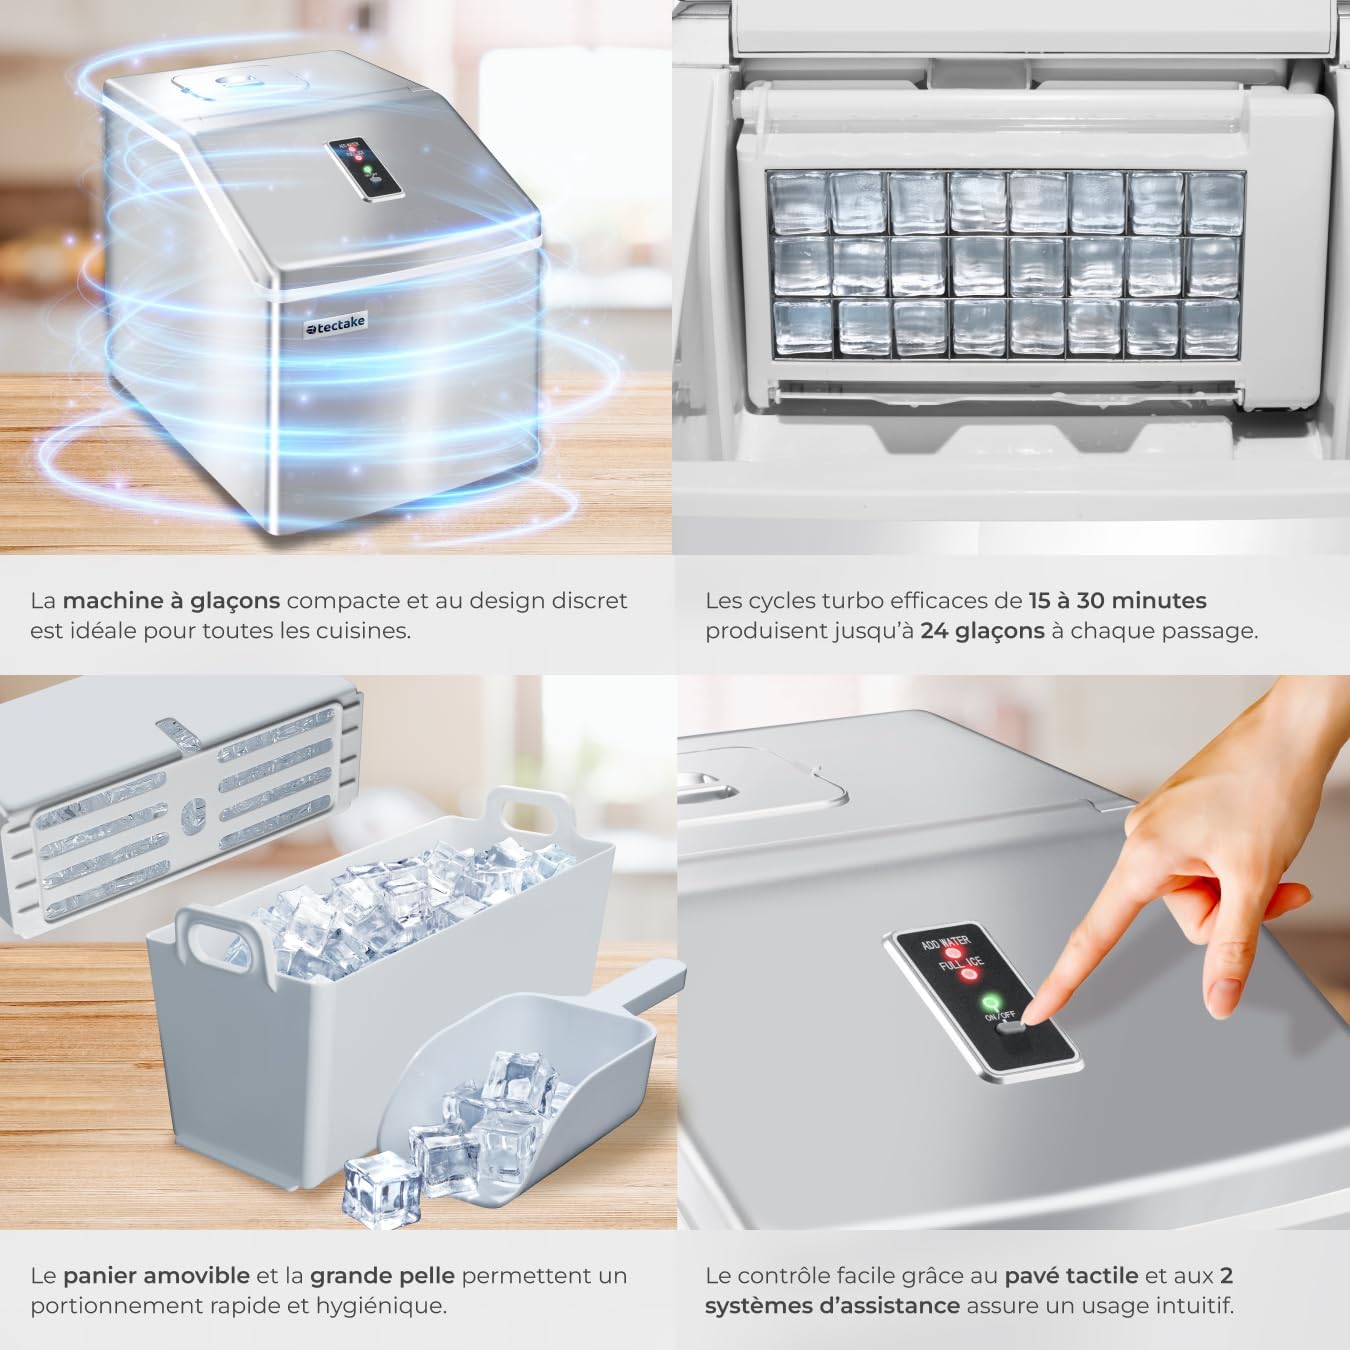
Image: Interior view of the ice maker showing the ice-making tray and newly formed ice cubes.
Maintenance and Cleaning
Regular cleaning and maintenance will prolong the life of your ice maker and ensure hygienic ice production.
- Daily Cleaning: After each use, drain any remaining water from the reservoir and wipe the interior with a soft, damp cloth.
- Weekly Cleaning: For thorough cleaning, unplug the unit. Remove the ice basket. Clean the water tank and ice-making components with a solution of water and mild detergent. Rinse thoroughly with clean water.
- Descaling: If hard water is used, mineral deposits may accumulate. Descale the unit every 1-2 months using a descaling solution suitable for kitchen appliances, following the product's instructions.
- Exterior Cleaning: Wipe the exterior with a soft, damp cloth. Do not use abrasive cleaners or solvents.
- Storage: If storing for an extended period, ensure the unit is completely dry. Drain all water, clean thoroughly, and store in a cool, dry place.
Troubleshooting
| Problem | Possible Cause | Solution |
|---|---|---|
| Ice maker not working | No power; 'ADD WATER' light on. | Check power connection; Fill water tank. |
| Ice cubes are small or cloudy | Water temperature too high; Mineral deposits. | Use colder water; Descale the unit. |
| 'FULL ICE' light on, but basket not full | Ice sensor blocked or dirty. | Clean the ice sensor. |
| Water leaks from the unit | Drain plug not properly sealed; Unit not level. | Ensure drain plug is secure; Place unit on a level surface. |
| Unusual noise during operation | Unit not level; Internal component issue. | Ensure unit is level; If noise persists, contact support. |
Specifications
| Feature | Detail |
|---|---|
| Brand | tectake |
| Model Name | 400162 |
| Product Dimensions (D x W x H) | 37 cm x 29 cm x 35.5 cm |
| Water Tank Capacity | 2.2 liters |
| Power | 130 Watts |
| Voltage | 220 Volts |
| Item Weight | 10.5 kg |
| Material | Plastic |
| Operating Cycle | 15 - 30 minutes |
| Daily Production Capacity | Up to 13 kg |
| Included Components | Ice maker with ice bucket, Ice scoop, User manual |

Image: Product dimensions diagram for the tectake Ice Maker.
Warranty and Support
This product comes with a standard manufacturer's warranty. For detailed warranty information, please refer to the warranty card included with your purchase or visit the official tectake website. For technical support, spare parts, or service inquiries, please contact tectake customer service through their official channels.
You can find more information and contact details on the tectake Brand Store.