BLACK+DECKER BDSBC10A
Black+Decker BD 0690101 Car Battery Charger User Manual
Model: BDSBC10A
1. Product Overview
The Black+Decker BD 0690101 Car Battery Charger is designed for ease of use and intelligent charging. It automatically detects battery size, type, and optimal charging speed. The intuitive LCD screen guides the user through the entire charging process, supporting multiple languages for clear communication. This device incorporates a safe and intelligent 4-step charging process to ensure optimal battery health and longevity.

Figure 1.1: The Black+Decker BD 0690101 Car Battery Charger, showcasing its compact design and clear display.
2. Key Features
- Maintenance Mode: Keeps the battery in optimal condition after full charge.
- Engine Test Function: Allows for basic diagnostics of the vehicle's engine.
- High-Frequency Charger: Ensures efficient and rapid charging.
- Voice-Controlled Menu: Provides audible guidance and feedback.
- Battery Diagnosis: Intelligent digital diagnostic function monitors battery voltage and identifies potential faults.
- Auto Select Technology: Automatically determines optimal charging settings based on battery type and size.
- Multilingual Support: Display messages and information available in various languages.
- Reverse Polarity Protection: Prevents damage from incorrect battery connections.
- Digital Display: Clear LCD with scroll function for easy reading of status and messages.
- Integrated Carrying Handle: For convenient portability.
3. Setup Instructions
Before connecting the charger, ensure the area is well-ventilated and free from flammable materials. Always wear appropriate safety gear, including eye protection.
3.1 Unpacking and Inspection
Carefully remove the charger and all accessories from the packaging. Inspect the unit for any signs of damage. Do not use the charger if it appears damaged.
3.2 Connecting to the Battery
- Ensure the charger is unplugged from the AC power outlet.
- Connect the red positive (+) clamp to the positive (+) terminal of the battery.
- Connect the black negative (-) clamp to the negative (-) terminal of the battery. If charging a battery installed in a vehicle, connect the negative clamp to the vehicle chassis away from the battery and fuel line.

Figure 3.1: Proper connection of the charger clamps to a car battery terminals.
3.3 Connecting to Power
Once the battery clamps are securely connected, plug the charger's AC power cord into a standard 230V AC wall outlet.

Figure 3.2: The charger connected to both the battery and a wall power outlet, ready for operation.
4. Operating Instructions
The Black+Decker charger features Auto Select technology, simplifying the charging process.
4.1 Initial Power On and Language Selection
Upon plugging in, the charger will power on. You may be prompted to select your preferred language. Use the controls to navigate and confirm your choice. The charger will store this setting for future use.
4.2 Automatic Charging Process (4-Phase Technology)
After selecting the desired application (e.g., car battery charging), the charger automatically initiates the optimal charging process. The integrated microprocessor control ensures a fast, safe, and complete charge through four distinct phases:
- Phase 1 – Battery Status Test: Before charging begins, the charger performs a diagnostic check of the battery connections and overall health to prevent damage from incorrect polarity or existing faults.
- Phase 2 – Bulk Charging: The battery is rapidly charged up to approximately 80% of its capacity using a high-current charge.
- Phase 3 – Absorption Charging: A slower, controlled charge is applied to bring the battery up to 100% capacity, preventing overcharging and ensuring a complete fill.
- Phase 4 – Maintenance Charging (Float Mode): Once fully charged, the charger switches to a maintenance mode, applying a small, continuous current to keep the battery at full charge without overcharging, ideal for long-term storage.

Figure 4.1: A close-up view of the charger's digital display, indicating the 'CHARGING' status and battery level.
4.3 Display Indicators
The LCD screen provides real-time information:
- Charging Status: Displays 'CHARGING' during the process.
- Battery Level: A graphical indicator shows the approximate charge percentage.
- Full Charge Indicator: When the battery is fully charged, the display will show 'BATTERY FULLY CHARGED' and a green status indicator will illuminate.
- Error Messages: The display will show specific error codes or messages if a fault is detected (e.g., reverse polarity, faulty battery).
5. Maintenance
Regular maintenance ensures the longevity and optimal performance of your Black+Decker battery charger.
5.1 Cleaning
Disconnect the charger from both the AC outlet and the battery before cleaning. Use a soft, dry cloth to wipe down the exterior of the charger. Do not use abrasive cleaners or solvents. Keep the ventilation openings clear of dust and debris.
5.2 Cable and Clamp Inspection
Periodically inspect the charging cables and clamps for any signs of wear, cuts, or corrosion. Replace damaged cables immediately to prevent electrical hazards.
5.3 Storage
Store the charger in a cool, dry place when not in use. Ensure the cables are neatly coiled and the clamps are not touching each other or any metal surfaces. The integrated cable management system helps keep cables tidy.

Figure 5.1: The charger's compact design and integrated handle make it easy to carry and store.
6. Troubleshooting
If you encounter issues with your charger, refer to the following common problems and solutions:
| Problem | Possible Cause | Solution |
|---|---|---|
| Charger does not power on. | No AC power; faulty outlet; damaged power cord. | Check AC outlet with another device. Inspect power cord for damage. Ensure charger is securely plugged in. |
| Charger displays an error message (e.g., reverse polarity). | Incorrect battery connection; faulty battery. | Disconnect charger, re-connect clamps ensuring correct polarity (+ to +, - to -). If error persists, battery may be faulty and require professional assessment. |
| Battery is not charging or charging slowly. | Battery is severely discharged; battery is sulfated; incorrect application selected. | Ensure correct application is selected. For deeply discharged batteries, it may take longer to initiate charging. If battery is old or damaged, it may not accept a charge. |
| Display is blank or frozen. | Temporary software glitch; power interruption. | Unplug the charger from the AC outlet for 30 seconds, then plug it back in to reset. |
If the problem persists after attempting these solutions, please contact customer support.
7. Specifications
| Specification | Value |
|---|---|
| Brand | BLACK+DECKER |
| Model Number | BDSBC10A |
| Input Voltage | 230V AC |
| Output Voltage | 12V DC |
| Output Current | 10A |
| Weight | 2.18 kg (approx. 4.8 lbs) |
| Color | Black/White |
| Compliance | CE |
| Battery Type Compatibility | Lead-acid (Wet, Gel, AGM) |
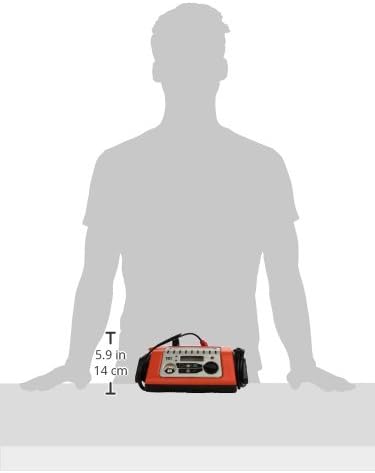
Figure 7.1: Dimensional overview of the charger, indicating its compact size for easy handling and storage.
8. Warranty and Support
For warranty information and customer support, please refer to the documentation included with your purchase or visit the official Black+Decker website. Keep your proof of purchase for any warranty claims.