Orbit 62062N
Orbit 62062N Digital Outlet and Manual Outlet Two Valve Water Timer User Manual
Model: 62062N
Introduction
This manual provides detailed instructions for the installation, programming, and maintenance of your Orbit 62062N Digital Outlet and Manual Outlet Two Valve Water Timer. This device is designed to automate your watering schedule for one outlet while providing a separate manual outlet for general hose use. Please read this manual thoroughly before operating the timer to ensure proper function and longevity.
Safety Information
- For outdoor use with cold water only. Do not use with hot water.
- Do not submerge the timer in water.
- Protect from freezing temperatures. Remove the timer from the faucet and store indoors during winter months to prevent damage.
- Use only alkaline batteries of the specified type. Do not mix old and new batteries or different battery types.
- Keep out of reach of children.
Setup
1. Battery Installation
- Locate the battery compartment on the back of the timer.
- Slide the battery tray out.
- Insert two (2) AA alkaline batteries, ensuring correct polarity (+/-).
- Slide the battery tray back into the compartment until it clicks securely.
- The timer display should activate.
2. Attaching to Faucet
Screw the timer onto any standard outdoor garden faucet. Hand-tighten only. Do not use tools, as this may damage the timer or faucet threads. Ensure a snug fit to prevent leaks.
3. Connecting Hoses
- Connect your watering hose to the programmable outlet (typically the bottom outlet).
- If desired, connect a second hose to the manual outlet (typically the side outlet).
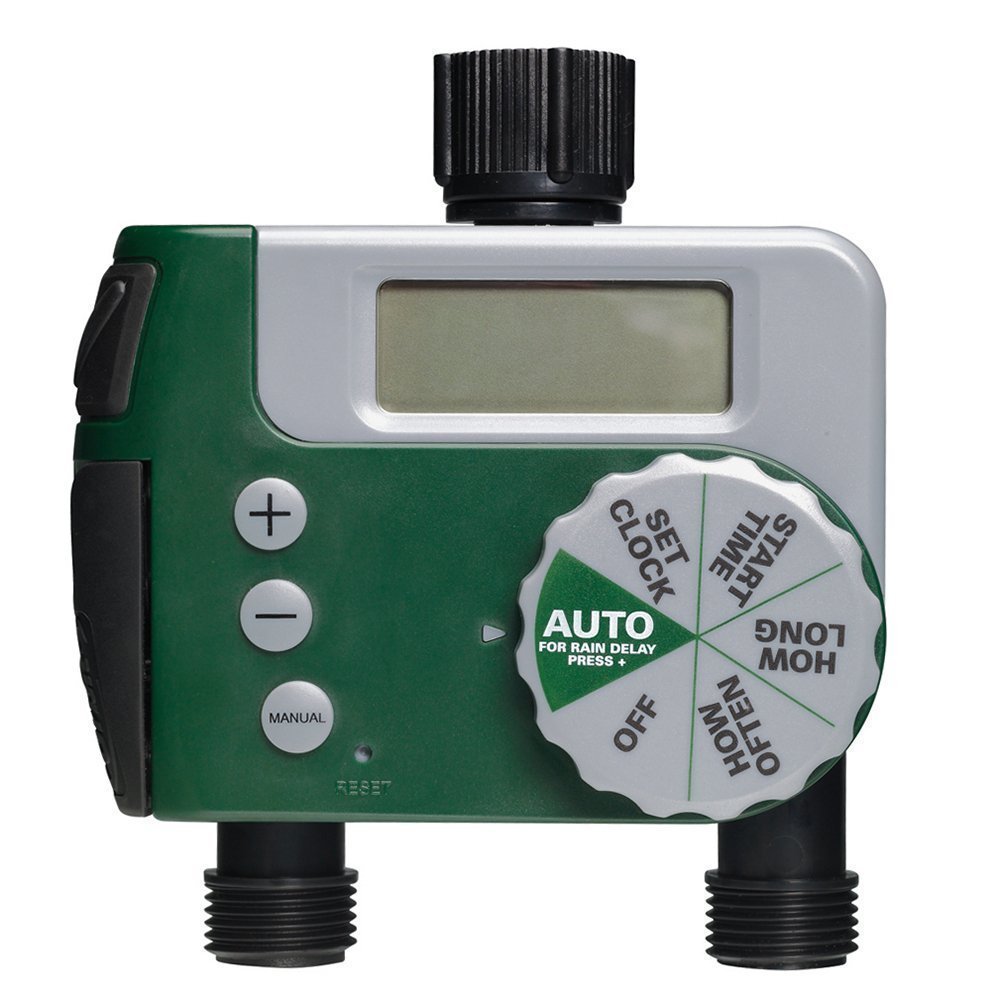
Image: The Orbit 62062N Digital Water Timer installed on an outdoor faucet, with two green hoses connected to its outlets. The timer's digital display and control dial are visible. This setup illustrates how the timer integrates into a typical garden watering system.
Operating Instructions
The timer features a large dial for easy navigation through programming steps and three buttons (+, -, AUTO/ON/DELAY) for adjustments and manual control.
1. Setting the Clock
- Turn the dial to SET CLOCK.
- Use the + and - buttons to set the current time.
- Press the AUTO/ON/DELAY button to confirm and move to AM/PM selection.
- Use + and - to select AM or PM, then press AUTO/ON/DELAY to confirm.
2. Programming the Automatic Valve
Follow these steps to set your desired watering schedule for the programmable outlet:
- Turn the dial to START TIME. Use + and - to set the desired watering start time. Press AUTO/ON/DELAY to confirm.
- Turn the dial to HOW LONG. Use + and - to set the duration of watering (from 1 minute to 240 minutes). Press AUTO/ON/DELAY to confirm.
- Turn the dial to HOW OFTEN. Use + and - to set the frequency (e.g., every 6 hours, 12 hours, 1 day, 2 days, up to 7 days). Press AUTO/ON/DELAY to confirm.
- Turn the dial to AUTO. The timer is now programmed and will water according to your settings.
3. Using the Manual Valve
The manual valve operates independently of the programmed schedule. To use it:
- Locate the manual valve lever on the side of the timer.
- Pull the lever forward to open the valve and allow water flow.
- Push the lever back to close the valve and stop water flow.
4. Rain Delay Feature
To conserve water during rainy periods, you can temporarily pause your watering schedule:
- Ensure the dial is set to AUTO.
- Press the AUTO/ON/DELAY button for 3 seconds. The display will show "DELAY" and the delay duration.
- Use the + and - buttons to select a delay of 24, 48, or 72 hours.
- The timer will automatically resume its schedule after the selected delay period.
- To cancel a rain delay, press the AUTO/ON/DELAY button again for 3 seconds.
5. Turning Off the Timer
To stop all automatic watering, turn the dial to OFF. The manual valve will still function independently.
Maintenance
- Battery Replacement: Replace batteries annually or when the low battery indicator appears on the display.
- Cleaning: Periodically check the filter washer at the inlet for debris and clean if necessary to ensure proper water flow.
- Winterization: Before the first frost, remove the timer from the faucet, remove batteries, and store the unit in a dry, frost-free location. Failure to do so will void the warranty and can cause permanent damage.
Troubleshooting
| Problem | Possible Cause | Solution |
|---|---|---|
| Timer does not turn on or display is blank. | Dead or incorrectly installed batteries. | Replace batteries with new AA alkaline batteries, ensuring correct polarity. |
| Water does not flow from the automatic outlet. |
|
|
| Water is leaking from the timer connections. |
|
|
| Timer is not watering at the programmed time. |
|
|
Specifications
- Model: 62062N
- Power Source: 2 x AA Alkaline Batteries (not included)
- Product Dimensions: 3.3 x 8 x 10.3 inches
- Item Weight: 1.35 pounds
- Operating Water Pressure: 25-100 PSI (pounds per square inch)
- Operating Temperature: 40-110°F (4-43°C)
- Outlets: 1 Programmable, 1 Manual
Warranty and Support
Orbit products are designed for durability and performance. For warranty information, technical support, or assistance with your Orbit 62062N water timer, please visit the official Orbit website or contact their customer service department. Keep your purchase receipt as proof of purchase for warranty claims.
Contact Information: Please refer to the Orbit packaging or official website for the most current customer support contact details.
Ask a question about this manual
Ask about setup, troubleshooting, compatibility, parts, safety, or missing instructions. Manuals+ will review the question and use this page’s manual context to help answer it.