1. Introduction
The Dell M210X Mobile Series Projector is designed for presentations requiring portability and clear image quality. It features a lightweight design, accurate color reproduction, and multiple connectivity options, making it suitable for various environments including business, education, and home cinema.
Key features include:
- Compact and lightweight design for easy transport.
- Up to 2000 ANSI lumens (max) brightness for effective presentations in various lighting conditions.
- XGA (1024x768) native resolution, providing enhanced detail compared to SVGA (800x600).
2. Setup
2.1 Unpacking the Projector
Carefully remove all components from the packaging. The box should contain the Dell M210X projector, a power cable, and potentially 3D-ready glasses, an HDMI cable, a DisplayPort cable, and a USB cable, depending on your specific package.
2.2 Projector Placement
Place the projector on a stable, flat surface such as a tabletop. Ensure there is adequate ventilation around the projector to prevent overheating.

Figure 2.2.1: Front and side view of the Dell M210X Projector. This image shows the projector's lens and general form factor, useful for understanding placement.
2.3 Connecting to Power
Connect the power cable to the projector's power inlet and then to a grounded electrical outlet.
2.4 Connecting Input Sources
The Dell M210X offers various connectivity options. Identify the appropriate port on the rear of the projector for your source device (e.g., laptop, gaming console, smartphone).

Figure 2.4.1: Rear view of the Dell M210X Projector, highlighting the various input and output ports. This includes USB Remote, VGA In, HDMI, S-Video In, Video In, Audio Out, and Audio In ports, along with the power inlet.
- HDMI: For high-definition digital video and audio.
- VGA (D-Sub): For analog video connection to computers.
- USB: For connecting USB devices or for remote control functionality.
- DisplayPort: For digital video and audio.
- S-Video: For standard definition video.
- Composite Video: For standard definition video (yellow RCA connector).
- Audio In/Out: For analog audio connections.
3. Operating the Projector
3.1 Powering On/Off
Press the power button on the projector's control panel or the remote control to turn the unit on. Press it again to initiate the shutdown sequence. Allow the projector to cool down completely before unplugging or moving it.

Figure 3.1.1: Top view of the Dell M210X Projector, showing the integrated control panel. This panel includes buttons for power, menu navigation, and input selection.
3.2 Adjusting Image Focus and Zoom
Use the focus and zoom rings located around the projector lens to achieve a clear and appropriately sized image on your screen or wall.
3.3 Input Source Selection
Use the 'Input' button on the control panel or remote to cycle through available input sources (HDMI, VGA, S-Video, etc.) until your desired source is displayed.
4. Maintenance
4.1 Lamp Replacement
The projector lamp has an estimated operating life of 2000 hours. When the lamp indicator light illuminates or the image brightness significantly decreases, the lamp may need replacement. Refer to the full service manual for detailed lamp replacement instructions. Always ensure the projector is unplugged and cooled down before attempting lamp replacement.
4.2 Cleaning the Projector
- Lens: Gently wipe the projector lens with a soft, lint-free cloth specifically designed for optical surfaces. Do not use abrasive cleaners.
- Vents: Use a soft brush or compressed air to clear dust from the air intake and exhaust vents. This helps maintain proper airflow and prevents overheating.
- Exterior: Wipe the exterior casing with a soft, damp cloth. Avoid harsh chemicals.
4.3 Cooling Considerations
The Dell M210X projector generates heat during operation. It is crucial to allow sufficient cooling time after use. Do not immediately pack the projector into its carrying case or restrict airflow around it after powering off. Allow at least 10-15 minutes for the unit to cool down to prevent damage and prolong component life.
5. Troubleshooting
This section addresses common issues you might encounter with your Dell M210X projector.
- No Image Displayed:
- Ensure the projector is powered on and the power indicator light is active.
- Verify that the input source cable (HDMI, VGA, etc.) is securely connected to both the projector and the source device.
- Select the correct input source using the projector's control panel or remote.
- Check the source device's display settings to ensure it is outputting to an external display.
- Blurry or Out-of-Focus Image:
- Adjust the focus ring around the projector lens until the image is sharp.
- Ensure the projector is at an appropriate distance from the screen for its throw ratio.
- Projector Overheating/Shuts Down:
- Ensure all ventilation vents are clear and unobstructed.
- Operate the projector in a well-ventilated area.
- Clean any dust accumulation from the vents.
- Allow the projector to cool down completely after use.
- Lamp Indicator Light Blinking:
- This typically indicates the lamp is nearing its end of life or has failed. The lamp may need to be replaced.
- Dead Pixels or Spots on Image:
- DLP technology can sometimes exhibit 'dead pixels' as small, unlit dots on the screen. If this issue is significant or appears suddenly, it may indicate a hardware fault.
If you continue to experience issues, refer to the Dell support website or contact customer service for further assistance.
6. Specifications
| Feature | Specification |
|---|---|
| Brand | Dell |
| Model Name | M210X DLP |
| Model Number | M210X |
| Display Type | DLP |
| Native Resolution | 1024 x 768 (XGA) |
| Brightness | 2000 ANSI lumen (max) |
| Contrast Ratio | 2100:1 |
| Connectivity Technology | DisplayPort, HDMI, USB, VGA, S-Video, Composite Video, Audio In/Out |
| Light Source Operating Life | 2000 Hours |
| Lamp Wattage | 165 Watts |
| Wattage | 210 watts |
| Item Weight | 6.45 Pounds |
| Form Factor | Portable |
| Mounting Type | Tabletop Mount |
| Controller Type | Button Control |
| Control Method | Remote |
| Special Features | 3D-Ready, Built-in Speakers |
7. Warranty and Support
Dell provides spare part availability for this product for up to 7 years within the EU. For specific warranty terms and conditions, please refer to the documentation included with your purchase or visit the official Dell support website.
When contacting support, you may be asked for your product's service tag or express service code. These can typically be found on a label on the bottom or side of the projector.
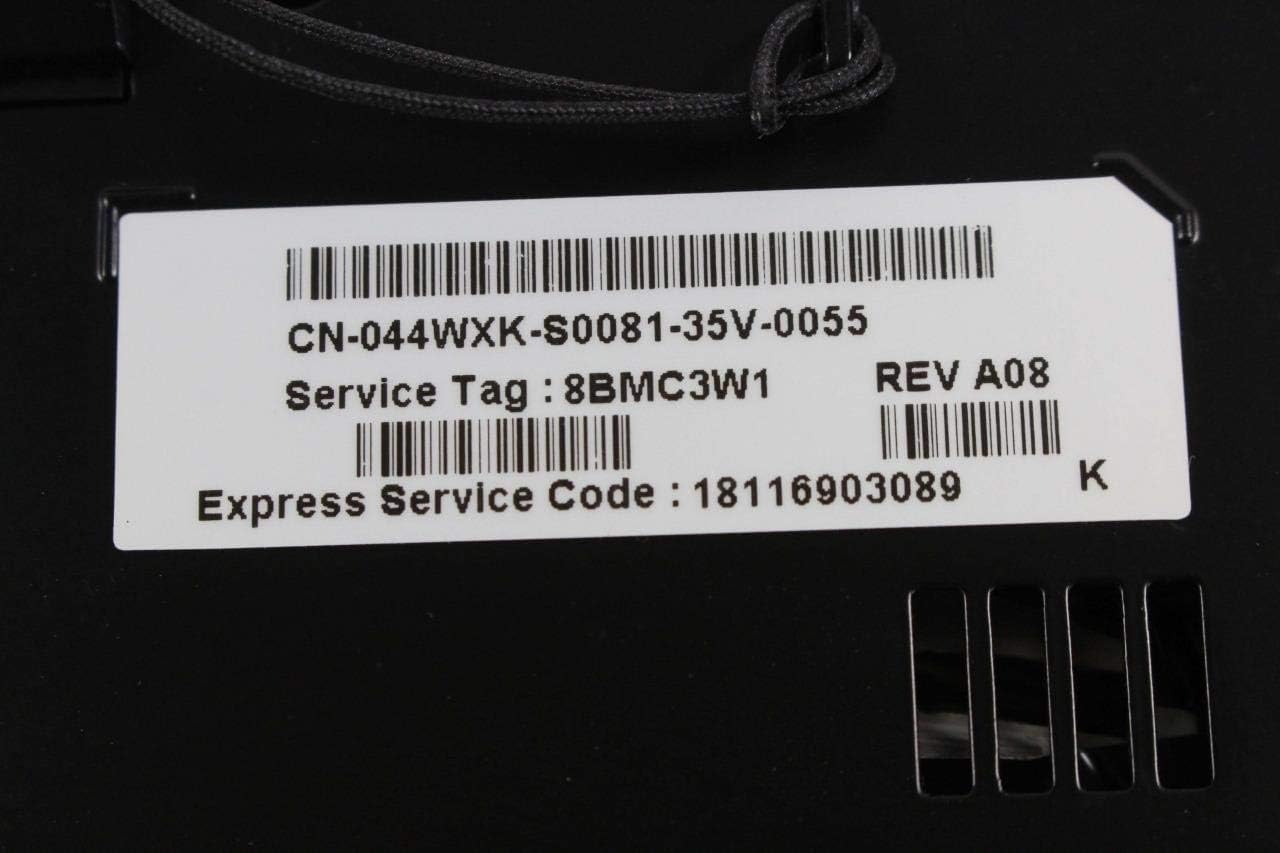
Figure 7.1.1: Close-up of the service tag label on the Dell M210X Projector. This label displays important identification numbers such as the Service Tag (e.g., 8BMC3W1), Express Service Code (e.g., 18116903089), and Part Number (e.g., CN-044WXK-S0081-35V-0055).
For additional support and resources, please visit the Dell Store on Amazon or the official Dell support website.