1. Introduction
This manual provides essential information for the safe and effective use of your KS Infrared Heat Lamp Desk Model (IR-300A). Please read all instructions carefully before operating the device and retain this manual for future reference.
2. Safety Information
To ensure safe operation and prevent injury or damage, observe the following precautions:
- Important: Always wear light clothing when using the lamp to prevent burns. DO NOT USE ON BARE SKIN.
- Caution: Do not exert excessive force when inserting the bulb into the socket, as the bulb may crack.
- Ensure the lamp is placed on a stable, flat surface to prevent tipping.
- Keep the lamp away from water or other liquids. Do not operate with wet hands.
- Do not cover the lamp during operation. Ensure adequate ventilation around the device.
- Unplug the lamp from the power outlet before cleaning or performing any maintenance.
- Do not attempt to modify or repair the lamp yourself. Contact qualified personnel for service.
- Keep out of reach of children and pets.
3. Product Overview
The KS Infrared Heat Lamp Desk Model is designed for heat and light therapy applications. It features an adjustable neck, a timer, and a remote control for convenient operation.
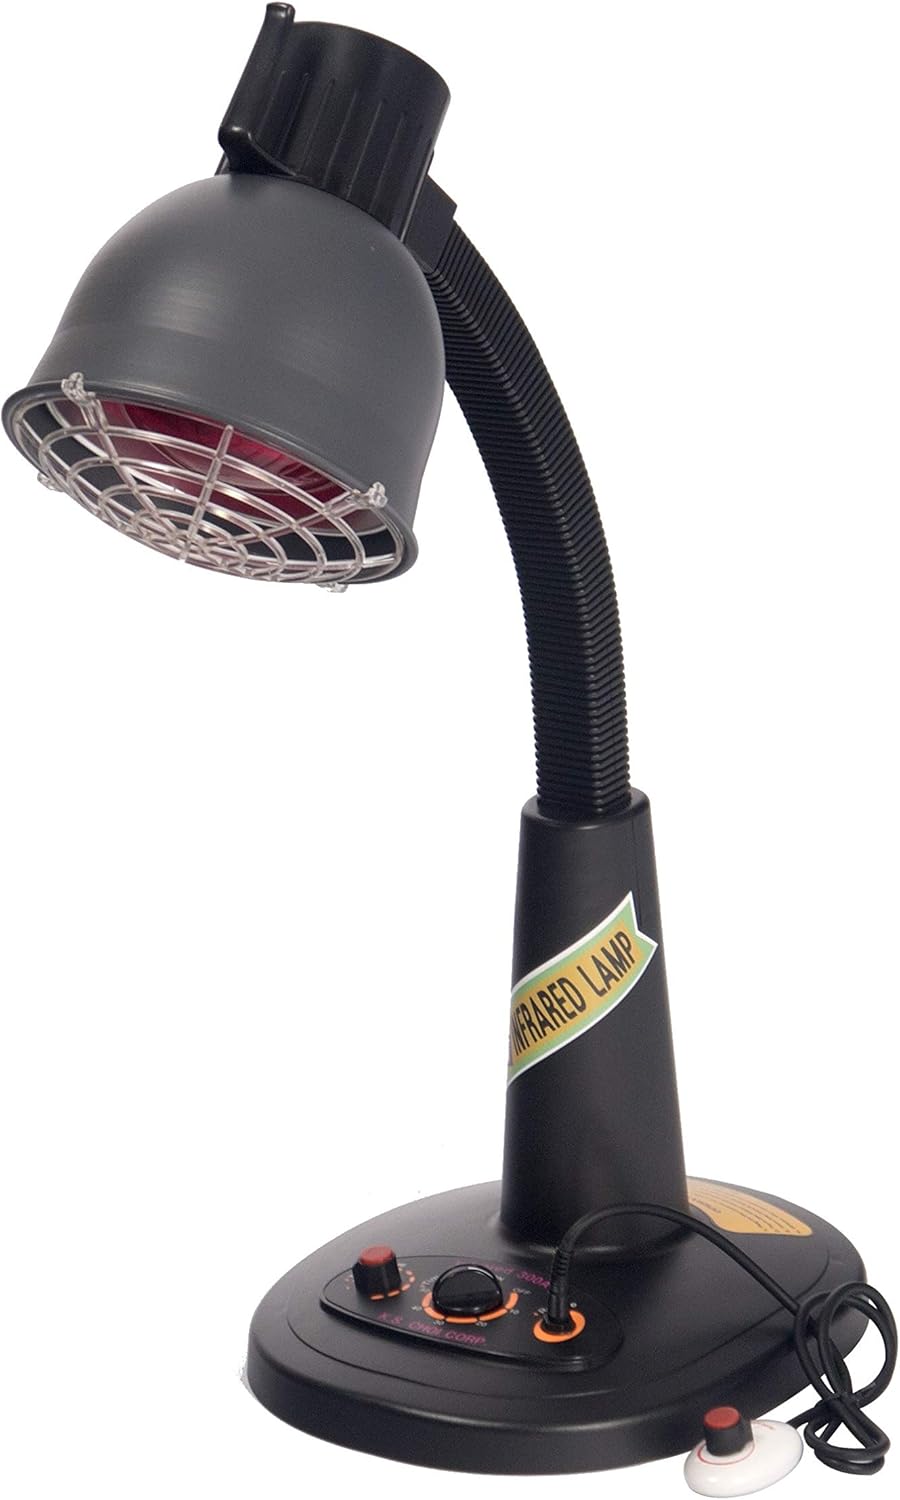
Figure 3.1: Front view of the KS Infrared Heat Lamp Desk Model. The lamp features a dark gray finish, an adjustable gooseneck, a protective grill over the bulb, and a control panel on its base.

Figure 3.2: The KS Infrared Heat Lamp Desk Model, illustrating that the lamp's color may vary between blue or black. This image shows the dark gray version.

Figure 3.3: Front view of an alternative color variant of the KS Infrared Heat Lamp, featuring a blue base and a red lamp head.

Figure 3.4: Back view of the alternative blue and red KS Infrared Heat Lamp, showing the adjustable arm mechanism.
4. Setup
4.1 Unpacking
Carefully remove all components from the packaging. Ensure all parts are present and undamaged. The package includes the lamp unit and one bulb.
4.2 Bulb Installation
- Ensure the lamp is unplugged from the power outlet.
- Gently screw the infrared bulb into the E26 Medium base socket. Do not overtighten or exert excessive force to avoid cracking the bulb.
4.3 Placement
Place the lamp on a stable, flat surface. The lamp base measures approximately 12 x 13 inches, providing a stable foundation.

Figure 4.1: Close-up view of the lamp base, indicating its approximate dimensions of 12 x 13 inches.
4.4 Power Connection
Plug the power cord into a standard 110V electrical outlet.
5. Operation
5.1 Main Control Panel
The lamp features a main control panel on its base with a timer and temperature control dial.
- Timer: The timer can be set clockwise for up to 60 minutes. The lamp will automatically turn off once the set time expires.
- Temperature Control: Use the dial to adjust the heat intensity.
5.2 Remote Control
The lamp includes a remote control for adjusting temperature. When the remote controller is plugged into the designated port on the lamp base, the main control panel's temperature control is disabled. To control the temperature from the main control panel, ensure the remote is unplugged. Do not attempt to use both heat controls simultaneously.

Figure 5.1: The remote control plugged into the lamp base. Note that when the remote is connected, the main temperature control on the base is disabled.

Figure 5.2: Detailed view of the lamp's control panel and remote control, with labels for Temperature Control, Timer, Remote Control port, and Remote Temperature Control.
5.3 Adjusting the Lamp Head
The lamp features an adjustable neck, allowing you to position the lamp head to direct the infrared heat as needed.
6. Maintenance
6.1 Cleaning
Before cleaning, ensure the lamp is unplugged and completely cool. Wipe the exterior surfaces with a soft, dry cloth. Do not use abrasive cleaners or immerse the lamp in water.
6.2 Fuse Replacement
If the lamp fails to power on, the fuse may need replacement. Follow these steps:
- Step 1: Make sure the lamp is unplugged before performing maintenance. Lay the lamp on its side and remove screws from the bottom cover. (Take note of baseplate orientation).

Figure 6.1: Images illustrating steps 1 through 4 of the fuse replacement process, showing the lamp base being opened and the fuse location.
- Step 2: The fuse is located on the circuit board underneath the lamp and is visible when the bottom cover is removed.
- Step 3: Use a tool with a flat head, such as a flat head screwdriver, to remove the fuse gently.
- Step 4: Gently remove the fuse and replace with a new working 3A 110V fuse.
- Step 5: After replacing the fuse, place and slip the green ground wire over the screw. Secure the wire until you have inserted the screw into its proper hole, then align the baseplate with the rest of the screw holes and secure the lid with all four screws.

Figure 6.2: Images illustrating steps 5 and 6 of the fuse replacement process, showing the reassembly of the lamp base.
- Step 6: Secure all the screws in the baseplate. DO NOT OVERTIGHTEN screws. Overtightening may cause screws to strip and the baseplate may become unsecure.
7. Troubleshooting
If you encounter issues with your KS Infrared Heat Lamp, consider the following:
- Lamp not turning on: Check if the power cord is securely plugged into the outlet. Verify the bulb is correctly installed and not damaged. Check the fuse as described in Section 6.2.
- No heat output: Ensure the temperature control is set to an appropriate level. If using the remote, ensure it is properly connected and the main control is disabled.
- Remote control not working: Ensure the remote is securely plugged into the lamp base.
For further assistance, please refer to the Warranty and Support section.
8. Specifications
| Feature | Specification |
|---|---|
| Model Number | IR-300A |
| Brand | KS |
| Light Source Type | Infrared |
| Bulb Base | E26 Medium |
| Wattage | 100 watts |
| Power Source | Corded Electric |
| Voltage | 110V |
| Switch Type | Remote |
| Control Method | Remote |
| Special Feature | Adjustable Arm |
| Material | Aluminum |
| Mounting Type | Tabletop |
| Recommended Uses | Curing |
| Included Components | Bulb |
| Item Weight | 10.9 pounds |
| Package Dimensions | 21 x 15.5 x 12.1 inches |
9. Warranty Information
The KS Infrared Heat Lamp Desk Model (IR-300A) comes with a 6 Months Limited Warranty covering parts (excluding the bulb) and labor only. Freight costs are not included in this warranty.
Please retain your proof of purchase for warranty claims.
10. Contact and Support
For technical support, warranty claims, or any questions regarding your KS Infrared Heat Lamp, please contact the manufacturer or your retailer. Refer to your purchase documentation for specific contact details.