
Introduction
This instruction manual provides essential information for the safe and effective installation, operation, and maintenance of your Powermaster CS130 Alternator, Model 57802. Please read this manual thoroughly before proceeding with installation or use to ensure proper function and longevity of the product.
Product Overview
The Powermaster CS130 Alternator, Model 57802, is a high-performance automotive alternator designed to provide 140 amps of electrical power. It features a durable black finish, a 6-groove pulley, and is compatible with both 1-wire and original equipment (OE) hookup configurations for versatile application in various vehicles.
Included Components:
- Powermaster - Alt GM CS130 Black 140A 6 grv Pulley
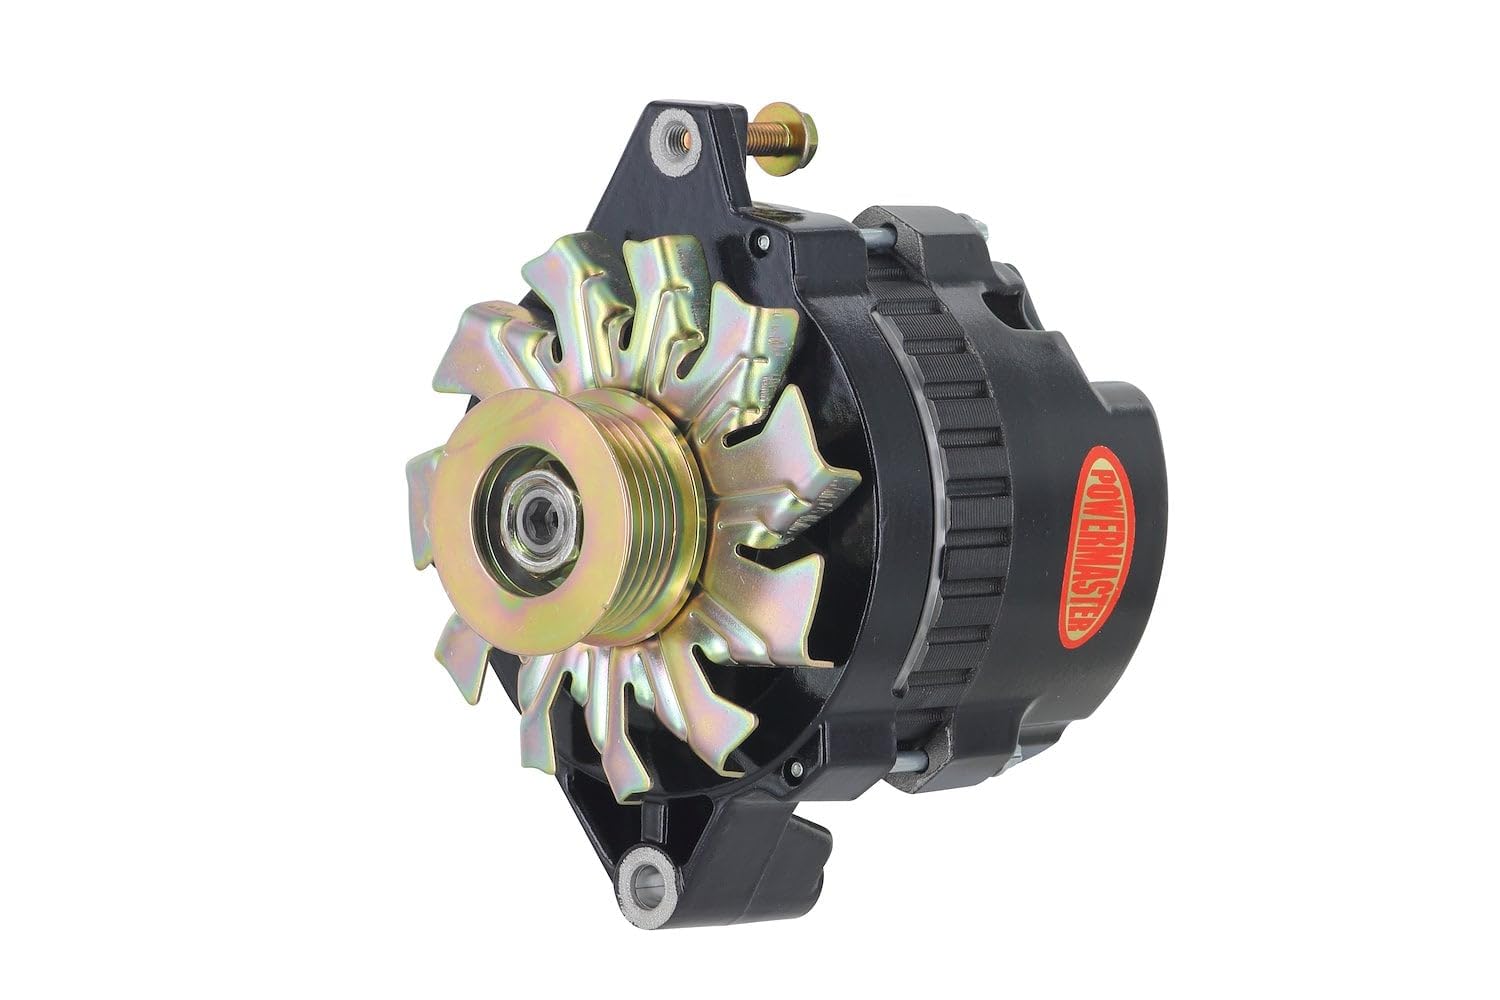
This image shows the Powermaster CS130 Alternator, highlighting its black casing, gold-colored fan, and 6-groove pulley. The Powermaster logo is visible on the side.
Setup and Installation
Proper installation is critical for the performance and safety of your alternator. If you are unsure about any steps, consult a qualified automotive technician.
Safety Precautions:
- Always disconnect the vehicle's negative battery terminal before beginning any electrical work.
- Wear appropriate personal protective equipment, including safety glasses and gloves.
- Ensure the engine is cool before working on it.
Installation Steps:
- Remove Old Alternator: Disconnect all wiring from the existing alternator. Loosen the tensioner and remove the serpentine belt. Unbolt and carefully remove the old alternator from its mounting brackets.
- Mount New Alternator: Position the Powermaster CS130 Alternator into the mounting brackets. Secure it with the appropriate bolts, ensuring they are tightened to the manufacturer's specifications.
- Install Belt: Route the serpentine belt correctly around all pulleys, including the alternator's 6-groove pulley. Adjust the belt tension according to your vehicle's specifications. The belt should be snug but not overly tight.
- Connect Wiring:
- 1-Wire Hookup: Connect the main output stud (B+) on the alternator directly to the positive terminal of the battery or the main power distribution point. This alternator is designed to self-excite once the engine reaches a certain RPM.
- OE (Original Equipment) Hookup: Connect the main output stud (B+) to the battery positive. Connect the excitation wire(s) from your vehicle's original wiring harness to the corresponding terminals on the alternator. Refer to your vehicle's service manual for specific wiring diagrams.
- Reconnect Battery: Once all connections are secure and the belt is tensioned, reconnect the negative battery terminal.
- Test System: Start the engine and observe the vehicle's voltage gauge or use a multimeter to verify that the alternator is charging the battery correctly (typically between 13.8V and 14.8V).
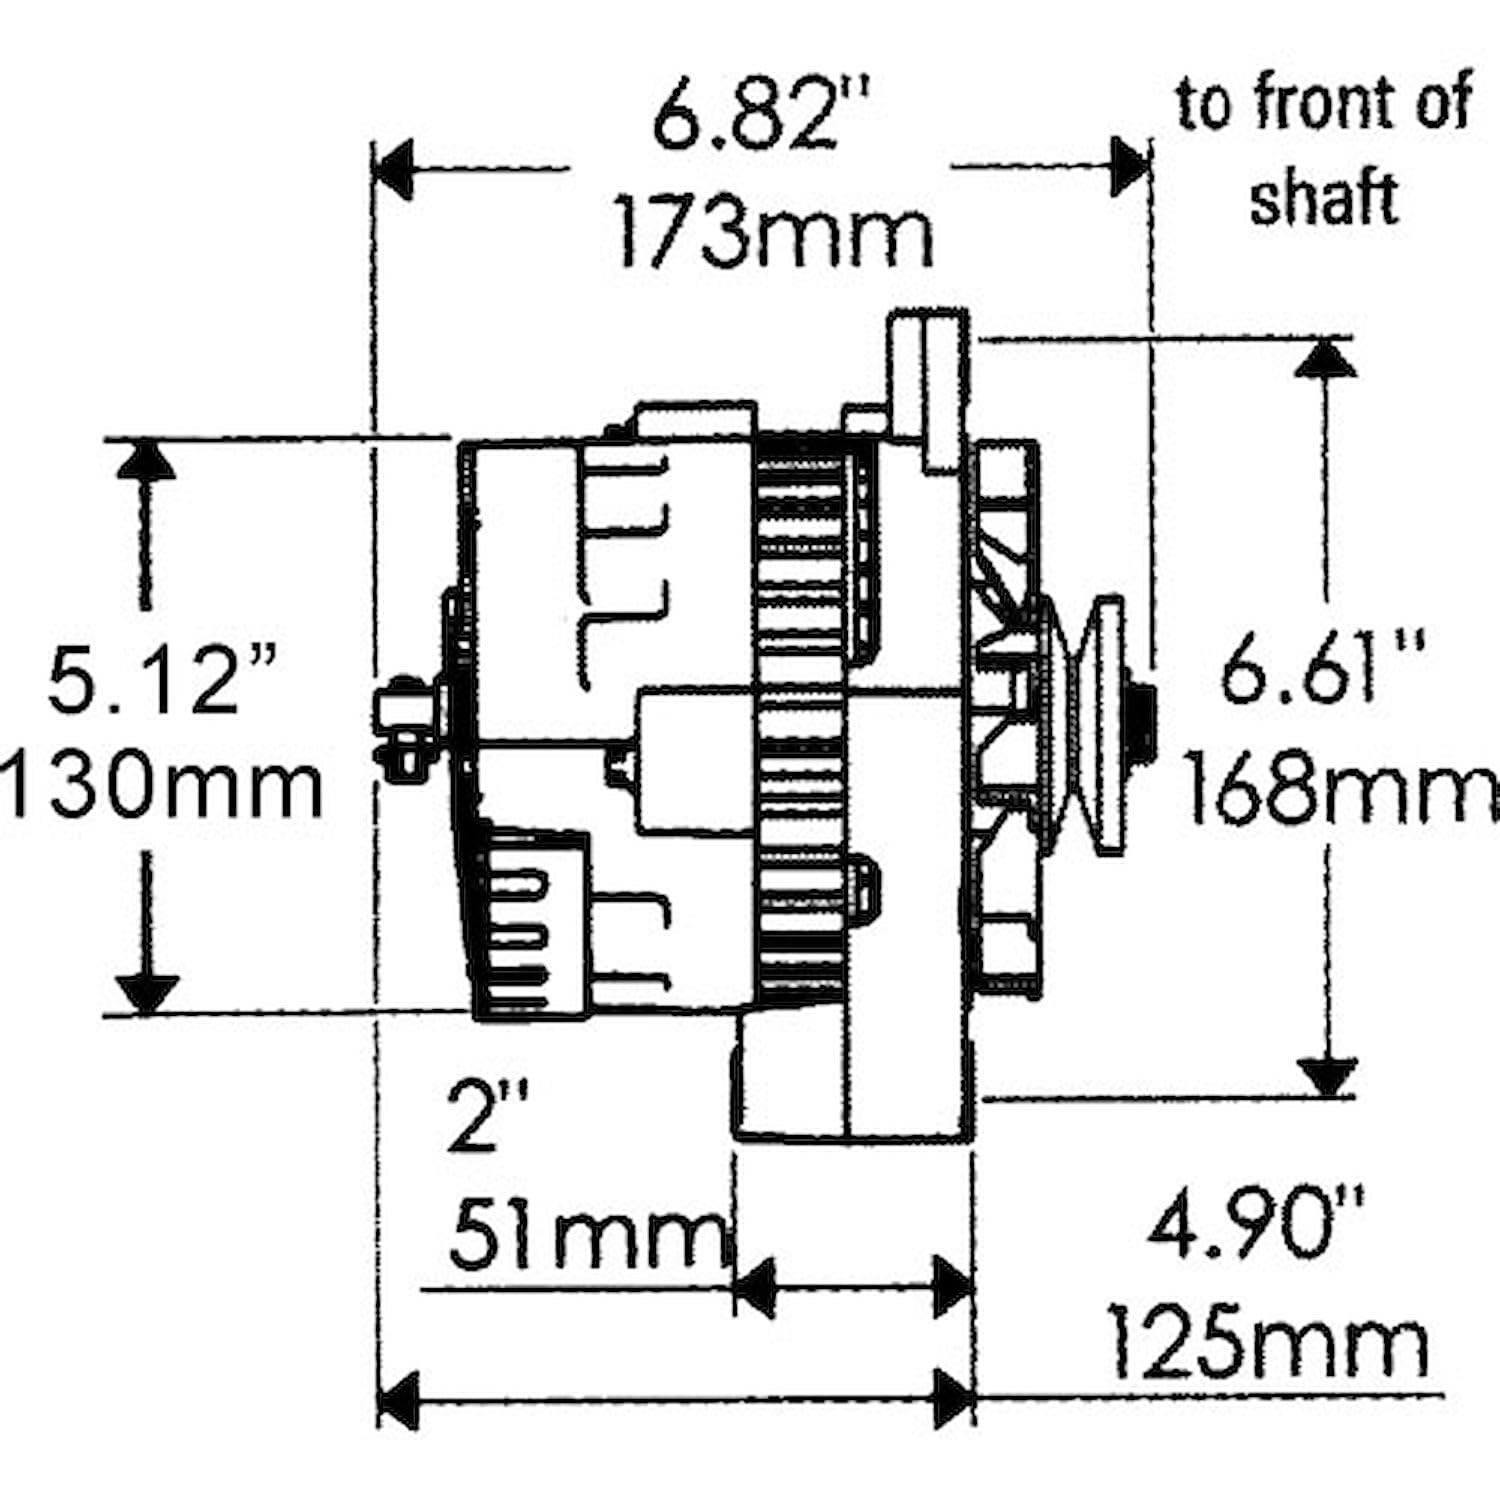
This technical drawing provides key dimensions of the Powermaster CS130 Alternator in both inches and millimeters, including overall length, height, and pulley position, essential for fitment verification.
Operating Instructions
The Powermaster CS130 Alternator operates automatically once installed and the engine is running. Its primary function is to convert mechanical energy from the engine into electrical energy to power the vehicle's electrical systems and recharge the battery.
- Ensure the engine is running smoothly for optimal alternator performance.
- Monitor your vehicle's voltage gauge. A healthy charging system typically shows a voltage between 13.8V and 14.8V when the engine is running.
- Avoid operating the vehicle with a loose or damaged serpentine belt, as this will prevent the alternator from charging effectively.
Maintenance
Regular maintenance helps ensure the longevity and reliable performance of your alternator and charging system.
- Belt Inspection: Periodically check the serpentine belt for cracks, fraying, or excessive wear. Ensure it has proper tension. A loose belt can cause slippage and reduce charging efficiency, while an overly tight belt can stress bearings.
- Wiring Connections: Inspect all electrical connections to the alternator for corrosion, looseness, or damage. Clean any corrosion and ensure connections are tight.
- Cleanliness: Keep the alternator free from excessive dirt, oil, and debris, which can impede cooling and affect performance.
- Battery Health: A healthy battery is essential for the charging system. Ensure your battery is in good condition and properly maintained.
Troubleshooting
If you experience issues with your vehicle's charging system, consider the following common troubleshooting steps:
- No Charge / Low Voltage:
- Check the serpentine belt for proper tension and condition.
- Verify all wiring connections to the alternator and battery are secure and free of corrosion.
- Test the battery's charge level and overall health.
- Inspect relevant fuses in the vehicle's fuse box.
- Overcharging / High Voltage:
- This often indicates a fault with the internal voltage regulator of the alternator. Professional diagnosis is recommended.
- Noise from Alternator:
- A squealing noise often points to a loose or worn serpentine belt.
- Grinding or rattling noises could indicate worn internal bearings or other mechanical issues within the alternator.
For persistent or complex issues, it is advisable to seek assistance from a certified automotive technician.
Specifications
| Item Package Dimensions L x W x H | 7 x 5 x 2 inches |
| Package Weight | 1 Pounds |
| Item Dimensions LxWxH | 9 x 7.5 x 7.5 inches |
| Item Weight | 1 Pounds |
| Brand Name | Powermaster |
| Warranty Description | Manufacturer Warranty |
| Model Name | 57802 |
| Color | Black/Silver |
| Material | Plastic |
| Manufacturer | Powermaster |
| Part Number | 57802 |
| Included Components | Powermaster - Alt GM CS130 Black 140A 6 grv Pulley |
Warranty and Support
This Powermaster CS130 Alternator is covered by a Manufacturer Warranty. For specific details regarding warranty coverage, terms, and conditions, please refer to the documentation provided with your purchase or contact Powermaster directly.
In addition to the manufacturer's warranty, the product may be eligible for a return or replacement within 30 days of purchase, subject to the retailer's return policy.
For technical assistance, warranty claims, or further support, please contact Powermaster customer service through their official channels.