1. Introduction
This manual provides detailed instructions for the safe and proper installation and operation of your SONAX CorLiving PM-2220 Tilting Wall Mount Stand. Please read all instructions carefully before beginning installation and retain this manual for future reference.
Safety Warnings:
- Always ensure the wall structure can safely support the combined weight of the mount and your television.
- Use appropriate tools and follow all steps precisely. Seek professional assistance if you are unsure about any part of the installation process.
- Do not exceed the maximum weight capacity of 165 lbs (75 kg).
- This product is intended for indoor use only.
2. Package Contents
Before installation, please verify that all components listed below are present and undamaged. If any parts are missing or damaged, do not proceed with installation and contact customer support.
- Wall Plate (1)
- TV Brackets (2)
- Assorted Lag Bolts, Washers, and Anchors for wall mounting
- Assorted Screws, Washers, and Spacers for TV attachment
- Instruction Manual (1)
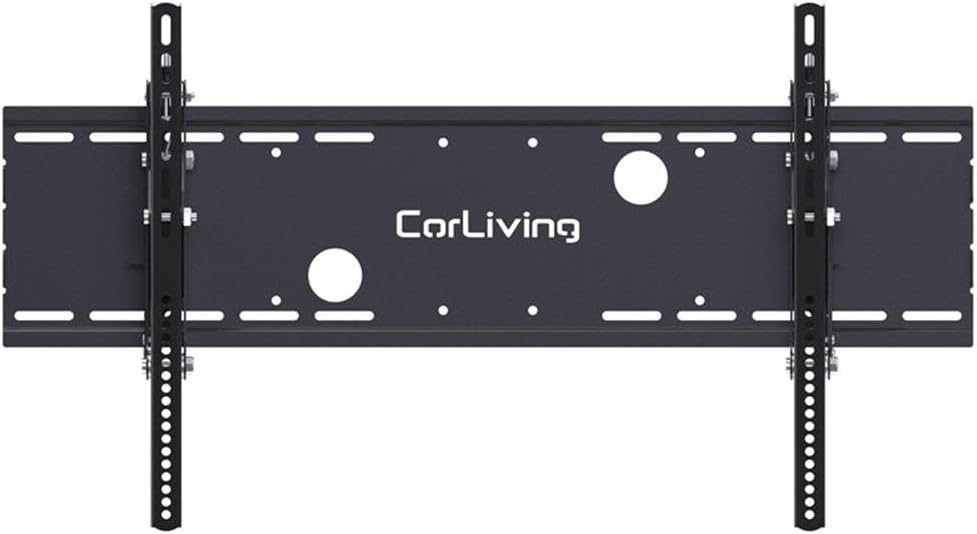
Image: Front view of the wall mount components, showing the main wall plate and the two vertical TV brackets.
3. Setup and Installation
Follow these steps carefully to ensure a secure and proper installation of your TV wall mount.
Step 1: Prepare the Wall
- Locate wall studs using a reliable stud finder. The extra wide wall plate (35.75 inches / 90.5 cm) is designed to accommodate standard 16-inch and 24-inch wall stud spacing.
- Mark the desired height and horizontal center for your television. Use a level to ensure the marked drilling locations are perfectly horizontal.
- Drill pilot holes at the marked locations. The size of the drill bit will depend on the type of lag bolts and wall anchors provided and your wall material. Refer to the hardware packaging for specific drill bit recommendations.

Image: Detailed dimension diagram of the wall mount, useful for planning installation and stud placement.
Step 2: Attach Wall Plate to Wall
- Align the wall plate with the drilled pilot holes.
- Secure the wall plate to the wall studs using the provided lag bolts and washers. Use a socket wrench or appropriate tool to tighten all bolts securely until the wall plate is firmly attached to the wall. Do not overtighten.
Step 3: Attach TV Brackets to Television
- Carefully place your television face down on a soft, clean surface to prevent screen damage.
- Identify the VESA mounting holes on the back of your TV. This mount supports VESA sizes from 200x200 to 800x400.
- Select the appropriate screws, washers, and spacers from the provided hardware kit that fit your TV's mounting holes.
- Attach the two vertical TV brackets to the back of your television. Ensure the brackets are oriented correctly (hooks facing upwards) and are securely fastened.

Image: Side view illustrating how the TV bracket attaches to the wall plate and the tilt functionality.
Step 4: Mount Television to Wall Plate
- With assistance, carefully lift the television with the attached brackets.
- Hook the top of the TV brackets onto the top edge of the wall plate.
- Gently lower the television until the brackets fully engage with the wall plate.
- Engage the security locking system at the bottom of the TV brackets to prevent accidental dislodgement. (Note: A padlock for additional security is not included).

Image: The SONAX CorLiving PM-2220 wall mount installed with a television.
4. Operating Instructions
Adjusting Tilt Angle
The PM-2220 mount features an adjustable forward tilt of up to 15 degrees. To adjust the viewing angle:
- Locate the tilt adjustment knobs on the side of the TV brackets.
- Loosen these knobs sufficiently to allow movement.
- Carefully tilt the television to your desired viewing angle.
- Re-tighten the tilt adjustment knobs firmly to secure the television in place.
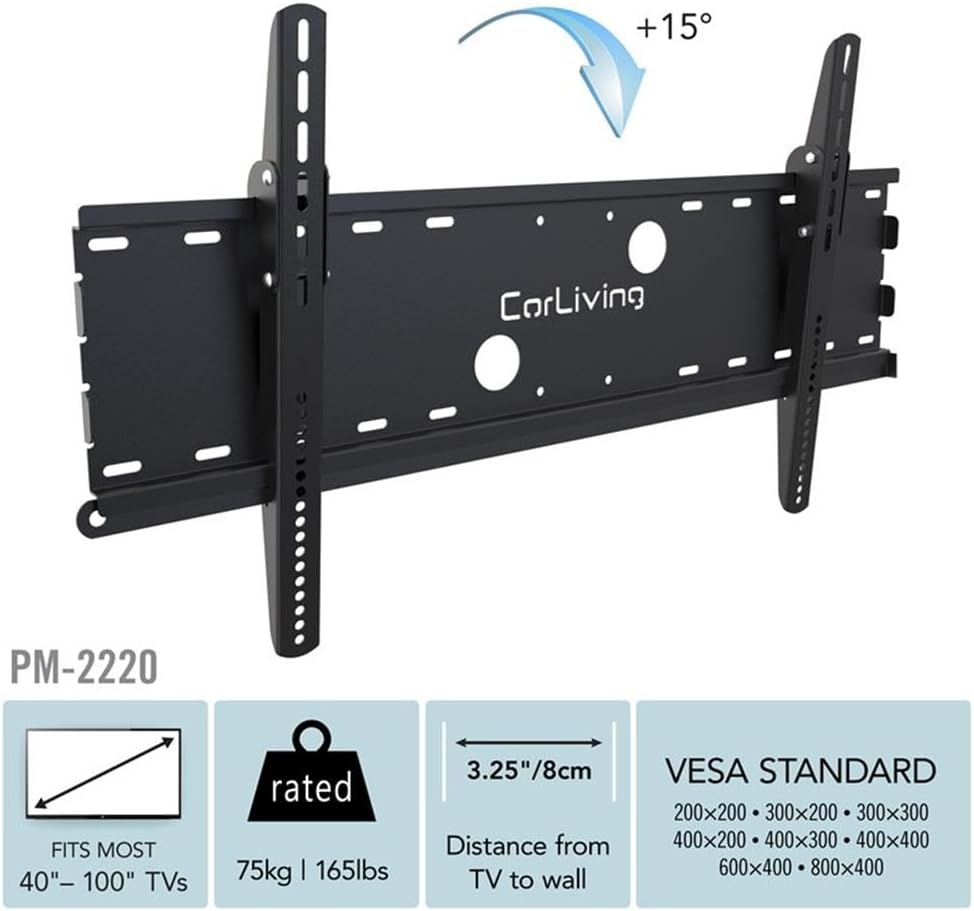
Image: Diagram showing the adjustable 15-degree tilt feature of the mount.
Security Locking System
The mount includes a locking system at the bottom of the TV brackets to prevent accidental lifting and dislodgement of the television from the wall plate. Ensure this mechanism is engaged after mounting the TV. For enhanced security, a padlock (not included) can be inserted through the designated holes in the locking system.
5. Maintenance
- Periodic Checks: Periodically (e.g., every 6 months) check all screws, bolts, and connections to ensure they remain tight and secure. Re-tighten if necessary.
- Cleaning: Clean the mount with a soft, dry cloth. Avoid using abrasive cleaners, solvents, or chemical-based cleaning products, as these may damage the finish.
- Damage Inspection: If any part of the mount appears damaged or worn, discontinue use and contact customer support for assistance.
6. Troubleshooting
- Issue: Television is not level after installation.
Solution: Ensure the wall plate was installed perfectly level. If not, carefully loosen the lag bolts, adjust the wall plate using a level, and re-tighten securely. Alternatively, some TVs allow for minor leveling adjustments on the brackets themselves. - Issue: Mount feels loose or unstable.
Solution: Verify that all lag bolts securing the wall plate to the wall studs are fully tightened. Also, ensure the screws attaching the TV brackets to the television are secure, and the security locking system is engaged. - Issue: Difficulty adjusting the tilt angle.
Solution: Ensure the tilt adjustment knobs on the side of the TV brackets are sufficiently loosened before attempting to change the angle. Once the desired angle is achieved, re-tighten the knobs firmly.
7. Specifications
| Feature | Specification |
|---|---|
| Model Number | PM-2220 |
| Brand | SONAX |
| Manufacturer | CorLiving |
| Compatible TV Sizes | 40" - 100" Flat and Curved Panel TVs |
| Weight Capacity | 165 lbs (75 kg) |
| Mounting Type | Wall Mount |
| Movement Type | Tilt |
| Maximum Tilt Angle | 15 Degrees Forward |
| VESA Compatibility | 200x200, 300x200, 300x300, 400x200, 400x300, 400x400, 600x400, 800x400 |
| Distance from Wall | 3.5" (8.8 cm) |
| Wall Plate Width | 35.75" (90.5 cm) |
| Material | Heavy Duty Steel with Powder Coated Finish |
| Color | Black |
| Item Weight (Mount Only) | 13 pounds |
| Product Dimensions (Packaging) | 3 x 36 x 20 inches |
8. Warranty and Support
For warranty information regarding your SONAX CorLiving PM-2220 Tilting Wall Mount Stand, please refer to the documentation included with your purchase or visit the official SONAX website. For technical support, troubleshooting assistance, or to inquire about replacement parts, please contact SONAX customer service directly. Contact details can typically be found on the product packaging or the manufacturer's website.


