Sierra 68356P
Sierra International 68356P Amega Domed Ammeter Instruction Manual
Model: 68356P
1. Introduction
This manual provides essential information for the proper installation, operation, and maintenance of your Sierra International 68356P Amega Domed Ammeter. Please read these instructions carefully before proceeding with installation or use to ensure safe and effective performance.
An ammeter measures the flow of electrical current in a circuit, typically indicating charging or discharging status in marine or automotive electrical systems. The 60-0-60 dial range indicates current flow up to 60 amps in either direction.
Safety Warning: Electrical work can be hazardous. If you are not confident in your ability to safely install this device, seek assistance from a qualified marine electrician or technician.
2. Product Overview
The Sierra International 68356P Amega Domed Ammeter is a durable and reliable instrument designed for marine environments. It features a 60-0-60 amp dial range, a scratch-resistant curved glass lens, and a 2-inch diameter for clear and accurate current monitoring.
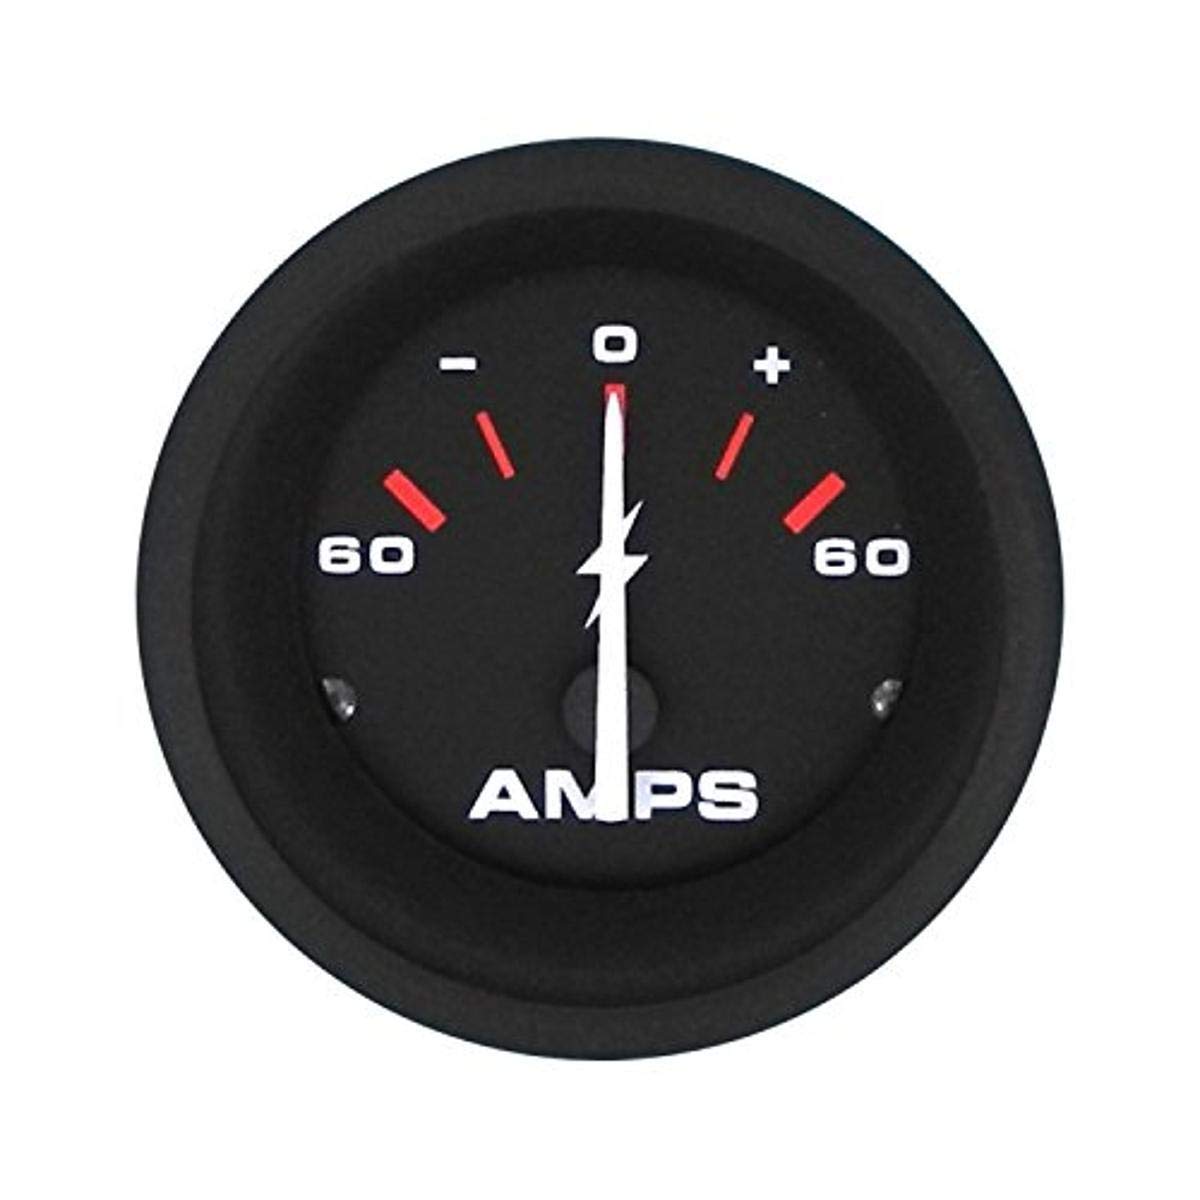
Figure 1: Sierra International 68356P Amega Domed Ammeter. This image shows the front view of the ammeter with its clear domed glass lens and 60-0-60 dial range.
Key features include:
- Dial Range: 60-0-60 Amps, indicating both charge and discharge.
- Lens: Scratch-resistant curved glass for enhanced durability and readability.
- Size: 2-inch diameter for standard panel mounting.
- Construction: Engineered for harsh marine environments.
3. Setup and Installation
Proper installation is crucial for the accurate and safe operation of your ammeter. This ammeter is designed to be installed in series with the circuit you wish to monitor.
3.1 Safety Precautions
- Always disconnect the battery or main power source before beginning any electrical work.
- Ensure all connections are secure and properly insulated to prevent short circuits.
- Use appropriate wire gauges for the expected current load.
- Wear appropriate personal protective equipment.
3.2 Mounting the Ammeter
- Choose a suitable location on your dashboard or panel that is visible and protected from direct impact or excessive moisture.
- Cut a 2-inch (approximately 52mm) diameter hole in the mounting surface.
- Insert the ammeter into the hole from the front.
- Secure the ammeter using the provided mounting bracket and hardware from the rear of the panel. Tighten securely but do not overtighten.
3.3 Wiring Connections
The ammeter must be wired in series with the circuit you intend to monitor. This typically involves connecting it between the battery's positive terminal (or a main distribution point) and the load or charging source.
- Identify the positive (+) and negative (-) terminals on the back of the ammeter.
- Disconnect the main positive cable from your battery or the circuit you are monitoring.
- Connect one end of a suitable gauge wire from the positive side of the circuit (e.g., battery positive terminal or main bus bar) to the positive (+) terminal of the ammeter.
- Connect another suitable gauge wire from the negative (-) terminal of the ammeter to the load side of the circuit (e.g., the original connection point of the main positive cable).
- Ensure all connections are tight and insulated.
- Reconnect the battery or main power source.
Note: For high current applications, an external shunt may be required. Consult your system's electrical diagram or a professional if unsure about wiring a shunt or direct connection.
4. Operation
Once properly installed and powered, the ammeter will display the current flow in amperes.
- Center '0' Position: Indicates no current flow or a balanced state.
- Positive Readings (Right of 0): Indicate current flowing into the battery (charging) or towards the positive side of the circuit.
- Negative Readings (Left of 0): Indicate current flowing out of the battery (discharging) or away from the positive side of the circuit, typically when loads are active and the charging system is not keeping up.
Monitor the ammeter during engine operation and with various electrical loads to understand your system's normal current draw and charging performance.
5. Maintenance
The Sierra 68356P Ammeter is designed for minimal maintenance. Regular inspection and cleaning will help ensure its longevity and accurate performance.
- Cleaning: Wipe the lens and bezel with a soft, damp cloth. Use a mild soap solution if necessary, but avoid harsh chemicals or abrasive cleaners that could damage the lens or finish.
- Connections: Periodically check all electrical connections to ensure they remain tight and free from corrosion. Loose connections can lead to inaccurate readings or electrical hazards.
- Environmental Protection: While designed for marine use, avoid prolonged exposure to extreme temperatures or direct, high-pressure water sprays.
6. Troubleshooting
If your ammeter is not functioning as expected, consider the following common issues and solutions:
- No Reading / Gauge Stays at Zero:
- Check if the main power to the circuit is on.
- Verify all wiring connections to the ammeter are secure and correctly installed in series.
- Inspect for any blown fuses in the circuit.
- Ensure there is an actual current flow in the circuit (e.g., turn on a load or start the engine to check charging).
- Incorrect or Inaccurate Reading:
- Double-check wiring polarity. Reversing connections will cause the needle to deflect in the opposite direction.
- Ensure the ammeter is correctly wired in series, not parallel.
- Verify that the ammeter's range (60-0-60 amps) is appropriate for the expected current in your system.
- Check for any corrosion or resistance in the wiring or connections.
- Fluctuating or Erratic Reading:
- Inspect for loose wiring connections at the ammeter or in the circuit.
- Check for intermittent loads or charging system issues.
- Ensure the battery terminals are clean and tight.
If troubleshooting steps do not resolve the issue, contact Sierra Technical Support for further assistance.
7. Specifications
| Model Number | 68356P |
| Brand | Sierra |
| Dial Range | 60-0-60 Amps |
| Gauge Diameter | 2 inches (approx. 52mm) |
| Lens Material | Scratch Resistant Curved Glass |
| Product Dimensions (L x W x H) | 10 x 10 x 10 millimeters (approx. 1 x 1 x 1 cm) |
| Item Weight | 118 g |
| Manufacturer | Teleflex |
| UPC | 808282267032 |
8. Warranty Information
Sierra is dedicated to protecting your investment. All Sierra parts, including the 68356P Amega Domed Ammeter, qualify for and are covered under Sierra's industry-leading customer satisfaction warranty.
Sierra warrants its products to be free of defects in workmanship and materials for the useful life of the product. If a Sierra product fails to comply with this warranty, Sierra will repair or replace the defective product free of charge.
Please note that this warranty is subject to additional terms, conditions, and limitations. For full details, refer to the official Sierra warranty documentation.
9. Technical Support
For technical assistance, installation questions, or troubleshooting support regarding your Sierra International 68356P Amega Domed Ammeter, please contact Sierra's Technical Support team.
Technical Support Phone: 1-877-663-8396
When contacting support, please have your product model number (68356P) and a description of your issue ready.
Related Documents - 68356P
 |
Sierra Gas Range Owner's Manual: Installation, Operation, and Maintenance Comprehensive owner's manual for Sierra gas ranges, covering installation, operation, and maintenance procedures for models SR-4-24, SR-6-36, SR-10-60, SR-4B-24G-48, SR-4B-36G-60, SR-6B-24G-60, and SR-6B-24RG-60. Includes safety precautions, troubleshooting tips, and cleaning instructions. |
 |
SIERRA SRTG Series Thermostat Griddle Operator's Manual Operator's manual for the SIERRA SRTG Series Thermostat Griddle, covering installation, operation, safety, maintenance, and calibration for models SRTG-24, SRTG-36, SRTG-48, and SRTG-60. |
 |
Sierra SRMG Series Manual Griddles Owner's Manual This owner's manual provides comprehensive instructions for the installation, operation, and maintenance of Sierra SRMG series manual griddles, including models SRMG-12, SRMG-24, SRMG-36, SRMG-48, and SRMG-60. Essential for qualified personnel. |
 |
Sierra Radiant Broiler Owner's Manual: Installation, Operation, and Maintenance Comprehensive owner's manual for Sierra Radiant Broilers (SRRB and SRCB series). Includes installation instructions, operation, maintenance, and troubleshooting guides. |
 |
Sierra SR-10-60 Commercial Range Parts Breakdown Detailed parts breakdown and identification for the Sierra SR-10-60 commercial range, including part codes, descriptions, and quantities for various assemblies and components. |
Ask a question about this manual
Ask about setup, troubleshooting, compatibility, parts, safety, or missing instructions. Manuals+ will review the question and use this page’s manual context to help answer it.