GAO 15GD/3A
GAO 15GD/3A Mechanical Mini Daytimer Instruction Manual
Model: 15GD/3A
Introduction
Thank you for choosing the GAO 15GD/3A Mechanical Mini Daytimer. This device is designed to automatically switch electrical appliances ON and OFF at pre-set times throughout a 24-hour period. It features a simple mechanical design, allowing for easy programming of up to 48 daily ON/OFF cycles with a minimum setting time of 30 minutes. This manual provides essential information for safe and effective use of your timer.
Safety Instructions
- Always ensure the timer is correctly plugged into a suitable wall socket.
- Do not exceed the maximum load capacity of 16A, 230V~, or 3680W. Overloading can cause damage to the timer and connected appliances, and poses a fire risk.
- This timer is designed for indoor use only. Do not expose it to moisture, water, or extreme temperatures.
- Do not attempt to open or repair the timer. Refer all servicing to qualified personnel.
- Keep out of reach of children. The timer includes child protection features, but supervision is always recommended.
- Do not plug multiple timers into each other (daisy-chaining).
- Ensure the timer is not covered during operation to prevent overheating.
Product Overview
Familiarize yourself with the components of your GAO 15GD/3A Mechanical Mini Daytimer.
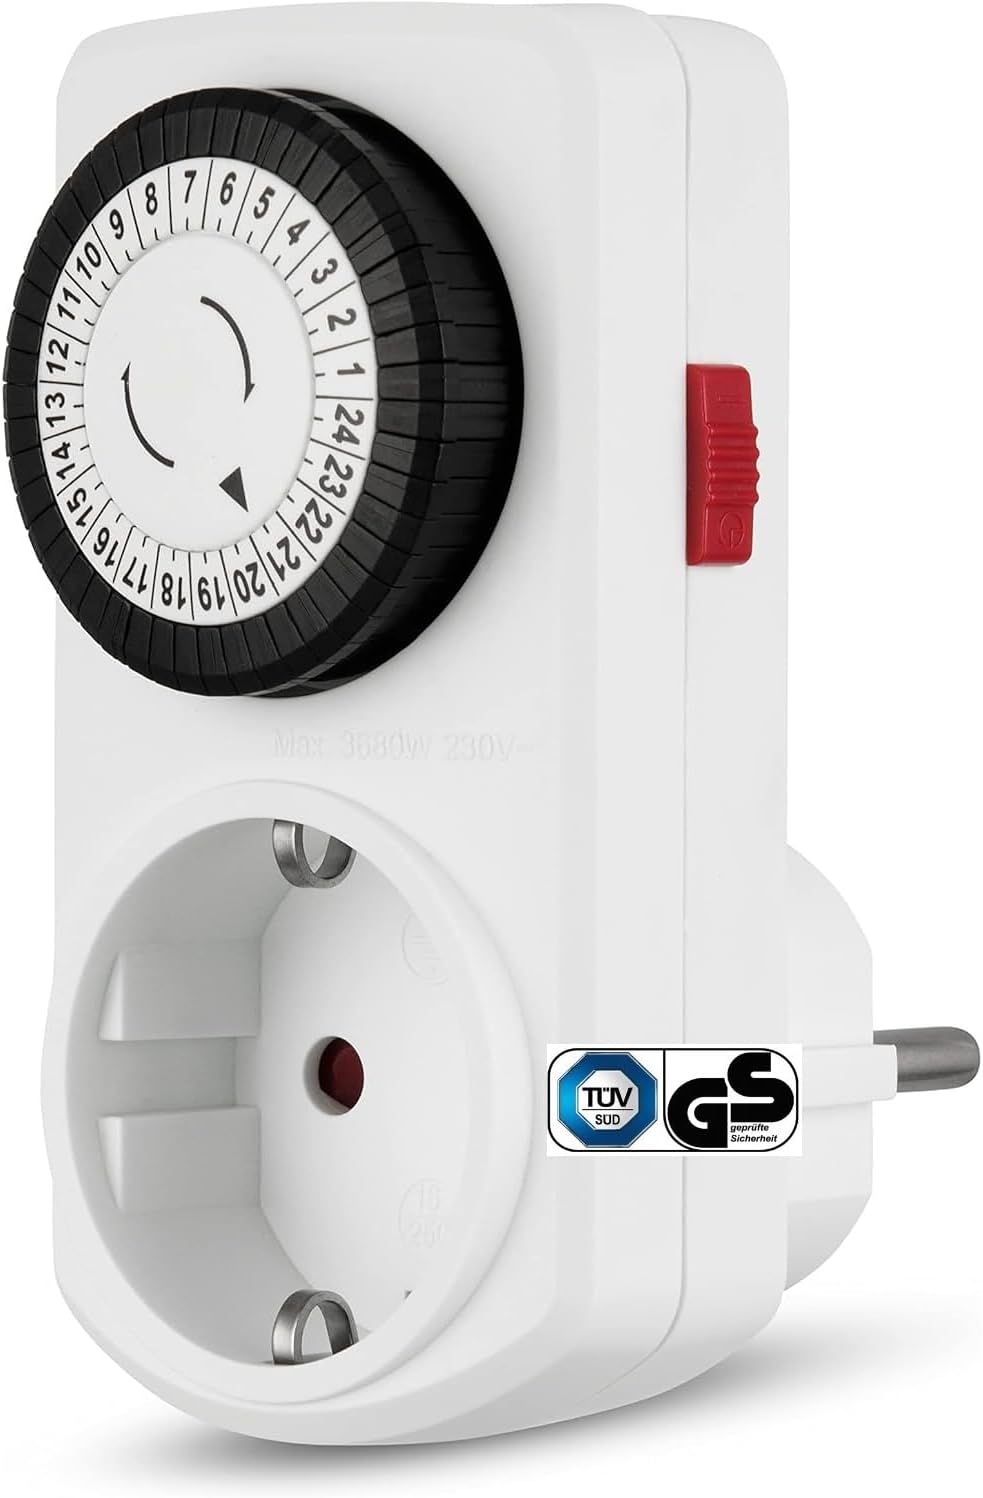
Figure 1: Front view of the timer, highlighting the programming dial and the power outlet.
- 24-Hour Dial: The large rotating dial with numbers 1-24 represents the hours of the day.
- Programming Segments (Pins): The small black segments around the dial. Each segment represents 30 minutes. Pushing a segment down activates the connected appliance during that 30-minute period.
- Current Time Indicator: A small arrow on the inner ring of the dial points to the current time.
- Manual Override Switch: A red switch located on the side of the timer to manually turn the connected appliance ON or OFF, overriding the timer program.
- Power Outlet: The socket on the front where you plug in the appliance to be controlled.
- Power Plug: The prongs on the back of the timer for plugging into a wall socket.

Figure 2: Detail of the programming dial with push-down segments.

Figure 3: Side view showing the manual override switch.
Setup and Programming
1. Set the Current Time
- Rotate the 24-hour dial clockwise until the current time aligns with the arrow indicator on the inner ring. For example, if it's 3 PM, rotate the dial until '15' aligns with the arrow.
- Ensure accuracy for precise timing.
2. Program ON/OFF Times
- Each black segment around the dial represents a 30-minute interval.
- To set an "ON" period, push down the segments corresponding to the desired ON time. For example, to turn an appliance ON from 6:00 PM to 8:00 PM, push down the segments from '18' to '20'.
- To set an "OFF" period, leave the segments in the "up" position.
- You can program up to 48 ON/OFF cycles per day. The minimum ON/OFF duration is 30 minutes.
3. Connect Appliance and Power
- Plug the appliance you wish to control into the power outlet on the front of the timer.
- Plug the timer into a standard wall socket.
Operating the Timer
Automatic Operation
Once plugged in and programmed, the timer's dial will continuously rotate clockwise. The connected appliance will turn ON when the current time indicator aligns with a pushed-down segment and turn OFF when it aligns with an "up" segment.
Manual Override Switch
The red manual override switch allows you to bypass the programmed settings temporarily:
- Timer Mode (Automatic): When the switch is in the "timer" position (often indicated by a clock icon or similar), the timer operates according to your programmed ON/OFF cycles.
- Always ON: When the switch is in the "ON" position (often indicated by an 'I' or a power symbol), the connected appliance will remain ON continuously, regardless of the dial's programming.
- Always OFF: When the switch is in the "OFF" position (often indicated by an 'O' or a crossed-out power symbol), the connected appliance will remain OFF continuously.
Remember to return the switch to the "timer" position for automatic operation.
Maintenance
- Cleaning: Disconnect the timer from the power outlet before cleaning. Wipe the exterior with a soft, dry cloth. Do not use liquid cleaners or abrasive materials.
- Storage: Store the timer in a cool, dry place when not in use.
- Inspection: Periodically inspect the timer and its plug for any signs of damage. If damage is found, discontinue use and replace the unit.
Troubleshooting
| Problem | Possible Cause | Solution |
|---|---|---|
| Appliance does not turn ON/OFF at programmed times. |
|
|
| Timer dial is not rotating. |
|
|
| Appliance remains ON continuously. |
|
|
Specifications
| Model Number | 15GD/3A |
| Brand | GAO |
| Type | Mechanical Mini Daytimer |
| Voltage | 230V~ |
| Current Rating | 16A |
| Max. Power Load | 3680W |
| Minimum Setting Time | 30 minutes |
| Max. Circuits per Day | 48 |
| Dimensions (L x W x H) | 7 x 10.3 x 5.4 cm |
| Weight | 0.11 kg |
| Features | Manual override switch, Child protection |
| Manufacturer | Everflourish Ltd. |
Warranty and Support
For warranty information, technical support, or further assistance, please refer to the official GAO website or contact your retailer. Keep your purchase receipt as proof of purchase.