1. Introduction
This manual provides detailed instructions for the operation and maintenance of your JWIN JXMP3034BLK 4 GB 2.4-Inch MP3 Player. Please read this manual thoroughly before using the device to ensure proper functionality and to maximize your user experience. Keep this manual for future reference.
2. Product Features
- 2.4-Inch color LCD video MP3 player
- Integrated FM radio tuner
- 4 GB internal flash memory for media storage
- Digital voice recorder functionality
- Built-in speaker for audio playback
- USB connectivity for file transfer and charging
3. Package Contents
Please check the package contents upon unboxing. If any items are missing or damaged, contact your retailer.
- JWIN JXMP3034BLK MP3 Player
- USB Cable (for charging and data transfer)
- Earphones
- User Manual (this document)
4. Device Overview
Familiarize yourself with the physical components of your MP3 player.
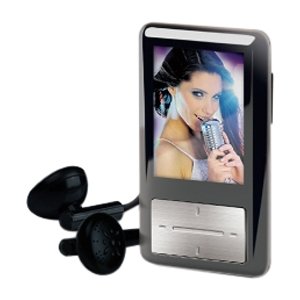
Figure 1: Front view of the JWIN JXMP3034BLK MP3 Player. This image displays the device's 2.4-inch color LCD screen, surrounded by control buttons. The overall design is compact and rectangular, with a black finish. The screen is central, and below it are navigation and playback controls.
4.1. Controls and Ports
- Power/Hold Button: Located on the side/top. Press and hold to power on/off. Slide to lock/unlock controls.
- Navigation Buttons (Up, Down, Left, Right): Used to navigate menus and adjust volume/seek.
- Menu/Back Button: Returns to the previous menu or accesses options.
- Play/Pause/Enter Button: Confirms selections, plays, or pauses media.
- USB Port: For connecting to a computer and charging.
- Headphone Jack (3.5mm): For connecting earphones.
- Built-in Speaker: Located on the rear or front panel.
- Microphone: For voice recording.
5. Setup
5.1. Charging the Battery
- Connect the small end of the USB cable to the USB port on your MP3 player.
- Connect the large end of the USB cable to a powered USB port on your computer or a compatible USB wall adapter (not included).
- The battery indicator on the screen will show charging status. A full charge typically takes 2-3 hours.
- Disconnect the cable once fully charged.
5.2. Connecting to a Computer and Transferring Files
- Ensure the MP3 player is powered on.
- Connect the MP3 player to your computer using the provided USB cable.
- Your computer should recognize the device as a removable disk.
- Open the device folder on your computer. You can drag and drop music, video, and image files into the appropriate folders (e.g., 'Music', 'Video', 'Pictures') on the MP3 player.
- Once file transfer is complete, safely eject the device from your computer before disconnecting the USB cable.
6. Operating Instructions
6.1. Power On/Off
- To Power On: Press and hold the Power button until the screen illuminates.
- To Power Off: Press and hold the Power button until the device shuts down.
- Hold Function: Slide the Hold switch to prevent accidental button presses.
6.2. Basic Navigation
- Use the Up/Down buttons to scroll through menu options.
- Use the Left/Right buttons to adjust settings or navigate within sub-menus.
- Press the Play/Pause/Enter button to select an option or confirm an action.
- Press the Menu/Back button to return to the previous screen or exit a menu.
6.3. Music Playback
- From the main menu, select 'Music'.
- Navigate through your music library (e.g., by Artist, Album, Songs, Playlists).
- Select a song and press the Play/Pause/Enter button to begin playback.
- During playback, use Left/Right to skip tracks, Up/Down to adjust volume.
- Press Play/Pause/Enter to pause/resume.
6.4. Video Playback
- From the main menu, select 'Video'.
- Browse your video files.
- Select a video and press the Play/Pause/Enter button to start playback.
- Ensure video files are in a compatible format for the device. Refer to specifications for supported formats.
6.5. FM Radio Operation
- Connect earphones to the headphone jack; they act as the antenna.
- From the main menu, select 'FM Radio'.
- Use the navigation buttons to scan for stations or manually tune.
- Save favorite stations for quick access.
6.6. Voice Recording
- From the main menu, select 'Recorder' or 'Voice Memo'.
- Press the Play/Pause/Enter button to start recording.
- Press it again to stop recording.
- Recordings are saved automatically and can be accessed from the 'Recordings' folder.
7. Maintenance
7.1. Cleaning
- Use a soft, dry, lint-free cloth to clean the device's exterior.
- For the screen, use a screen-specific cleaning solution and cloth.
- Avoid using abrasive cleaners, solvents, or aerosol sprays.
7.2. Battery Care
- To prolong battery life, avoid fully discharging the battery frequently.
- Charge the device regularly, even if not in use for extended periods.
- Do not expose the device to extreme temperatures.
7.3. Storage
- Store the MP3 player in a cool, dry place away from direct sunlight and moisture.
- Protect the screen from scratches by using a protective case or screen protector.
8. Troubleshooting
| Problem | Possible Cause | Solution |
|---|---|---|
| Device does not power on. | Battery is depleted. | Charge the device for at least 30 minutes. |
| Device freezes or is unresponsive. | Software glitch. | Press and hold the Power button for 10-15 seconds to force a restart. |
| Cannot transfer files. | Incorrect USB connection; driver issue; device not recognized. | Ensure USB cable is securely connected. Try a different USB port or computer. Ensure device is powered on. |
| No sound from headphones. | Headphones not properly connected; volume too low; damaged headphones. | Check headphone connection. Increase volume. Test with different headphones. |
| FM radio not working. | Earphones not connected (acting as antenna). | Ensure earphones are plugged in. |
9. Specifications
| Feature | Detail |
|---|---|
| Model Number | JXMP3034BLK |
| Memory Storage Capacity | 4 GB |
| Screen Size | 2.4 Inches |
| Special Features | FM Radio, Voice Recorder |
| Connectivity Technology | Aux, USB |
| Supported Standards | MP3 (and likely other common audio/video formats, though only MP3 is explicitly listed) |
| Product Dimensions | 12.8 x 9.25 x 5.5 inches |
| Item Weight | 3.9 pounds |
| Manufacturer | JWIN |
10. Warranty and Support
For warranty information and technical support, please refer to the warranty card included with your product or visit the official JWIN website. Keep your proof of purchase for warranty claims.
JWIN Official Website: www.jwin.com (Note: This is a placeholder URL as specific support information was not provided.)