1. Introduction
This instruction manual provides essential information for the safe and efficient use of your THOMSON CE-26 Cassette/SD/USB Audio System. Please read this manual thoroughly before operating the device and retain it for future reference. The CE-26 allows you to play audio from cassettes, USB drives, and SD/MMC cards, as well as record audio directly from cassettes or external sources to MP3 format on USB or SD/MMC media.
2. Product Overview
Familiarize yourself with the components and controls of your CE-26 audio system.

Figure 2.1: Front Panel View. This image displays the front of the THOMSON CE-26 unit, showing the cassette deck, control buttons, display screen, USB port, SD/MMC card slot, and volume knob.
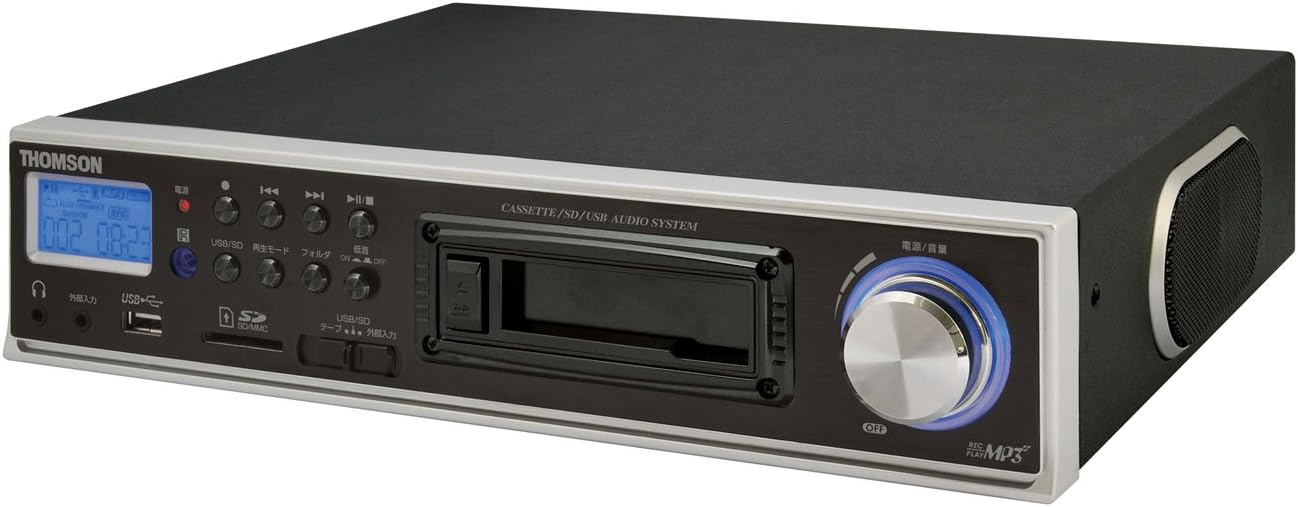
Figure 2.2: Angled View. This image shows the THOMSON CE-26 from an angled perspective, highlighting the integrated side speaker and the overall compact design.

Figure 2.3: Remote Control Unit. This image displays the included remote control for the THOMSON CE-26, featuring buttons for search, display, record, playback mode, program, folder navigation, and USB/SD selection.

Figure 2.4: Feature Overview Diagram. This diagram illustrates the key functionalities of the THOMSON CE-26, including direct recording from cassette to USB/SD, MP3/WMA playback, USB/SD memory copying, AUX input, built-in speaker, and remote control.
Front Panel Controls:
- Power Button: Turns the unit on or off.
- Display Screen: Shows track information, mode, and time.
- Cassette Deck: For inserting and playing audio cassettes.
- USB Port: Connect USB flash drives for playback or recording.
- SD/MMC Card Slot: Insert SD or MMC cards for playback or recording.
- Playback Controls: Play, Pause, Stop, Fast Forward, Rewind, Skip Track.
- Record Button: Initiates recording.
- Mode Button: Switches between Cassette, USB, SD, and AUX input modes.
- Volume Knob: Adjusts the audio output level.
- Headphone Jack: For private listening.
- AUX Input: Connect external audio devices.
3. Setup
- Power Connection: Connect the AC power cord to the unit's power input and then to a standard wall outlet.
- Initial Power On: Press the Power button to turn on the unit. The display will illuminate.
- Inserting Media:
- Cassette: Open the cassette door and insert an audio cassette with the open edge facing upwards. Close the door securely.
- USB Drive: Insert a USB flash drive into the USB port. Ensure it is formatted to FAT32.
- SD/MMC Card: Insert an SD or MMC card into the card slot until it clicks into place. Ensure it is formatted to FAT32.
- External Audio Device (Optional): To use the AUX input, connect an external audio source (e.g., smartphone, CD player) to the AUX IN jack using a 3.5mm audio cable.
4. Operating Instructions
4.1. Cassette Playback
- Insert a cassette tape.
- Press the "Mode" button until "Cassette" mode is selected (or the cassette deck automatically starts playing).
- Press the Play button (►) on the unit or remote.
- Adjust the volume using the Volume knob.
- Use Fast Forward (►►) or Rewind (◄◄) buttons to navigate the tape.
- Press Stop (■) to end playback.
4.2. USB/SD Playback
- Insert a USB drive or SD/MMC card containing MP3 or WMA audio files.
- Press the "Mode" button to select "USB" or "SD" mode. The unit will automatically scan and begin playing the first track.
- Use the Play/Pause (►/∥), Stop (■), Next Track (►►|), and Previous Track (|◄◄) buttons to control playback.
- The "Folder" buttons on the remote can be used to navigate between folders on the USB/SD media.
4.3. Recording Audio to MP3 (Cassette to USB/SD)
This feature allows you to convert your cassette tapes into digital MP3 files.
- Insert a blank or desired USB drive/SD card into the respective slot.
- Insert the cassette tape you wish to record.
- Press the "Mode" button to select "Cassette" mode.
- Start playing the cassette tape.
- Press the "Record" button on the unit or remote. The recording indicator will light up, and the unit will begin converting the cassette audio to MP3 format on the selected USB/SD media.
- To stop recording, press the "Stop" button. The recorded MP3 file will be saved on your USB drive or SD card.
- Note: There might be a slight delay between pressing record and the actual start of recording. It is recommended to start recording slightly before the desired audio begins to avoid cutting off the start of a track.
4.4. Recording Audio to MP3 (AUX Input to USB/SD)
Record audio from an external device connected via the AUX input.
- Connect your external audio device to the AUX IN jack.
- Insert a blank or desired USB drive/SD card.
- Press the "Mode" button to select "AUX" mode.
- Start playback on your external audio device.
- Press the "Record" button on the unit or remote. The recording indicator will light up, and the unit will begin converting the AUX audio to MP3 format on the selected USB/SD media.
- To stop recording, press the "Stop" button.
4.5. Copying Files Between USB and SD/MMC
The CE-26 allows direct copying of MP3/WMA files between a USB drive and an SD/MMC card.
- Ensure both a USB drive and an SD/MMC card are inserted into their respective slots.
- Select either "USB" or "SD" mode using the "Mode" button, depending on which source you want to copy from.
- Navigate to the file or folder you wish to copy.
- Press and hold the "Copy" button (often labeled "USB/SD Copy" or similar) on the unit or remote. Follow any on-screen prompts to confirm the copy operation.
- The display will indicate when the copying process is complete.
5. Maintenance
- Cleaning: Use a soft, dry cloth to clean the exterior of the unit. Do not use liquid cleaners or abrasive materials.
- Cassette Deck Care: Periodically clean the cassette head and pinch rollers with a specialized cassette head cleaner to ensure optimal audio quality and prevent tape damage.
- Storage: When not in use for extended periods, disconnect the power cord and store the unit in a cool, dry place away from direct sunlight and extreme temperatures.
6. Troubleshooting
| Problem | Possible Cause | Solution |
|---|---|---|
| No power | Power cord not connected; Power outlet not active. | Ensure power cord is securely connected. Check if the power outlet is working. |
| No sound during playback | Volume too low; Incorrect mode selected; Headphones connected. | Increase volume. Select the correct input mode (Cassette, USB, SD, AUX). Disconnect headphones if using speakers. |
| Cassette tape not playing or recording correctly | Tape tangled or damaged; Cassette heads dirty; Incorrect tape direction. | Check tape condition. Clean cassette heads and pinch rollers. Ensure tape is inserted correctly. |
| Recording stops prematurely or has gaps | USB drive/SD card full; Media format issue; Intermittent power. | Ensure sufficient storage space. Use FAT32 formatted media. Check power connection stability. |
| Poor audio quality from USB/SD | Corrupted files; Low bitrate MP3/WMA files. | Try different audio files. Ensure files are not corrupted. |
| Remote control not working | Batteries depleted; Obstruction between remote and unit; Incorrect angle. | Replace remote control batteries. Ensure clear line of sight to the unit's IR receiver. |
7. Specifications
| Feature | Detail |
|---|---|
| Brand | THOMSON |
| Model Number | CE-26 |
| Supported Media | Cassette Tape, USB Memory, SD/MMC Card |
| Supported Audio Formats | MP3, WMA (playback); MP3 (recording) |
| Recording Function | Direct digital recording from Cassette to MP3, AUX to MP3 |
| Connectivity | USB Port, SD/MMC Card Slot, AUX Input (3.5mm), Headphone Output (3.5mm) |
| Built-in Speaker | Yes |
| Remote Control | Included |
| Dimensions (approx.) | 35.4 x 33.2 x 12 cm |
| Weight (approx.) | 3.02 kg |
8. Warranty and Support
For warranty information and technical support, please refer to the warranty card included with your product or contact THOMSON customer service directly. Keep your purchase receipt as proof of purchase.
For further assistance, please visit the official THOMSON website or contact their authorized service centers.