Introduction
This manual provides essential instructions for the safe and efficient operation, setup, and maintenance of your Baby Lock Imagine BLE1AT-2 overlock machine. The Baby Lock Imagine is designed to provide professional-quality finishes for a wide range of sewing projects, featuring advanced threading systems and precise stitch control.
Setup
1. Unpacking and Placement
Carefully remove the machine from its packaging. Place the machine on a stable, flat surface, ensuring adequate space around it for fabric handling and ventilation. Keep all packaging materials for future transport or storage.
2. Power Connection
Connect the power cord to the machine's power input and then to a suitable electrical outlet. Ensure the machine's power switch is in the 'OFF' position before connecting to power.
3. Needle Installation
Refer to the markings on the needle clamp for correct needle orientation. Loosen the needle clamp screw, insert the needle fully with the flat side facing the back, and tighten the screw securely. Always use the correct type and size of needles recommended for overlock machines.
4. Threading the Machine
The Baby Lock Imagine features an advanced Jet-Air Threading system for the loopers. Follow the numbered threading path for each thread. For the Jet-Air system, insert the looper thread into the designated port and activate the air lever to effortlessly thread the loopers. Thread the needles manually after the loopers are threaded.

Image: Front panel of the Baby Lock Imagine, highlighting the Jet-Air Threading port and the individual tension dials for each thread.
Operating Instructions
1. Basic Stitching
Raise the presser foot using the lever. Place the fabric under the presser foot, aligning the edge with the cutting blade. Lower the presser foot. Gently press the foot pedal to begin stitching. Guide the fabric smoothly without forcing it.
2. Adjusting Stitch Length and Differential Feed
The stitch length and differential feed can be adjusted using the dials located on the side of the machine. The stitch length dial controls the length of each stitch, while the differential feed dial helps manage fabric stretch and puckering. Adjust these settings based on your fabric type and desired stitch appearance.
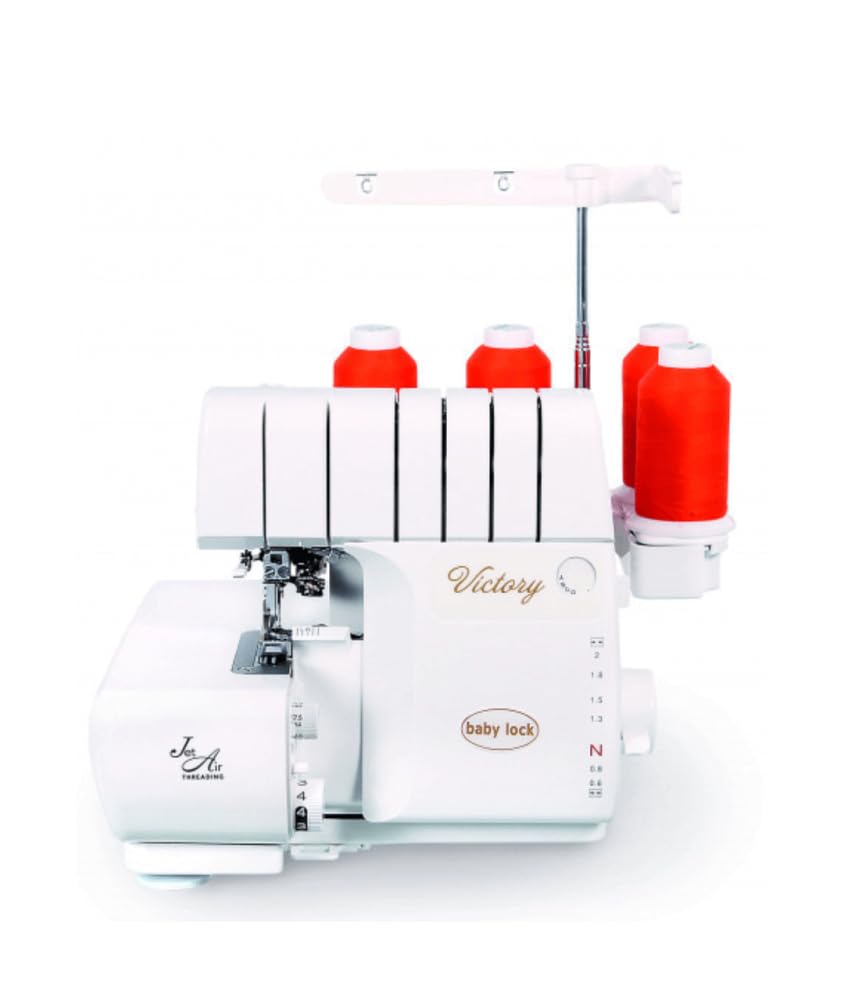
Image: Side panel of the Baby Lock Imagine, showing the rotary dial for adjusting stitch length and differential feed settings.
3. Adjusting Thread Tension
Each thread has an individual tension dial. Proper tension is crucial for balanced stitches. Adjust the tension dials incrementally until the stitches appear even and lie flat on the fabric. Typically, the looper tensions are higher than the needle tensions.
4. Using the Presser Foot
The presser foot holds the fabric firmly against the feed dogs. Ensure the presser foot is lowered before stitching. For thicker fabrics or multiple layers, the presser foot can be lifted higher to accommodate the material.

Image: Detailed view of the needle plate, presser foot, and looper mechanisms, illustrating the working area of the machine.
Maintenance
1. Cleaning
Regularly clean lint and dust from the machine, especially around the feed dogs, loopers, and knife area. Use a soft brush and a vacuum cleaner with a small nozzle. Disconnect the machine from power before cleaning.
2. Needle Replacement
Replace needles frequently, typically after 8-10 hours of sewing or when you notice skipped stitches or fabric damage. Dull or bent needles can cause significant issues.
3. Blade Maintenance
The cutting blades should be kept sharp. If the fabric is not cutting cleanly, the blades may need cleaning or replacement. Consult a qualified technician for blade replacement.
Troubleshooting
- Skipped Stitches: Check if the needles are inserted correctly and are not bent or dull. Re-thread the machine completely, ensuring all threads are seated properly in their tension discs.
- Broken Threads: Verify that the machine is threaded correctly and that the tension settings are not too high. Inspect threads for knots or damage. Ensure the correct thread type is being used.
- Fabric Puckering or Wavy Seams: Adjust the differential feed setting. For stretchy fabrics, increase the differential feed. For fabrics that pucker, decrease it. Also, check thread tensions.
- Machine Not Starting: Ensure the power cord is securely plugged in and the power switch is 'ON'. Check if the foot pedal is connected correctly.
Specifications
| Feature | Detail |
|---|---|
| Brand | Baby Lock |
| Model Number | w-0085 |
| Dimensions (L x W x H) | 32.69 x 15.54 x 10.77 cm |
| Item Weight | 59 g |
| Power Source | Electric Cable |
| UPC | 604020020231 |
Warranty Information
Specific warranty details for the Baby Lock Imagine BLE1AT-2 overlock machine are not provided in the available product data. Please refer to your purchase documentation or contact the retailer for warranty terms and conditions.
Customer Support
For technical assistance, service, or inquiries regarding your Baby Lock Imagine BLE1AT-2, please contact your authorized Baby Lock dealer or visit the official Baby Lock website. Specific contact information is not available in this document.


