1. Introduction
This manual provides instructions for the installation, operation, and maintenance of the Honeywell Home RLV3120A1005 Digital Non-Programmable Thermostat. This thermostat is designed for use with electric baseboard heaters, convectors, and radiant ceilings. It is a non-programmable model, offering straightforward temperature control for your electric heating system.
Key features include:
- Digital display for precise temperature readings.
- Non-programmable functionality for simple set-and-forget operation.
- TRIAC switching for silent operation and accurate temperature control.
- Compatible with line volt heating systems (120V/240V).

Figure 1: Front view of the Honeywell Home RLV3120A1005 Thermostat.
2. Safety Information
Please read all instructions carefully before installing or operating this thermostat. Failure to follow these instructions could result in property damage, injury, or death.
- Electrical Hazard: Always turn off power at the main service panel before installing or servicing this thermostat.
- This thermostat is designed for line voltage electric heating systems only. Do not use with low voltage (24V) systems, central heating/cooling systems, or fan-forced convectors.
- Installation should be performed by a qualified electrician in accordance with local electrical codes.
- Ensure all wiring connections are secure and properly insulated.
3. Installation
Follow these steps for proper installation of your thermostat.
3.1 Pre-Installation
- Turn off power: Locate the circuit breaker or fuse box that controls your electric heating system and turn off the power. Verify that the power is off before proceeding.
- Remove the old thermostat, if applicable.
3.2 Wiring
The RLV3120A1005 thermostat features a 2-wire non-polarized connection for simplified installation.
- Connect one of the thermostat's wires to one of the heating system wires from the wall box using a solderless connector (wire nut).
- Connect the second thermostat wire to the remaining heating system wire from the wall box using another solderless connector. The order of connection for these two wires does not matter as they are non-polarized.
- Ensure all connections are tight and secure.

Figure 2: Rear view of the thermostat with wiring leads. Note the 2-wire non-polarized connection.
3.3 Mounting
- Carefully push the connected wires back into the wall box.
- Align the thermostat with the mounting holes in the wall box.
- Secure the thermostat to the wall box using the provided mounting screws.
- Restore power at the main service panel.
4. Operation
The RLV3120A1005 thermostat is designed for simple and intuitive operation.

Figure 3: Thermostat displaying the current room temperature and setpoint.
4.1 Setting the Temperature
- The display typically shows the current ambient room temperature.
- Press the Up or Down button once to display the setpoint temperature.
- Press the Up or Down button again to adjust the setpoint to your desired temperature. The thermostat will automatically save the new setting.
4.2 Changing Temperature Units (Celsius/Fahrenheit)
- To switch between Celsius (°C) and Fahrenheit (°F), press and hold both the Up and Down buttons simultaneously for approximately 3 seconds.
- The display will change units. Release the buttons to confirm the selection.
4.3 Heating Power Indicator
- The thermostat features an on-screen heating power indicator, typically represented by flame icons or bars.
- The number of icons/bars indicates the intensity of heating power being used. More icons mean the heater is running at a higher intensity to reach or maintain the setpoint.
- This indicator provides visual confirmation of the heating activity.
5. Maintenance
The Honeywell Home RLV3120A1005 thermostat requires minimal maintenance.
- Cleaning: To clean the thermostat, gently wipe the exterior with a soft, damp cloth. Do not use abrasive cleaners or solvents.
- No User-Serviceable Parts: This thermostat contains no user-serviceable parts. Do not attempt to open or repair the unit yourself.
- Ensure that the air vents on the top and bottom of the thermostat are not obstructed to allow for proper temperature sensing.
6. Troubleshooting
If you experience issues with your thermostat, refer to the following common troubleshooting steps.
| Problem | Possible Cause | Solution |
|---|---|---|
| Thermostat display is blank. | No power to the thermostat. | Check the circuit breaker for your heating system. Ensure it is in the ON position. Verify wiring connections. |
| Heater not turning on/off as expected. | Incorrect setpoint; wiring issue; thermostat malfunction. | Verify the setpoint temperature. Ensure wiring is secure. If problem persists, consult a qualified electrician. |
| Inaccurate temperature reading. | Thermostat location; obstructed vents. | Ensure the thermostat is not exposed to direct sunlight, drafts, or heat sources. Check that the thermostat's vents are clear. |
| Display shows incorrect units (°C instead of °F or vice versa). | Unit setting needs adjustment. | Press and hold both the Up and Down buttons simultaneously for 3 seconds to toggle between Celsius and Fahrenheit. |
7. Specifications
Technical specifications for the Honeywell Home RLV3120A1005 Digital Non-Programmable Thermostat.
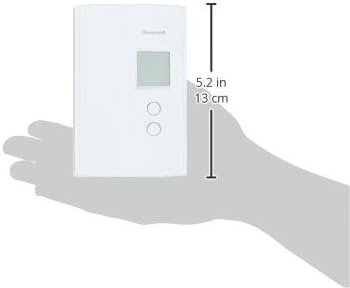
Figure 4: Thermostat dimensions: 4.8 inches (H) x 3.2 inches (W) x 1.1 inches (D).
- Model: RLV3120A1005
- Brand: Honeywell Home
- Type: Digital Non-Programmable Thermostat
- Compatibility: Electric baseboard heaters, convectors, radiant ceilings (line volt heating only). Not compatible with fan-forced convectors.
- Voltage: 120V / 240V AC, 60 Hz
- Maximum Load: 2000W @ 240V (8.3A resistive); 1000W @ 120V (8.3A resistive)
- Minimum Load: 200W @ 240V (0.83A resistive); 100W @ 120V (0.83A resistive)
- Accuracy: ± 0.27°F (0.15°C)
- Switching: TRIAC (silent operation)
- Dimensions: 4.8" H x 3.2" W x 1.1" D (12.2 cm H x 8.1 cm W x 2.8 cm D)
- Color: White
- Display Type: Digital
- Control Type: Push Button
- Item Weight: 6.4 ounces
8. Warranty and Support
This Honeywell Home RLV3120A1005 thermostat comes with a 1-year limited warranty from the date of purchase.
For warranty claims, technical assistance, or further support, please contact Honeywell Home customer service. Refer to the product packaging or the official Honeywell Home website for the most current contact information.
Online resources may include:
- Honeywell Home Official Website
- Product support pages for model RLV3120A1005.


