Weller 8200PKS
Weller 8200PKS Universal Soldering Gun Kit Instruction Manual
Model: 8200PKS
1. Introduction
This manual provides essential instructions for the safe and effective use of your Weller 8200PKS Universal Soldering Gun Kit. This kit is designed for various soldering applications, offering dual heat settings of 140 watts and 100 watts. Please read this manual thoroughly before operation to ensure proper usage and to prevent injury or damage.
2. Safety Information
WARNING: Always follow basic safety precautions when using electrical tools to reduce the risk of fire, electric shock, and personal injury.
- Ventilation: Use the soldering gun in a well-ventilated area to avoid inhaling fumes from solder and flux.
- Eye Protection: Always wear safety glasses or goggles to protect your eyes from splashes of molten solder or flux.
- Burn Hazard: The soldering tip and surrounding metal parts become extremely hot during operation. Avoid contact with skin and flammable materials. Allow the tool to cool completely before handling or storing.
- Electrical Safety: Ensure the power cord is in good condition and avoid using the tool in damp or wet conditions. Do not modify the plug.
- Duty Cycle: To prevent overheating and prolong tool life, operate the soldering gun for a maximum of 1 minute ON, followed by a minimum of 4 minutes OFF. Exceeding this duty cycle can damage the tool.
- Storage: Store the tool in a dry, secure place, out of reach of children.
- UL & cUL Listed: This product is UL & cUL listed, indicating compliance with safety standards.
3. Package Contents
Your Weller 8200PKS Soldering Gun Kit includes the following items:
- Weller 8200 Soldering Gun (120V, 140/100W)
- Soldering Tip
- Smoothing Tip
- Cutting Tip
- Coil of Lead-Free Solder
- Flux Brush
- Soldering Aid Tool
- Storage Case

Image 1: The Weller 8200PKS Soldering Gun Kit, including the gun, various tips, solder, and other accessories, neatly organized within its black plastic storage case.
4. Setup
- Select a Tip: Choose the appropriate tip for your task (soldering, smoothing, or cutting). The kit includes different tips for various applications.
- Install the Tip: Ensure the soldering gun is unplugged and cool. Loosen the two screws at the front of the gun. Insert the desired tip into the two holes, ensuring it is seated firmly. Tighten the screws to secure the tip.
- Prepare Work Area: Work on a heat-resistant surface in a well-ventilated area. Have your solder, flux, and any necessary cleaning tools ready.
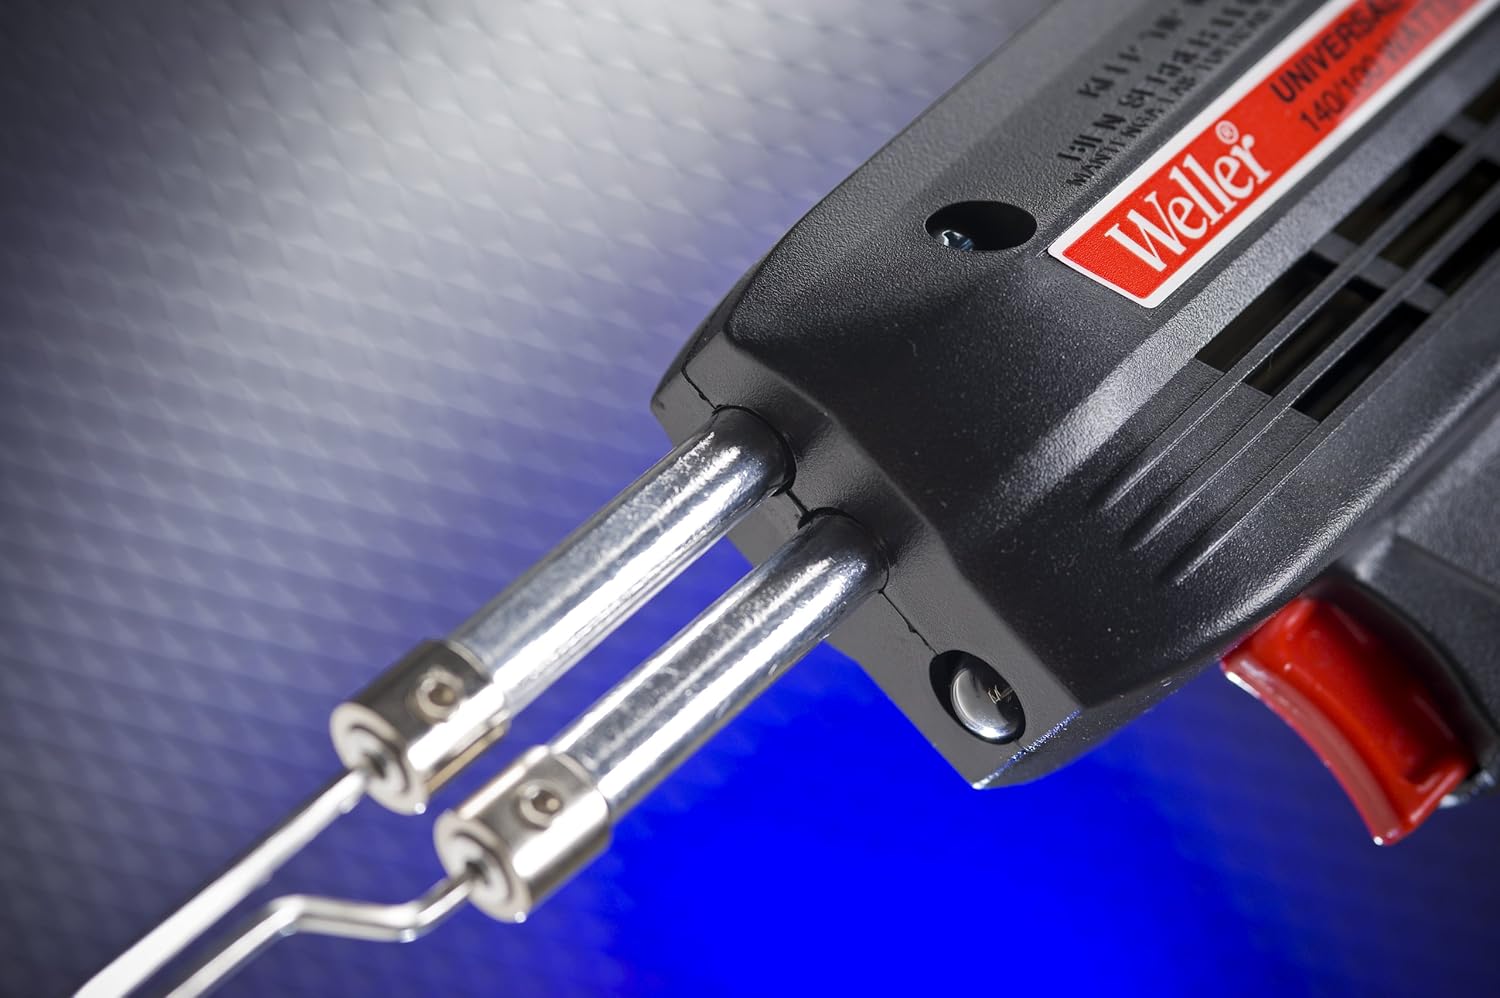
Image 2: A close-up view of the front of the Weller soldering gun, highlighting the two metal tubes where the soldering tips are inserted and secured with screws.
5. Operating Instructions
- Power On: Plug the soldering gun into a standard 120-volt AC outlet.
- Select Heat Setting: The gun features a dual-heat trigger.
- Press the trigger partially (first position) for 100 watts of heat.
- Press the trigger fully (second position) for 140 watts of heat.
- Soldering:
- Apply the hot tip to the joint to be soldered, ensuring both surfaces are heated simultaneously.
- Feed solder onto the heated joint, not directly onto the tip. The solder should flow smoothly and evenly.
- Remove the solder wire, then remove the soldering gun. Allow the joint to cool undisturbed.
- Duty Cycle Adherence: Remember to observe the 1 minute ON / 4 minutes OFF duty cycle to prevent damage to the tool.
- Power Off: Release the trigger to turn off the heating element. Unplug the tool from the outlet when finished or when not in use.

Image 3: The Weller 8200PKS Soldering Gun, showing its pistol grip design, red trigger for dual heat control, and the integrated work light.
6. Maintenance
- Tip Cleaning: Regularly clean the soldering tip with a damp sponge or brass wool to remove excess solder and oxidation. A clean tip ensures efficient heat transfer.
- Tip Replacement: Tips will wear out over time. Replace them when they become pitted, corroded, or no longer hold solder effectively. Ensure the gun is unplugged and cool before replacing tips.
- General Cleaning: Keep the body of the soldering gun clean and free of dust and debris. Use a dry cloth for cleaning.
- Cord Inspection: Periodically inspect the power cord for any signs of damage. Do not use the tool if the cord is frayed or damaged.
7. Troubleshooting
| Problem | Possible Cause | Solution |
|---|---|---|
| Gun does not heat up. | Not plugged in; faulty outlet; damaged cord; loose tip connection. | Check power connection; try a different outlet; inspect cord for damage; ensure tip screws are tight. |
| Solder does not melt or flows poorly. | Dirty or oxidized tip; insufficient heat setting; improper application. | Clean the tip thoroughly; ensure full trigger press for 140W; apply tip to joint, not solder. |
| Gun overheats or shuts off. | Exceeded duty cycle (1 min ON / 4 min OFF). | Allow the gun to cool down for at least 4 minutes. Adhere strictly to the recommended duty cycle. |
| Work light is dim or not working. | Bulb failure; electrical issue. | Contact Weller customer support for assistance. |
8. Specifications
- Model: 8200PKS
- Brand: Weller
- Power Source: Corded Electric
- Voltage: 120 Volts
- Wattage: 140 Watts (High), 100 Watts (Low)
- Heating Time: Approximately 6 seconds
- Upper Temperature Rating: 1100 Degrees Fahrenheit
- Handle Material: Rubber or Acrylonitrile Butadiene Styrene (ABS)
- Item Weight: 3 Pounds
- Cord Length: 6 Feet
- Special Features: Dual Heat, Work Light, Durable
- Certifications: UL & cUL Listed
- Included Components: Soldering Gun, Soldering Iron Tips (Soldering, Smoothing, Cutting), Flux, Lead-free Solder, Soldering Aid Tool, Storage Case
9. Warranty and Support
The Weller 8200PKS Universal Soldering Gun Kit comes with a 7-year warranty. For warranty claims, technical support, or to purchase replacement parts and accessories, please contact Weller customer service.
Visit the official Weller website for contact information and further resources: www.weller-tools.com
Related Documents - 8200PKS
 |
Weller D550 & 8200 Series Soldering Guns: Operating Instructions, Parts, and Uses Comprehensive guide for Weller D550 and 8200 series soldering guns, detailing operating instructions, safety, warranty, replacement parts, and alternative uses like cutting, burning, and smoothing. |
 |
Weller Soldering Gun 8100U, 9200U, 05C Operating Instructions Comprehensive operating instructions and safety guidelines for Weller soldering gun models 8100U, 9200U, and 05C. Includes usage, maintenance, and technical specifications. |
 |
Weller Soldering Equipment Catalog and Product Guide Explore the comprehensive range of Weller soldering stations, irons, desoldering tools, rework stations, and accessories for professional, industrial, and hobbyist applications. |
 |
Weller EC2000/EC2000D Electronic Soldering System: Product Description, Specifications, and Operation Detailed information on the Weller EC2000/EC2000D Electronic Soldering System, including product description, technical specifications, operating instructions, tip selection, calibration, and troubleshooting. |
 |
Weller Portasol P2 Cordless Soldering Tool Operating Instructions Comprehensive operating instructions for the Weller Portasol P2 cordless soldering tool. Includes safety guidelines, ignition sequences, temperature adjustments, and maintenance procedures for this butane-powered device. |
 |
Weller Soldering Gun Maintenance and Duty Cycle Guide Maintenance instructions for tightening Weller soldering gun tips and important duty cycle information for models 7200, 8200, 9400, D550, and D650. |
Ask a question about this manual
Ask about setup, troubleshooting, compatibility, parts, safety, or missing instructions. Manuals+ will review the question and use this page’s manual context to help answer it.