Introduction
Thank you for purchasing the Kingavon BB-OR101 11-Fin Oil Filled Radiator with Timer. This manual provides essential information for the safe and efficient operation of your new appliance. Please read these instructions thoroughly before use and retain them for future reference.
Important Safety Instructions
- Always ensure the radiator is placed on a firm, level surface.
- Do not cover the radiator. Covering the radiator can cause overheating.
- Keep flammable materials such as furniture, curtains, and other combustible items at least 1 meter (3 feet) from the front and sides of the radiator.
- Do not use this radiator in the immediate surroundings of a bath, a shower or a swimming pool.
- Do not insert any objects into the radiator's openings.
- Unplug the radiator from the power outlet when not in use or during cleaning.
- Ensure the voltage indicated on the rating label corresponds with the mains voltage in your home.
- This appliance is not intended for use by persons (including children) with reduced physical, sensory or mental capabilities, or lack of experience and knowledge, unless they have been given supervision or instruction concerning use of the appliance by a person responsible for their safety.
- Children should be supervised to ensure that they do not play with the appliance.
- If the supply cord is damaged, it must be replaced by the manufacturer, its service agent or similarly qualified persons in order to avoid a hazard.
Product Overview
The Kingavon BB-OR101 is an 11-fin oil-filled radiator designed for efficient room heating. It features an adjustable thermostat, multiple heat settings, and a convenient timer function for automated operation. The unit is also equipped with wheels for easy movement and integrated cord storage.
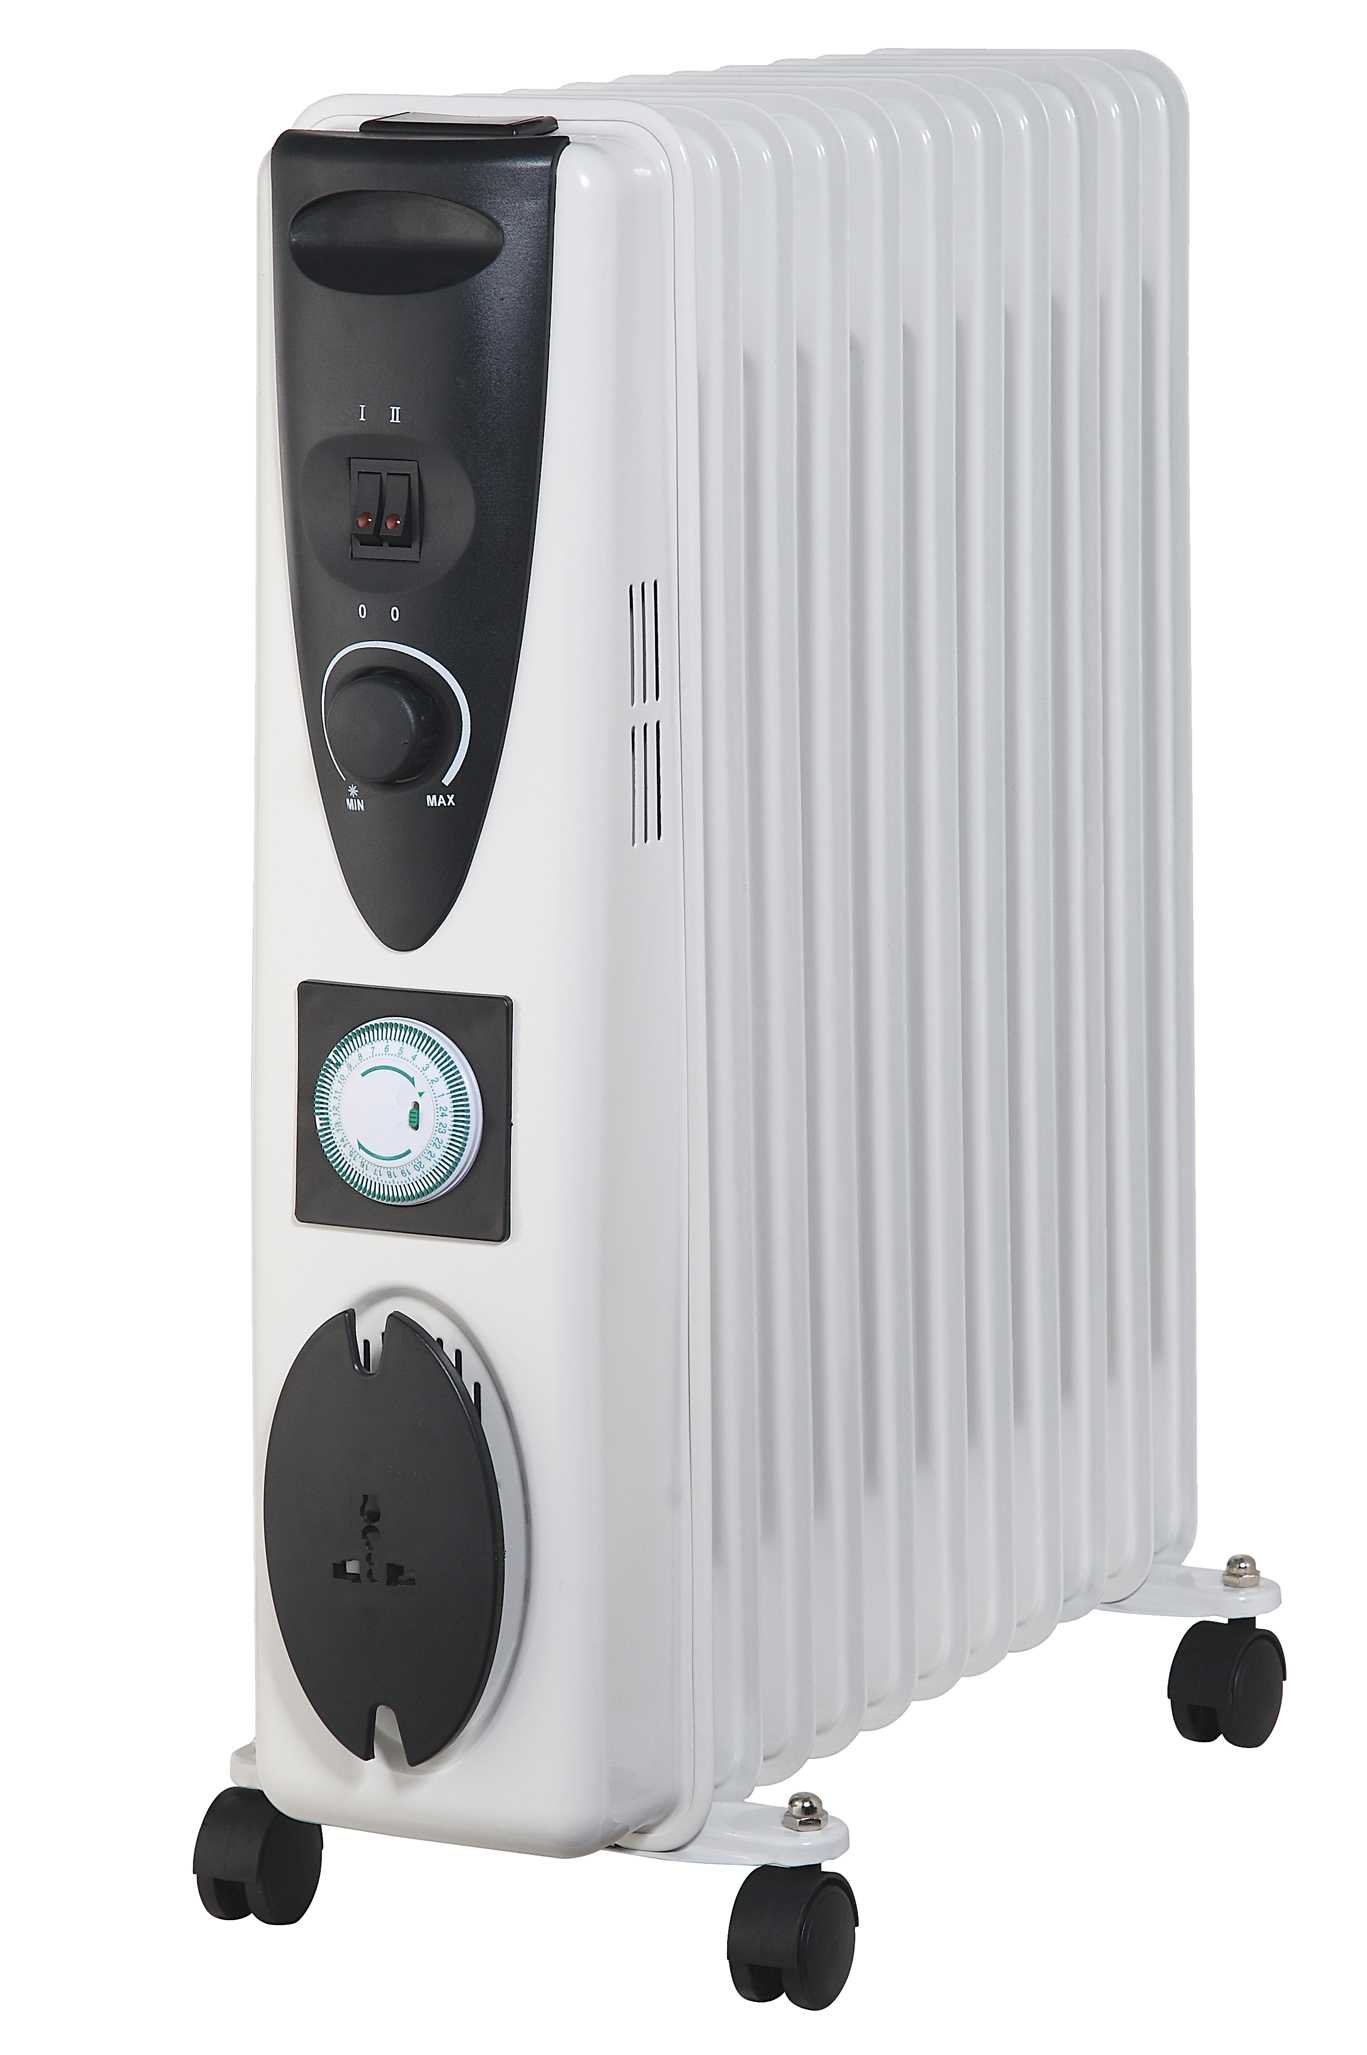
Image 1: Front view of the Kingavon BB-OR101 11-Fin Oil Filled Radiator. This image shows the radiator fins, control panel, and wheels for portability.
Key Features:
- 11-Fin design for effective heat distribution.
- Adjustable thermostat for precise temperature control.
- 3 Heat settings to suit various comfort levels.
- 4-Hour timer for scheduled operation.
- Mounted on wheels for easy movement.
- Integrated cord and plug storage for neatness.
Setup Instructions
- Unpack the Radiator: Carefully remove the radiator from its packaging. Retain the packaging for future storage or transport.
- Attach Wheels (if not pre-assembled): If the wheels are not already attached, follow the instructions provided in the separate wheel assembly guide (if applicable). Ensure they are securely fastened for stability.
- Placement: Place the radiator on a stable, level surface. Ensure there is at least 1 meter (3 feet) of clear space around the radiator from walls, furniture, and other objects to allow for proper heat circulation and prevent fire hazards. Do not place it directly under a power socket.
- Power Connection: Unwind the power cord completely from its storage. Plug the radiator into a suitable 220-240V AC, 50Hz earthed mains socket. Ensure the socket is easily accessible.
Operating Instructions
Turning On/Off:
- To turn on, plug the radiator into the mains and select a heat setting.
- To turn off, set the heat setting to '0' or unplug the unit from the mains.
Adjusting Heat Settings:
The radiator offers 3 heat settings. Use the heat setting switch (usually a rotary dial or push buttons) to select your desired power output:
- Setting 1 (Low): For gentle, continuous heat.
- Setting 2 (Medium): For moderate heating.
- Setting 3 (High): For rapid heating of the room.
Using the Adjustable Thermostat:
The thermostat controls the room temperature. Turn the thermostat dial clockwise to increase the desired temperature and counter-clockwise to decrease it. The radiator will cycle on and off to maintain the set temperature.
- Turn the thermostat dial to its maximum setting.
- Once the room reaches your desired temperature, slowly turn the thermostat dial counter-clockwise until you hear a click. The radiator will now maintain this temperature.
Using the 4-Hour Timer:
The integrated 4-hour timer allows you to set the radiator to operate for a specific duration.
- To activate the timer, press the timer button or rotate the timer dial to the desired duration (up to 4 hours).
- The radiator will operate for the set time and then automatically switch off.
- To override the timer, simply turn the timer function off or unplug the unit.
Maintenance and Storage
Cleaning:
- Always unplug the radiator from the power outlet and allow it to cool down completely before cleaning.
- Wipe the exterior surfaces with a soft, damp cloth. Do not use abrasive cleaners or solvents as these may damage the finish.
- Ensure no water enters the internal parts of the radiator.
- Do not immerse the radiator in water or any other liquid.
Storage:
- When not in use, store the radiator in a cool, dry place.
- Utilize the integrated cord and plug storage to keep the power cord tidy and prevent damage.
- If possible, store the radiator in its original packaging to protect it from dust and damage.
Troubleshooting
| Problem | Possible Cause | Solution |
|---|---|---|
| Radiator does not turn on. | Not plugged in; power outlet faulty; heat setting or thermostat set to '0' or too low; timer active and expired. | Ensure the plug is securely in the outlet. Check the power outlet with another appliance. Increase heat setting and thermostat. Check timer settings. |
| Radiator is not heating effectively. | Heat setting too low; thermostat set too low; room too large for radiator; obstructions blocking heat. | Increase heat setting and thermostat. Ensure the room size is appropriate for the radiator's output. Remove any obstructions. |
| Radiator makes clicking noises. | Normal operation of the thermostat switching on/off; expansion/contraction of metal due to heating/cooling. | This is usually normal. If noises are excessive or unusual, discontinue use and contact support. |
| Radiator smells burnt. | Dust accumulation on heating elements; new unit burning off manufacturing residues. | Unplug and allow to cool. Clean the radiator. A slight smell is normal for first use. If the smell persists or is strong, unplug immediately and contact support. |
Product Specifications
| Feature | Detail |
|---|---|
| Model Number | BB-OR101 |
| Brand | Kingavon |
| Number of Fins | 11 |
| Power Source | Corded Electric |
| Mounting Type | Floor Mount |
| Form Factor | Pedestal |
| Timer | 4 Hour |
| Heat Settings | 3 |
| Adjustable Thermostat | Yes |
| Product Dimensions (approx.) | 65 x 53 x 16 cm (25.6 x 20.9 x 6.3 inches) |
| Item Weight (approx.) | 12.66 kg (27.9 lbs) |
Warranty and Support
Kingavon products are manufactured to high-quality standards. For information regarding warranty coverage, please refer to the warranty card included with your purchase or contact your retailer. If you experience any issues with your Kingavon BB-OR101 radiator, please contact the retailer where the product was purchased for assistance. Do not attempt to repair the appliance yourself.


