iGaging 35-128
iGaging Digital Electronic Indicator User Manual
Model: 35-128
Introduction
The iGaging Digital Electronic Indicator is a precision measuring instrument designed for accurate dimensional measurements in various workshop and industrial applications. It provides highly precise readings in multiple units, making it an indispensable tool for tasks such as aligning machinery, checking runout, and setting tool heights.
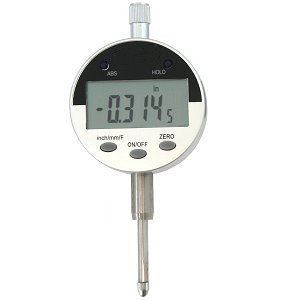
Figure 1: The iGaging Digital Electronic Indicator, displaying a measurement. This image illustrates the compact design and digital display of the device.
Product Features
- Versatile Reading Functions: Provides measurements in inches, metric (millimeters), and fractional increments for broad applicability.
- Power-Saving Auto/Off Feature: Automatically conserves battery life by powering down when not in use.
- ABS Hold Function: Allows for absolute and incremental measurements, enhancing flexibility in various measurement scenarios.
- Data Output Capability: Equipped with a port for connecting to a computer, enabling data logging and analysis.
- Wide Measurement Range: Features a 1-inch range with a high resolution of 0.0005 inches.
- Standard Mounting: Includes a 3/8 inch hole on the back mount for compatibility with standard alignment tools, height gauges, and magnetic base holders.
- Protective Storage: Comes packaged in a padded, protective plastic case for safe transport and storage.
Setup
1. Unpacking
Carefully remove the Digital Electronic Indicator from its padded protective plastic case. Inspect the device for any signs of damage during transit. Retain the original packaging for future storage or transport.
2. Battery Installation
The indicator typically comes with a battery pre-installed. If the display does not illuminate or shows a low battery indicator, follow these steps to replace the battery:
- Locate the battery compartment cover on the back of the unit.
- Gently slide or unscrew the cover to open the compartment.
- Remove the old battery (if present) and insert a new CR2032 lithium coin cell battery, ensuring the positive (+) side faces upwards.
- Replace the battery compartment cover securely.
3. Mounting the Indicator
The indicator is designed for use with various mounting accessories. It features a 3/8 inch hole on its back mount for compatibility.
- Attach the indicator to a suitable magnetic base, height gauge, or other alignment tool using the 3/8 inch mounting hole.
- Ensure the indicator is securely fastened to prevent movement during measurement.
Operating Instructions
1. Power On/Off
- To turn the indicator ON, press the ON/OFF button. The display will illuminate.
- To turn the indicator OFF, press and hold the ON/OFF button for a few seconds until the display turns off. The unit also features an automatic power-off function to save battery.
2. Unit Selection (Inch/Metric/Fractional)
Press the inch/mm/F button to cycle through the available measurement units:
- inch: Displays measurements in decimal inches.
- mm: Displays measurements in millimeters.
- F (Fractional): Displays measurements in fractional inches (e.g., 1/64, 1/32).
3. Zeroing the Display
To set the current position as the zero reference point:
- Position the indicator's probe at the desired starting point for your measurement.
- Press the ZERO button. The display will reset to 0.0000 (or 0.00 in mm, or 0 in fractional) at this position. All subsequent movements will be measured relative to this zero point.
4. ABS/INC Mode (Absolute/Incremental)
The indicator supports both absolute and incremental measurement modes:
- Press the ABS button to toggle between Absolute (ABS) and Incremental (INC) modes.
- In ABS mode, the display shows the absolute distance from a factory-set or previously established absolute zero point.
- In INC mode, the display shows the distance from the last zeroed position (set using the ZERO button). This is useful for measuring differences or relative movements.
5. Taking Measurements
Once the indicator is mounted and zeroed, gently move the probe to make contact with the surface or object to be measured. The digital display will show the precise measurement. Ensure smooth and consistent movement for accurate readings.
6. Data Output
The indicator features a data output port (often a Mini USB jack) for connecting to a computer or data acquisition system. This allows for real-time data logging and analysis. Refer to specific software or interface instructions for detailed data transfer procedures.
Maintenance
1. Cleaning
- Regularly wipe the indicator's body and probe with a clean, soft, lint-free cloth.
- For stubborn dirt, a slightly damp cloth with mild soap can be used, followed by immediate drying.
- Avoid using harsh chemicals, solvents, or abrasive materials, as these can damage the display or finish.
- Ensure no liquids enter the electronic components or the data output port.
2. Battery Replacement
Replace the battery (CR2032) when the display becomes dim or a low battery indicator appears. Refer to the "Setup" section for detailed battery installation instructions.
3. Storage
When not in use, store the Digital Electronic Indicator in its original padded, protective plastic case. This protects it from dust, moisture, and physical impact, ensuring its longevity and accuracy.
- Store in a dry environment, away from extreme temperatures and direct sunlight.
- Avoid storing near strong magnetic fields, which could affect the electronic components.
Troubleshooting
| Problem | Possible Cause | Solution |
|---|---|---|
| Display does not turn on. | Dead or improperly installed battery. | Replace the battery (CR2032) and ensure it is inserted with correct polarity. |
| Inaccurate or inconsistent readings. | Dirt/debris on probe or measuring surface; loose mounting; extreme temperature changes. | Clean the probe and measuring surface. Ensure the indicator is securely mounted. Allow the unit to acclimate to ambient temperature. |
| Display flickering or blinking. | Low battery; internal electronic issue. | Replace the battery. If the issue persists, contact customer support. |
| Buttons unresponsive. | Unit frozen; low battery. | Remove and reinsert the battery to reset the unit. Replace battery if low. |
Specifications
| Attribute | Detail |
|---|---|
| Model Number | 35-128 |
| Measurement Units | Inch, Millimeter, Fractional Inch |
| Range | 1 inch (25.4 mm) |
| Resolution | 0.0005 inch |
| Power Source | CR2032 Lithium Coin Cell Battery (included) |
| Mounting Hole Diameter | 3/8 inch |
| Package Dimensions | 6 x 3.1 x 2.5 inches |
| Weight | Approximately 0.01 ounces (unit weight, excluding packaging) |
| Manufacturer | iGaging |
Warranty Information
Specific warranty details for the iGaging Digital Electronic Indicator (Model 35-128) are typically provided at the point of purchase or within the product packaging. Please refer to the documentation included with your product for comprehensive warranty terms and conditions. For general warranty inquiries, it is recommended to contact iGaging directly.
Customer Support
For technical assistance, operational questions, or service inquiries regarding your iGaging Digital Electronic Indicator, please contact iGaging customer support. Contact information can usually be found on the manufacturer's official website or on the product packaging.
When contacting support, please have your product model number (35-128) and any relevant purchase information readily available to facilitate a quicker resolution.
Related Documents - 35-128
 |
iGAGING Electronic Digital Indicator Operating Manual Operating Instructions and Parts Manual for iGAGING Electronic Digital Indicators (Models 35-125-A, 35-125-4, 35-126, 35-128). Learn about features, operation, data output, and care instructions. |
 |
iGAGING 6 & 12" Digital Height Gauge - Absolute Instruction Manual Instruction manual for the iGAGING 6 & 12" Digital Height Gauge - Absolute, covering product details, specifications, function keys, and care instructions. Includes model numbers 35-629 and 35-630. |
 |
iGAGING IP54 OriginCal Absolute Digital Caliper Operating Instructions and Parts Manual Operating instructions and parts manual for the iGAGING IP54 OriginCal Absolute Digital Caliper, detailing its parts, specifications, operations, battery replacement, and precautions. |
 |
EZ View DRO for Large Size Planer Quick Setup Manual This manual provides quick setup and operating instructions for the iGAGING EZ View DRO system designed for large size planers. It covers mounting, parts identification, and operational features like unit selection, preset values, and calibration. |
 |
iGaging EZ-Depth Digital Drill Press Gauge: Operating & Installation Instructions Comprehensive guide for operating and installing the iGaging EZ-Depth Digital Drill Press Gauge, featuring accuracy improvements for drilling operations. Includes setup steps, button functions, and specifications. |
 |
iGAGING EZ Digital Miter Gauge: Installation, Calibration, and User Guide Comprehensive guide for installing, calibrating, and using the iGAGING EZ Digital Miter Gauge (Item #35-0929-18). Includes parts, tools, assembly steps, usage instructions, specifications, and safety information for woodworking. |
Ask a question about this manual
Ask about setup, troubleshooting, compatibility, parts, safety, or missing instructions. Manuals+ will review the question and use this page’s manual context to help answer it.