
1. Introduction
Thank you for choosing the AOC 931SWL 19-Inch Wide Class LCD Monitor. This manual provides essential information for the safe and efficient use of your new monitor. Please read it thoroughly before installation and operation, and keep it for future reference.
The AOC 931SWL is a 19-inch (18.5-inch viewable image size) widescreen LCD monitor designed for personal computing. It features a 16:9 aspect ratio, 1366 x 768 resolution, a fast 5 ms response time, 200 cd/m2 brightness, and a 10,000:1 dynamic contrast ratio for clear and vibrant images. Connectivity is provided via a VGA port.
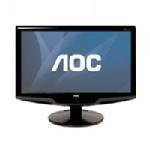
Figure 1.1: Front view of the AOC 931SWL 19-Inch Wide Class LCD Monitor. This image displays the monitor's sleek design with its widescreen display and stand.
2. Safety Information
Observe the following safety precautions to ensure optimal performance and prevent damage to the monitor or injury to yourself.
- Power Source: Use only the power cord and adapter supplied with the monitor. Connect to a grounded power outlet.
- Ventilation: Do not block ventilation openings. Ensure adequate space around the monitor for proper airflow.
- Moisture: Do not expose the monitor to rain, moisture, or excessive humidity. Do not place objects filled with liquids on or near the monitor.
- Heat: Keep the monitor away from heat sources such as radiators, heat registers, stoves, or other heat-producing appliances.
- Cleaning: Unplug the monitor from the power outlet before cleaning. Use a soft, dry cloth for cleaning. Avoid liquid or aerosol cleaners.
- Placement: Place the monitor on a stable, flat surface. Avoid placing it in direct sunlight or near strong electromagnetic fields.
- Servicing: Do not attempt to service this product yourself. Refer all servicing to qualified service personnel.
3. Package Contents
Please check the package contents upon unpacking. If any items are missing or damaged, contact your retailer or AOC customer support.
- AOC 931SWL 19-Inch Wide Class LCD Monitor
- Power Cord
- VGA Cable
- User Manual (this document, or a quick start guide)
- Driver CD (may include digital manual)
4. Setup
4.1 Unpacking and Assembly
- Carefully remove the monitor from its packaging.
- Place the monitor face down on a soft, clean surface to prevent scratching the screen.
- Attach the stand base to the monitor neck/arm according to the instructions provided in the quick start guide (if applicable). Ensure it is securely fastened.
- Carefully lift the monitor and place it upright on a stable desk or table.
4.2 Connecting Cables
Before connecting any cables, ensure both the monitor and your computer are powered off.
- Connect the VGA Cable: Locate the VGA port on the back of the monitor and on your computer's graphics card. Connect one end of the VGA cable to the monitor's VGA port and the other end to your computer's VGA port. Tighten the screws on the VGA connectors to secure the connection.
- Connect the Power Cord: Plug one end of the power cord into the monitor's power input port and the other end into a grounded electrical outlet.
4.3 Powering On
- Power on your computer.
- Press the power button on the front or bottom of the monitor. The power indicator light should illuminate.
- The monitor should automatically detect the input signal from your computer. If no image appears, refer to the Troubleshooting section.
5. Operating Instructions
5.1 Power On/Off
Press the power button located on the front bezel of the monitor to turn it on or off. The power indicator light will show the monitor's status (e.g., green for on, amber for standby).
5.2 On-Screen Display (OSD) Menu
The OSD menu allows you to adjust various display settings. The control buttons are typically located on the bottom right or front bezel of the monitor. Common buttons include:
- Menu: Opens the OSD menu.
- Up/Down (or Left/Right) Arrows: Navigate through menu options and adjust values.
- Enter/Select: Confirms a selection or enters a sub-menu.
- Exit/Auto: Exits the OSD menu or performs an auto-adjustment for optimal picture settings.
5.3 Adjusting Display Settings
To optimize your viewing experience, you may need to adjust settings such as brightness, contrast, and color balance.
- Press the Menu button to open the OSD.
- Use the navigation buttons to select categories like Picture, Color, or OSD Setup.
- Select specific settings such as Brightness, Contrast, Color Temperature, or Gamma.
- Adjust the values using the navigation buttons.
- Press the Exit button to close the OSD menu.
- For initial setup, pressing the Auto button (if available) can automatically optimize the display settings for the current input signal.
6. Maintenance
6.1 Cleaning the Monitor
Regular cleaning helps maintain the monitor's appearance and performance.
- Always unplug the monitor from the power outlet before cleaning.
- Use a soft, lint-free cloth slightly dampened with water or a mild, non-abrasive screen cleaner.
- Do not spray cleaner directly onto the screen. Apply it to the cloth first.
- Wipe the screen gently. Avoid applying excessive pressure.
- For the monitor casing, use a soft, dry cloth.
6.2 General Care
- Avoid placing heavy objects on the monitor or its cables.
- Do not expose the monitor to extreme temperatures or rapid temperature changes.
- If the monitor will not be used for an extended period, unplug it from the power outlet.
7. Troubleshooting
If you encounter issues with your monitor, refer to the following common problems and solutions before contacting support.
| Problem | Possible Cause | Solution |
|---|---|---|
| No image on screen / Power LED off | Monitor not powered on; Power cable loose; No power from outlet. | Press the power button; Check power cable connections; Test the power outlet with another device. |
| No image / Power LED amber | No signal from computer; Incorrect input selected. | Ensure computer is on and not in sleep mode; Check VGA cable connection; Press the 'Auto' button or navigate OSD to select correct input. |
| Image is blurry or distorted | Incorrect resolution; VGA cable not fully connected; Auto-adjustment needed. | Set computer's display resolution to 1366 x 768; Reconnect VGA cable securely; Perform OSD auto-adjustment. |
| Image is too bright or too dark | Brightness/Contrast settings incorrect. | Adjust Brightness and Contrast settings via the OSD menu. |
| Colors are incorrect | Color settings incorrect; Faulty VGA cable. | Adjust Color Temperature or RGB settings via the OSD menu; Try a different VGA cable if available. |
| Limited viewing angle distortion | Characteristic of TN panel technology. | Adjust your seating position to be directly in front of the monitor for optimal viewing. |
8. Specifications
Detailed technical specifications for the AOC 931SWL monitor:
- Brand: AOC
- Model Number: 931SWL
- Screen Size: 19 Inches (18.5-inch viewable)
- Resolution: 1366 x 768 (XGA Wide)
- Aspect Ratio: 16:9
- Contrast Ratio: 10,000:1 (Dynamic)
- Refresh Rate: 60 Hz
- Display Type: LCD
- Brightness: 200 cd/m2
- Response Time: 5 Milliseconds
- Connectivity Technology: VGA
- Color: Black
- Item Weight: 10.8 Pounds
- Manufacturer: Aoc International
- UPC: 685417025985
9. Warranty and Support
For warranty information and technical support, please refer to the warranty card included with your product or visit the official AOC website. You can typically find support resources, driver downloads, and contact information for customer service there.
AOC Official Website: www.aoc.com
Please have your monitor's model number (931SWL) and serial number ready when contacting support.


