1. Introduction
This manual provides essential information for the safe assembly, operation, maintenance, and troubleshooting of your Hiland Outdoor Propane Gas Patio Heater, Model HLDS01-WCGT. Please read and understand all instructions before using the appliance.

Figure 1: Hiland Outdoor Propane Gas Patio Heater.

Figure 2: Patio heater in an outdoor setting.
2. Safety Information
WARNING: For outdoor use only. Improper installation, adjustment, alteration, service, or maintenance can cause injury or property damage. Read the installation, operating, and maintenance instructions thoroughly before installing or servicing this equipment.
- Always operate the heater in a well-ventilated outdoor area.
- Keep combustible materials at least 3 feet (0.9 meters) away from the top, sides, and rear of the heater.
- Ensure the heater is on a level, stable surface to prevent tipping.
- Do not store or use gasoline or other flammable vapors and liquids in the vicinity of this or any other appliance.
- Always turn off the gas supply at the LP cylinder when the heater is not in use.
- This product contains chemicals known to the State of California to cause cancer and birth defects or other reproductive harm (Proposition 65 warning).
3. Parts List
Before assembly, ensure all parts are present and undamaged. Refer to the assembly diagram in your product packaging for detailed component identification.
- Reflector Assembly
- Burner Assembly with Control Unit
- Main Pole (Single Pole Design)
- Adjustable Table
- Cylinder Housing (with Open Door Design)
- Base with Wheels
- Hardware Kit
4. Setup and Assembly
Follow these steps for proper assembly of your patio heater:
- Unpacking: Carefully remove all components from the packaging. Remove any protective films, especially from reflective surfaces, before assembly.
- Base Assembly: Attach the wheels to the base of the heater. The built-in wheels allow for easy movement of the unit.
- Cylinder Housing: Position the cylinder housing onto the base. The open door design facilitates easy access for changing the propane gas bottle without lifting the entire housing.
- Pole Installation: Secure the single pole to the cylinder housing. This design enhances stability and simplifies assembly compared to multi-piece poles.
- Adjustable Table: Install the adjustable table onto the main pole. The height of the table can be adjusted to your preference, providing a convenient surface for drinks or small items.
- Burner and Reflector: Attach the burner assembly and then the reflector to the top of the pole. Ensure all connections are secure.
- Propane Tank Connection: Place a standard 20lb propane tank inside the cylinder housing. Connect the gas hose from the heater's control unit to the propane tank. Ensure a tight, leak-free connection.
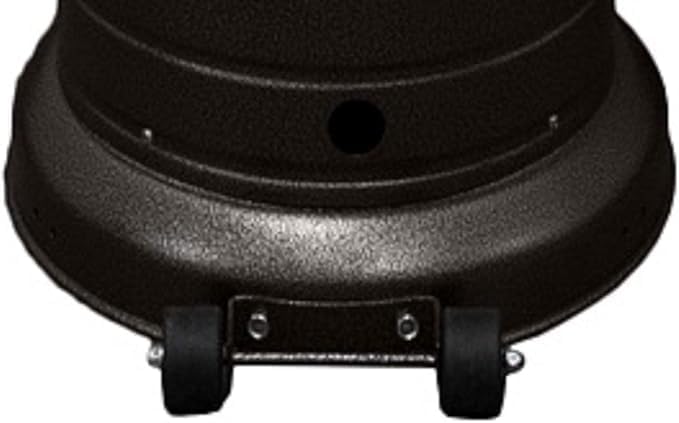
Figure 3: Base with built-in wheels for easy mobility.

Figure 4: Adjustable table for convenience.

Figure 5: Open door for easy propane tank access.
Video 1: Demonstrates the heater's mobility with its built-in wheels and handles.
Video 2: Shows the ease of operation and propane tank access.
5. Operating Instructions
Your Hiland Patio Heater features a powerful 48,000 BTU output with variable control for optimal comfort.
- Gas Supply: Ensure the propane tank valve is fully open.
- Ignition: Turn the control knob to the 'Pilot' position and push it in. Press the igniter button repeatedly until the pilot flame lights. Hold the knob in for 10-15 seconds after ignition to allow the thermocouple to heat up.
- Main Burner: Once the pilot is lit, release the control knob and slowly turn it to the 'Low' or 'High' position to ignite the main burner.
- Heat Adjustment: Rotate the control knob between 'Low' and 'High' to adjust the heat output as desired.
- Shut Down: To turn off the heater, turn the control knob to the 'Off' position. Close the valve on the propane tank.

Figure 6: Control unit for ignition and heat adjustment.
Video 3: Provides a general overview of the heater, including assembly and operation.
6. Maintenance
Regular maintenance ensures the longevity and safe operation of your patio heater.
- Cleaning: Clean the exterior surfaces with a soft, damp cloth. Do not use abrasive cleaners or solvents.
- Storage: When not in use, especially during inclement weather or off-season, store the heater in a covered area to protect it from elements and prevent rust. Disconnect the propane tank before storage.
- Gas Line Inspection: Periodically check the gas hose and connections for any signs of wear, cuts, or leaks. Perform a leak test with soapy water if a leak is suspected.
- Safety Features: The heater includes double safety features: a built-in tilt switch that cuts off gas supply in case of accidental tip-over, and an integral thermocouple that prevents gas leakage in the event of flameout. Ensure these features are not obstructed.
7. Troubleshooting
If your heater is not operating correctly, consult the following table before contacting customer support.
| Problem | Possible Cause | Solution |
|---|---|---|
| Heater will not ignite. | No gas flow; igniter not sparking; pilot light not staying lit. | Check propane tank level and valve. Ensure igniter is clean and positioned correctly. Hold pilot knob longer (10-15 seconds) to heat thermocouple. |
| Low heat output. | Low gas pressure; control knob set too low. | Check propane tank level. Adjust control knob to a higher setting. |
| Flame goes out unexpectedly. | Low gas pressure; tip-over switch activated; strong wind. | Check propane tank. Ensure heater is upright and stable. Relocate heater to a less windy area or use a windbreak. |
| Gas odor detected. | Gas leak. | Immediately turn off gas supply. Perform a leak test with soapy water on all connections. Do not operate if a leak is found. Contact qualified service personnel. |
8. Specifications
- Brand: Hiland
- Model Number: HLDS01-WCGT
- Fuel Type: Propane
- Heat Output: 48,000 BTU's
- Color: Hammered Bronze Finish
- Product Dimensions: 32"D x 87"W x 32"H
- Item Weight: 42 pounds
- Special Features: Adjustable Height, Adjustable Temperature, Fast Heating, Wheels
- Safety: CSA approved, Built-in Tilt Switch, Thermocouple
- UPC: 872313014469
9. Warranty and Support
For warranty information and customer support, please refer to the documentation included with your product or visit the official Hiland website. Keep your purchase receipt for warranty claims.