1. Introduction
This manual provides detailed instructions for the installation, operation, and maintenance of the Hurricane HM3809-01 Indicator Lamp Kit. Please read this manual thoroughly before installation and use to ensure proper function and safety.
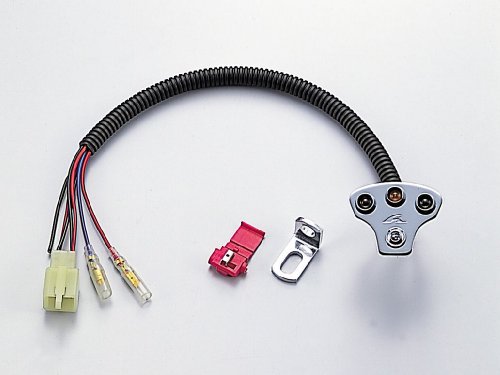
Figure 1: Hurricane HM3809-01 Indicator Lamp Kit. This image shows the main components of the indicator lamp kit, including the LED lamps and associated wiring.
2. Safety Information
- Always disconnect the vehicle's battery before performing any electrical work to prevent short circuits or electrical shock.
- Ensure all connections are secure and properly insulated to prevent moisture ingress and electrical faults.
- Verify the indicator lamps are functioning correctly after installation before operating the vehicle.
- This product is designed for DC 12V vehicle electrical systems only. Do not connect to other voltage systems.
- If you are unsure about any installation steps, consult a qualified mechanic.
3. Package Contents
The Hurricane HM3809-01 Indicator Lamp Kit includes:
- Waterproof LED Indicator Lamps (pair)
- Dedicated Wiring Harness
- Aluminum Stays (L-shaped)
- Mounting Hardware (suitable for M6 and M8 bolts)
4. Setup and Installation
This indicator lamp kit is designed for installation on the side of the top bridge or similar locations on compatible motorcycles. Compatible models include SL230 ('97-'06/MD33), CB223S ('08-'16/MC40), and FTR223 ('00-'16/MC34).
- Prepare the Vehicle: Park the motorcycle on a stable, level surface. Turn off the ignition and disconnect the negative terminal of the battery.
- Identify Mounting Location: Determine the desired mounting position for the indicator lamps, typically on the side of the top bridge. The included L-shaped aluminum stays are designed for this purpose.
- Mount the Stays: Secure the aluminum stays to the chosen location using appropriate M6 or M8 bolts. Ensure the stays are firmly attached and do not obstruct any moving parts or controls.
- Attach Indicator Lamps: Mount the LED indicator lamps to the installed aluminum stays. Ensure they are oriented correctly and securely fastened.
- Wire the Lamps: Connect the dedicated wiring harness to the indicator lamps. Route the wiring carefully, avoiding hot engine parts, sharp edges, and moving components. Secure the wiring with zip ties or similar fasteners to prevent chafing or snagging.
- Connect to Vehicle Electrical System: Connect the wiring harness to the motorcycle's 12V DC electrical system, typically to the existing indicator light circuit. Ensure correct polarity (positive to positive, negative to negative). If unsure, consult your motorcycle's service manual or a professional.
- Reconnect Battery: Once all connections are made and secured, reconnect the negative terminal of the battery.
- Test Functionality: Turn on the ignition and test the indicator lamps to ensure they illuminate correctly when the turn signals are activated. Verify both left and right indicators function as expected.
5. Operating Instructions
The Hurricane HM3809-01 Indicator Lamp Kit operates in conjunction with your motorcycle's existing turn signal system. Once properly installed and wired, the LED indicator lamps will illuminate when the corresponding turn signal is activated, providing enhanced visibility.
- Activate your motorcycle's left turn signal to illuminate the left indicator lamp.
- Activate your motorcycle's right turn signal to illuminate the right indicator lamp.
- Ensure the lamps flash in sync with your motorcycle's primary turn signals.
6. Maintenance
The Hurricane HM3809-01 Indicator Lamp Kit requires minimal maintenance due to its durable and waterproof LED design.
- Cleaning: Periodically clean the lamp lenses with a soft, damp cloth to remove dirt and debris. Avoid abrasive cleaners that could scratch the lens.
- Inspection: Regularly inspect the wiring and connections for any signs of wear, damage, or corrosion. Ensure all mounting bolts remain tight.
- Waterproofing: The lamps are waterproof, but avoid directing high-pressure water jets directly at the wiring connections during washing.
7. Troubleshooting
| Problem | Possible Cause | Solution |
|---|---|---|
| Lamps do not illuminate. |
|
|
| Lamps flash too fast or too slow. |
|
|
| One lamp does not illuminate. |
|
|
8. Specifications
| Feature | Detail |
|---|---|
| Model Number | HM3809-01 |
| Brand | Hurricane |
| Bulb Type | LED |
| Voltage | DC 12 Volts |
| Waterproofing | Yes |
| Mounting Bolt Compatibility | M6 and M8 |
| Product Dimensions | 3.8 x 10 x 14.5 cm |
| Item Weight | 92 g |
| Compatible Models | SL230 ('97-'06/MD33), CB223S ('08-'16/MC40), FTR223 ('00-'16/MC34) |
9. Warranty and Support
For warranty information and customer support, please refer to the documentation provided with your purchase or contact the retailer where the product was acquired. You may also visit the official Hurricane website for further assistance.
Note: Specific warranty terms may vary by region and retailer. Keep your proof of purchase for warranty claims.