1. Introduction and Kit Overview
This manual provides instructions for the Master Airbrush Multi-Purpose Airbrushing System Kit, Model KIT-18. This kit is designed for various airbrushing applications, including hobbies, crafts, auto graphics, temporary tattoos, cake decorating, fine art, and nail art.
Kit Components
- Model S68 Precision Dual-Action Siphon Feed Airbrush with 0.35 mm fluid tip, 3/4 oz. siphon bottle, and 1/6 oz. color cup.
- Model TC-320 Cool Runner II 1/5 hp Single-Piston Air Compressor with two cooling fans.
- Pressure Regulator with Gauge.
- Water Trap Filter.
- 6-foot Braided Air Hose.
- Dual Airbrush Holder.
- Master Airbrush Quick Start Guide and Airbrush Resource Center Access Card.

Figure 1: Overview of the Master Airbrush Multi-Purpose Airbrushing System Kit, showing the S68 airbrush, TC-320 compressor, air hose, and accessories.
2. Assembly and Initial Setup
Carefully unpack all components and inspect for any damage. Ensure all parts listed in the Kit Components section are present before proceeding with assembly.
2.1 Airbrush Assembly (Model S68)
- Attach the desired fluid cup (3/4 oz. siphon bottle or 1/6 oz. color cup) to the bottom of the airbrush body. Ensure it is securely fastened.
- Verify the 0.35 mm fluid tip and needle are correctly installed. The needle should move freely when the trigger is pulled back.

Figure 2: Exploded view of the Model S68 airbrush, illustrating its various parts for assembly and maintenance.
2.2 Compressor Connection (Model TC-320)
- Place the TC-320 compressor on a stable, level surface with adequate ventilation.
- Screw the pressure regulator with gauge and water trap filter onto the air outlet port of the compressor. Apply Teflon tape to threads for a secure, airtight seal if needed.
- Connect one end of the 6-foot braided air hose to the water trap filter outlet.
- Connect the other end of the air hose to the air inlet of the S68 airbrush.
- Plug the compressor power cord into a grounded electrical outlet.

Figure 3: Diagram of the Model TC-320 Cool Runner II air compressor, highlighting its dual cooling fan system for extended operation.
2.3 Dual Airbrush Holder
The dual airbrush holder can be mounted directly onto the compressor for convenient storage and access to your airbrush during use or breaks.
3. Operating Instructions
Before operating, ensure you are in a well-ventilated area and wearing appropriate personal protective equipment, such as a respirator and safety glasses.
3.1 Filling the Fluid Cup
- Prepare your chosen paint or medium according to the manufacturer's instructions, ensuring it is properly thinned for airbrush use.
- Carefully pour the prepared fluid into the siphon bottle or color cup. Do not overfill.
3.2 Dual-Action Control
The Model S68 is a dual-action airbrush, meaning it controls both air and fluid flow with a single trigger movement:
- Pressing Down: Pushing the trigger down releases air.
- Pulling Back: Pulling the trigger back (while holding it down) releases fluid. The further back you pull, the more fluid is released.
Practice this motion to achieve smooth transitions between air and paint flow.
3.3 Adjusting Air Pressure
The TC-320 compressor's pressure regulator allows you to adjust the air pressure (PSI) to suit your specific paint and application. Start with a lower PSI (e.g., 15-20 PSI) and gradually increase as needed. The gauge displays the current operating pressure.
3.4 Spraying Techniques
- Always begin by pressing the trigger down for air, then pull back for paint. Release paint first, then air.
- Maintain a consistent distance from your surface. Closer distances produce finer lines, while further distances create broader sprays.
- Move your airbrush in smooth, even strokes to avoid paint buildup or uneven coverage.
4. Cleaning and Maintenance
Proper cleaning and maintenance are essential for the longevity and optimal performance of your airbrush system.
4.1 Daily Cleaning (After Each Use)
- Empty any remaining paint from the fluid cup.
- Add a small amount of appropriate airbrush cleaner or solvent to the cup.
- Spray the cleaner through the airbrush onto a paper towel or into a cleaning pot until the spray runs clear.
- Use a cotton swab or brush to clean the inside of the fluid cup.
4.2 Deep Cleaning (Periodically or When Clogged)
- Disassemble the airbrush components (needle, nozzle, air cap). Refer to Figure 2 for guidance.
- Soak components in airbrush cleaner.
- Use specialized airbrush cleaning brushes to remove dried paint from the nozzle, needle cap, and airbrush body.
- Carefully clean the needle, wiping it from the back towards the tip. Avoid bending the tip.
- Rinse all components with clean water and allow them to dry completely before reassembly.
4.3 Compressor Maintenance
- Regularly drain any accumulated moisture from the water trap filter by pressing the silver button at the bottom.
- Keep the compressor's air intake vents clear of dust and debris to ensure proper cooling.
- Ensure the air hose connections are tight and free of leaks.
5. Troubleshooting Guide
This section addresses common issues you might encounter with your airbrush system.
| Problem | Possible Cause | Solution |
|---|---|---|
| No paint flow or inconsistent spray | Clogged nozzle or air cap; dried paint on needle; paint too thick; low air pressure. | Perform deep cleaning of airbrush components. Thin paint appropriately. Increase air pressure. |
| Air bubbles in fluid cup | Loose nozzle; damaged nozzle; air leak in fluid cup connection. | Tighten nozzle. Inspect nozzle for damage and replace if necessary. Ensure fluid cup is securely attached. |
| Compressor not building pressure or overheating | Air leaks in connections; blocked air intake; prolonged continuous use. | Check all hose and regulator connections for leaks (use Teflon tape). Ensure air intake is clear. Allow compressor to cool down if used for extended periods. |
| Regulator not functioning correctly | Faulty regulator; improper installation. | Ensure regulator is securely attached to the compressor with proper sealing. If issues persist, contact customer support. |
| Styrofoam bits in air hose/airbrush | Packaging residue. | Thoroughly clean out air hose ends and connections to the compressor and airbrush before first use. |
6. Product Specifications
| Feature | Specification |
|---|---|
| Brand | Master Airbrush |
| Model Number | KIT-18 |
| Airbrush Model | S68 Dual-Action Siphon Feed |
| Airbrush Tip Size | 0.35 mm |
| Fluid Cup Capacity | 3/4 oz. (siphon bottle), 1/6 oz. (color cup) |
| Compressor Model | TC-320 Cool Runner II |
| Compressor Horsepower | 1/5 hp (0.2 Horsepower) |
| Air Flow Capacity | 25 Liters Per Minute |
| Noise Level | 59 Decibels |
| Hose Length | 6 Feet |
| Item Weight | 9.8 Pounds |
| UPC | 844825085060 |
7. Warranty and Customer Support
Master Airbrush is dedicated to customer satisfaction. For specific warranty details, please refer to the documentation included with your product or contact customer support directly.
Customer Support
For assistance, technical support, or to access additional resources, please use the contact information provided on your Airbrush Resource Center Access Card:
- Phone: (888) 909-2110
- Email: support@tcpglobal.com
- Website: www.airbrushresourcecenter.com
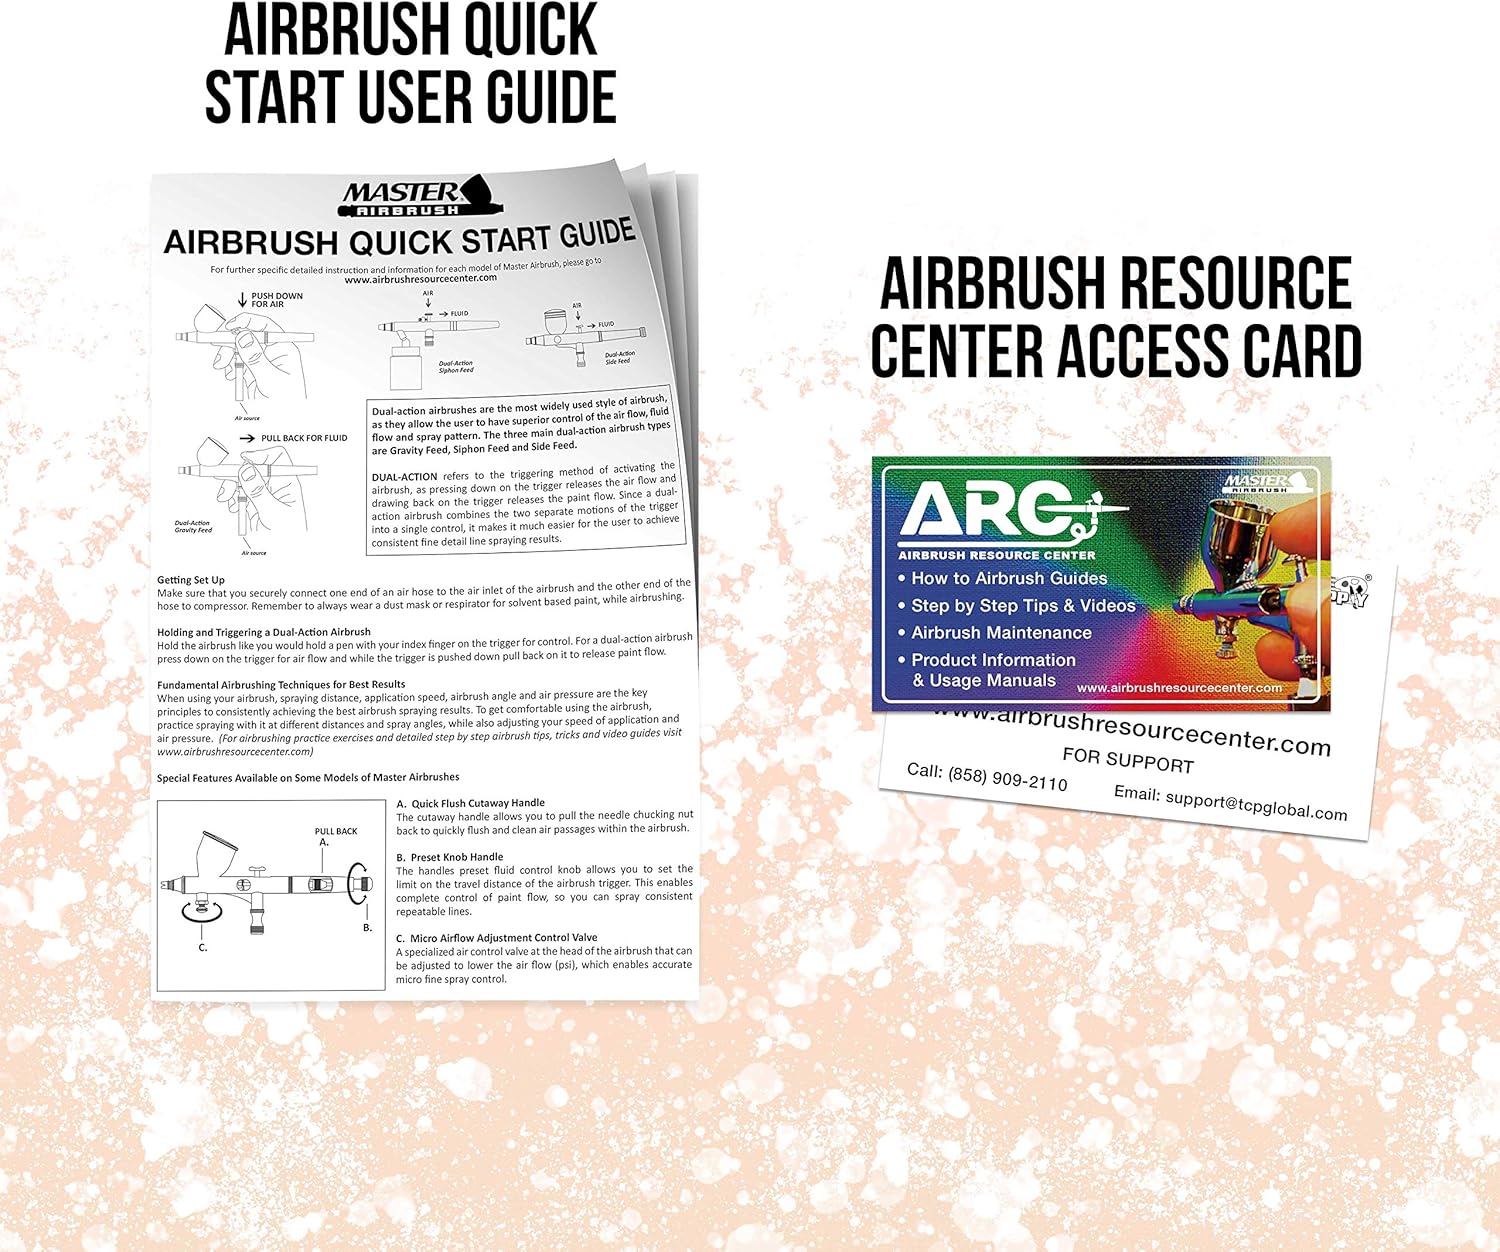
Figure 4: Master Airbrush Quick Start Guide and Airbrush Resource Center Access Card, providing essential information and support contacts.