Opteka OPT 8 DPF-CH
Opteka OPT 8 DPF-CH 8-Inch Digital Picture Frame User Manual
Model: OPT 8 DPF-CH
1. Introduction
This manual provides comprehensive instructions for the setup, operation, and maintenance of your Opteka OPT 8 DPF-CH 8-Inch Digital Picture Frame. This device allows you to view digital pictures (JPEG) directly from various memory cards without the need for a computer. It features 128MB of built-in memory, a high-resolution TFT LCD screen, and built-in stereo speakers.

Figure 1: The Opteka OPT 8 DPF-CH 8-Inch Digital Picture Frame, featuring a cherry wood finish and displaying a vibrant family photograph. A remote control is also visible next to the frame.
2. Setup
2.1 Unpacking
Carefully remove all components from the packaging. Ensure the following items are present:
- Opteka OPT 8 DPF-CH Digital Picture Frame
- AC Power Adapter
- Remote Control
- USB Cable (for computer connection, if desired)
- Adjustable Stand
2.2 Power Connection
- Connect the AC power adapter to the DC IN port on the back of the digital picture frame.
- Plug the other end of the power adapter into a standard electrical outlet.
- The frame will power on automatically or can be turned on using the power button on the frame or remote control.
2.3 Inserting a Memory Card
The frame is compatible with various memory card formats. Locate the memory card slot(s) on the side or back of the frame.
- Supported formats include: Secure Digital (SD), xD Picture Card, Compact Flash (CF), MultiMedia Card (MMC), Memory Stick, Memory Stick Duo, Memory Stick Pro, and Microdrive cards.
- Insert your memory card into the appropriate slot with the contacts facing the correct direction. Do not force the card.
- The frame will automatically detect the card and begin displaying photos, or prompt you to select a mode.
2.4 Using Built-in Memory
The frame includes 128MB of built-in memory. You can transfer photos directly from your computer to this memory using the provided USB cable.
- Connect one end of the USB cable to the USB port on the frame and the other end to your computer.
- The frame will appear as a removable disk drive on your computer.
- Drag and drop JPEG image files into the frame's internal storage folder.
- Safely eject the device from your computer before disconnecting the USB cable.
3. Operating Instructions
3.1 Remote Control Overview
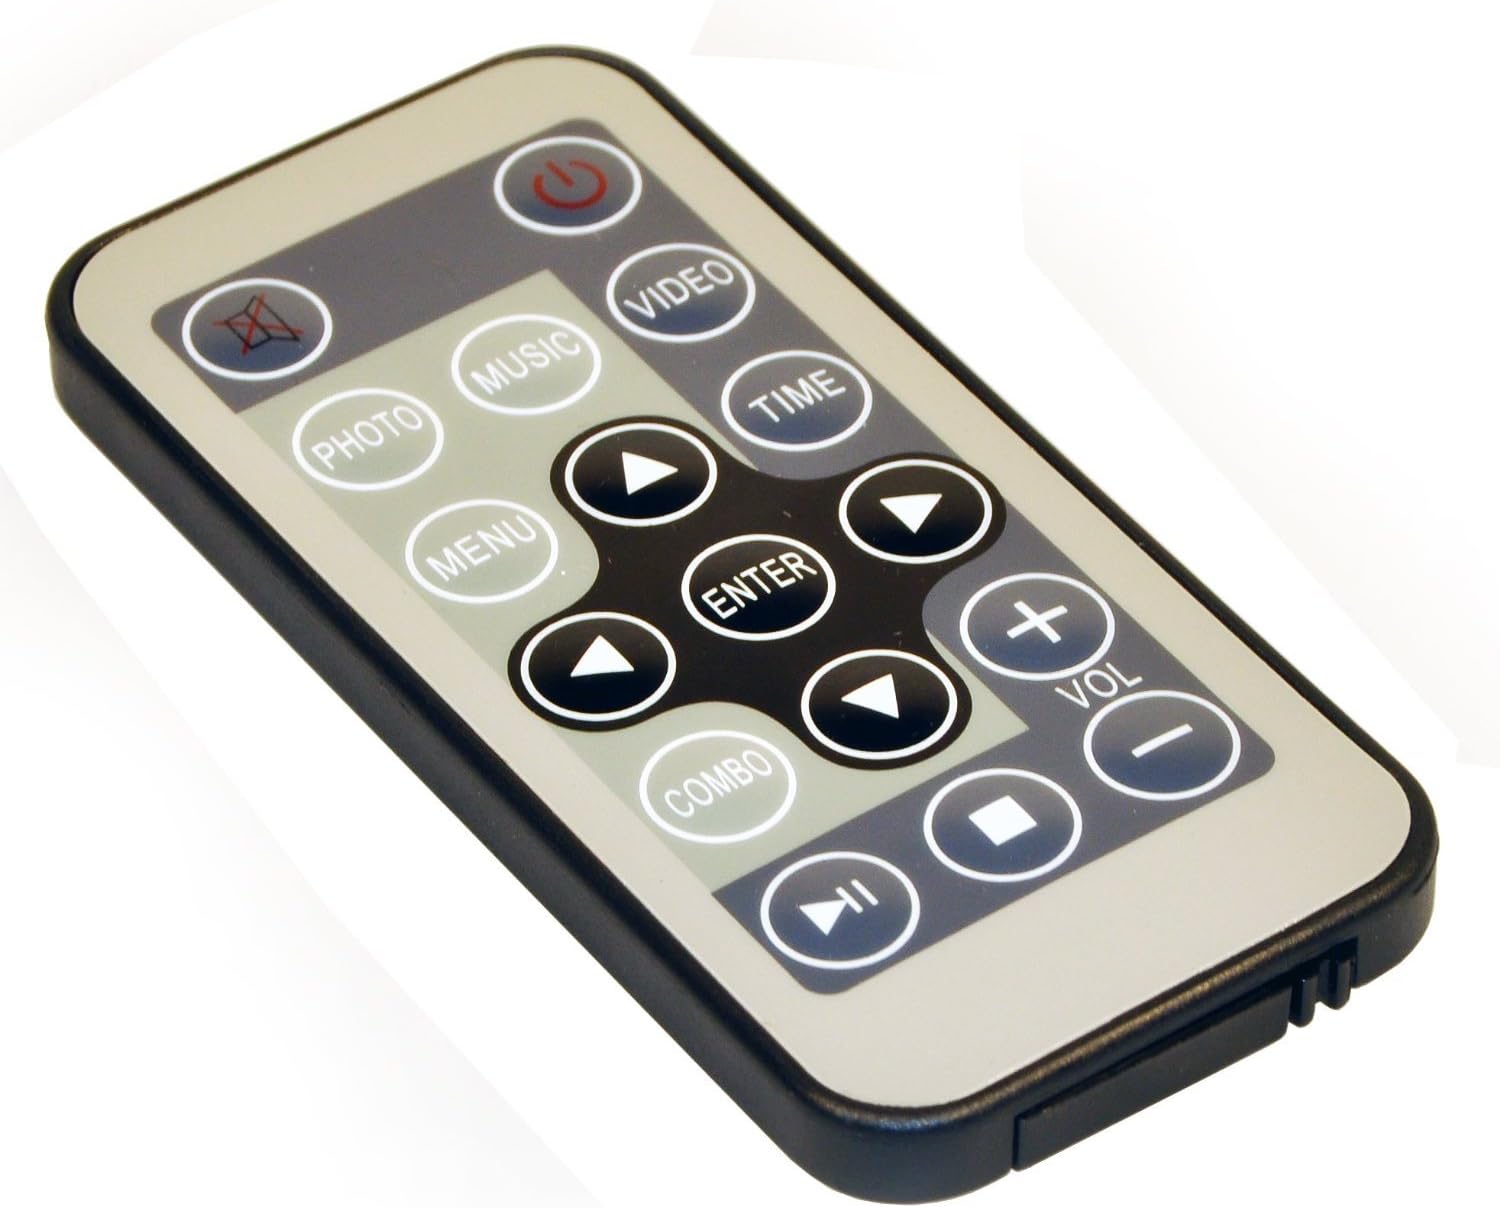
Figure 2: The remote control for the Opteka Digital Picture Frame, showing buttons for power, menu navigation, volume, photo, music, video, and time functions.
The remote control provides full functionality for navigating menus and controlling playback. Key buttons include:
- Power Button: Turns the frame on or off.
- Menu: Accesses the main menu for settings and options.
- Navigation Arrows (Up/Down/Left/Right): Used to navigate through menus and select options.
- Enter: Confirms a selection.
- Photo/Music/Video: Switches between media modes.
- Vol +/-: Adjusts speaker volume.
- Play/Pause, Previous, Next, Stop: Media playback controls.
3.2 Viewing Photos
Once a memory card is inserted or photos are loaded onto the internal memory, the frame will typically enter photo mode automatically.
- Slideshow Mode: The frame can automatically play a slideshow of all detected JPEG images. You can configure transition effects and interval times in the settings menu.
- Manual Browsing: Use the navigation arrows on the remote or frame to browse through individual photos.
- Image Rotation: Photos can be rotated using the appropriate button on the remote control if needed.
3.3 Playing Music and Videos
The frame supports music (MP3) and video (AVI) playback. Ensure your media files are in compatible formats.
- Press the Music or Video button on the remote control to switch to the desired mode.
- Navigate to the desired file using the arrow keys and press Enter to play.
- Use the playback control buttons (Play/Pause, Next, Previous, Stop) to manage media.
3.4 System Settings
Access the main menu by pressing the Menu button on the remote control. Here you can adjust various settings:
- Display Settings: Brightness, contrast, aspect ratio.
- Slideshow Settings: Transition effects, display interval, repeat mode.
- Time Settings: Set date and time.
- Language: Select preferred language.
- File Management: Copy, delete, or move files between internal memory and memory cards.
4. Maintenance
4.1 Cleaning the Screen
To clean the TFT LCD screen, use a soft, lint-free cloth. For stubborn smudges, slightly dampen the cloth with water or a non-abrasive screen cleaner. Do not spray cleaner directly onto the screen.
4.2 General Care
- Keep the digital picture frame away from direct sunlight, excessive heat, and moisture.
- Avoid dropping the frame or subjecting it to strong impacts.
- Ensure proper ventilation around the frame to prevent overheating.
- When not in use for extended periods, disconnect the power adapter.
5. Troubleshooting
| Problem | Possible Cause | Solution |
|---|---|---|
| Frame does not power on. | Power adapter not connected properly; power outlet not active. | Ensure power adapter is securely connected to the frame and a working electrical outlet. Try a different outlet. |
| No images displayed. | Memory card not inserted correctly; unsupported file format; no images on card/internal memory. | Reinsert memory card. Ensure images are in JPEG format. Verify images are present on the card or internal memory. |
| Remote control not working. | Batteries are dead or inserted incorrectly; obstruction between remote and frame. | Replace remote control batteries. Ensure line of sight to the frame's IR receiver. |
| Images appear distorted or stretched. | Incorrect aspect ratio setting. | Adjust the aspect ratio setting in the display menu to match your photos (e.g., 4:3 or 16:9). |
6. Specifications
- Model: OPT 8 DPF-CH
- Screen Size: 8 Inches
- Display Type: TFT LCD
- Resolution: XGA
- Built-in Memory: 128MB
- Compatible Memory Cards: Secure Digital (SD), xD Picture Card, Compact Flash (CF), MultiMedia Card (MMC), Memory Stick, Memory Stick Duo, Memory Stick Pro, Microdrive
- Supported Image Formats: JPEG
- Supported Video Formats: AVI
- Supported Audio Formats: MP3
- Connectivity: USB
- Color: Cherry Wood
- Product Dimensions: 12.25 x 11.5 x 4 inches
- Item Weight: 3 pounds
7. Warranty Information
Specific warranty details for the Opteka OPT 8 DPF-CH Digital Picture Frame are typically provided with the product packaging or on the manufacturer's official website. Please refer to the documentation included with your purchase for the most accurate and up-to-date warranty terms and conditions.
8. Customer Support
For technical assistance, troubleshooting beyond this manual, or inquiries regarding your Opteka Digital Picture Frame, please contact Opteka customer support. Contact information can usually be found on the manufacturer's website or in the product packaging.
You may also visit the Opteka Store on Amazon for additional product information and resources.
Ask a question about this manual
Ask about setup, troubleshooting, compatibility, parts, safety, or missing instructions. Manuals+ will review the question and use this page’s manual context to help answer it.